

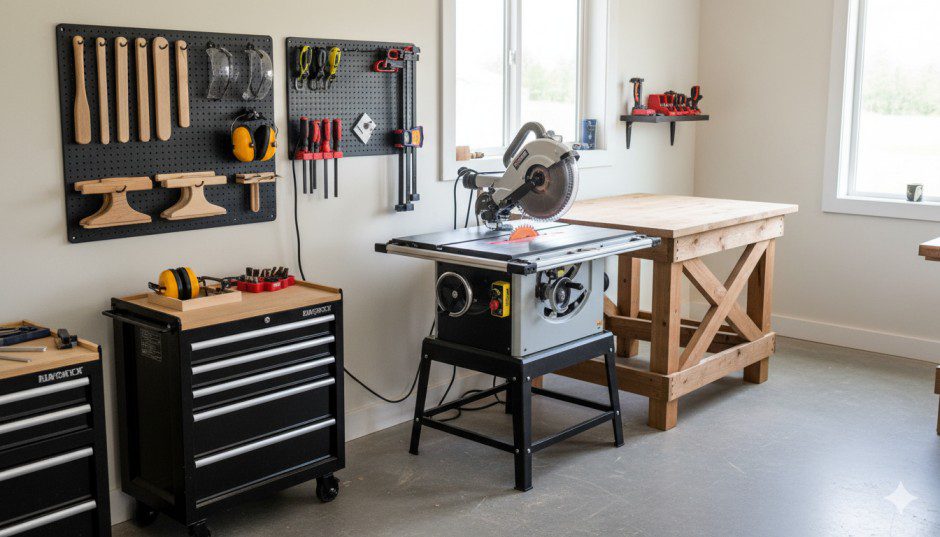
I still remember the first time I fired up a table saw in my tiny garage workshop. My palms were sweating, my heart was racing, and I must’ve checked the blade guard three times before making that first cut. Looking back, I was right to be nervous—but also completely unprepared for how much this one tool would transform my woodworking.
Here’s what nobody tells you when you’re starting out: a table saw isn’t just another power tool. It’s the beating heart of most woodworking shops, capable of precision that hand tools can’t match and versatility that’ll surprise you for years. But it also demands respect, proper setup, and real technique to use safely and effectively.
I’ve spent over a decade working with table saws, from cheap contractor models in cramped garages to cabinet saws in professional shops. I’ve made beautiful furniture and I’ve made mistakes—some expensive, some dangerous, all educational. This guide distills everything I wish someone had taught me on day one, from setting up your saw correctly to mastering techniques that separate clean cuts from splintered disasters.
Whether you’re trying to figure out how to use a table saw for the first time or looking to refine techniques you’ve been using for years, we’ll cover the complete picture: safety that actually works, setup that stays accurate, and cutting techniques that deliver professional results.
What a Table Saw Actually Does (And Why You Need One)
At its core, a table saw is beautifully simple—a circular blade protruding through a flat surface, powered by a motor underneath. But that simplicity unlocks capabilities no other tool can match for certain cuts.
The magic happens because the blade stays stationary while you move the wood. This gives you control and repeatability that’s nearly impossible with handheld tools. Need ten boards exactly 3.5 inches wide? Set your fence once and rip them all identically. Want perfect 90-degree crosscuts on twenty pieces? Your miter gauge handles that without drift.
What table saws excel at:
- Ripping lumber lengthwise – This is their primary superpower. Turning wide boards into narrower strips happens faster and more accurately than any other method
- Crosscutting boards to length – With a good miter gauge or crosscut sled, you’ll get square cuts every time
- Cutting sheet goods – Plywood and MDF break down cleanly with the right blade and setup
- Creating joinery – Dadoes, rabbets, tenons, and box joints all start at the table saw
- Bevel and compound cuts – Tilt the blade for angled cuts that handheld tools struggle with
I’ve used mine for everything from breaking down full plywood sheets to cutting delicate inlay grooves. It’s versatile enough that you’ll find yourself reaching for it constantly, which is exactly why proper technique matters so much.
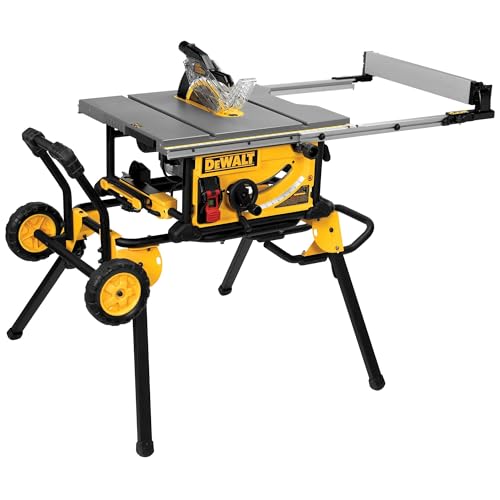
DEWALT 10-Inch Table Saw with Rolling Stand, 32-1/2-Inch Rip Capacity (DWE7491RS)
- Rack & Pinion Telescoping Fence System Make fence adjustments fast, smooth and accurate
- Patented material support, can be used for narrow rip cuts.
- 32-1/2″ rip capacity easily cuts a variety of larger shelving and trim materials
List Price :
Offer: 599.00 $
Go to AmazonIf you’re still deciding between tools, understanding the difference between a table saw and circular saw helps clarify when each tool makes sense. Similarly, knowing when to use a table saw versus a miter saw prevents buying the wrong tool for your actual needs.
Know Your Table Saw: Parts That Matter
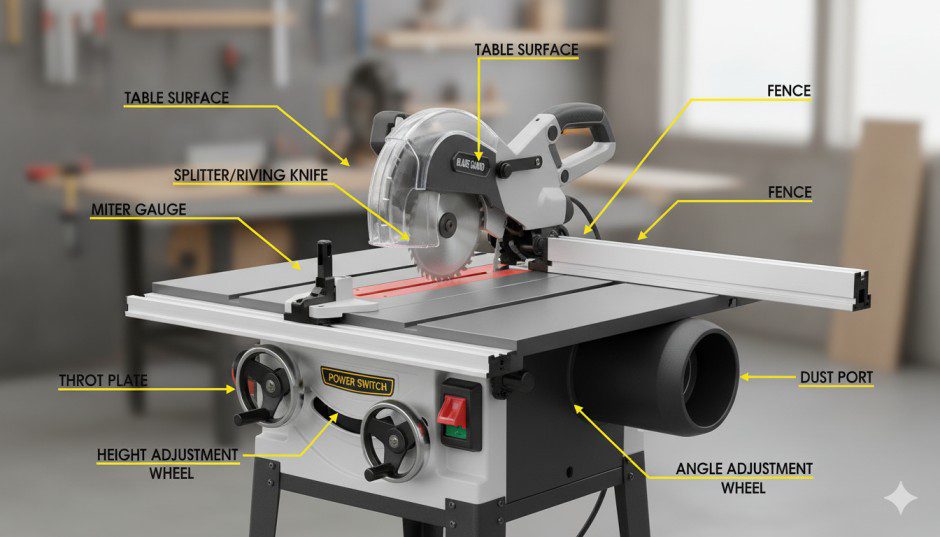
You can’t use a table saw confidently without understanding what each component does. Here’s what matters in everyday use:
The table surface – Usually cast iron or aluminum, this flat surface supports your workpiece. Keep it clean, waxed, and rust-free. I learned this after fighting a rusty table for months—removing rust properly made cutting dramatically easier.
The blade – Typically 10 inches in diameter, though 8-inch and 12-inch versions exist. Tooth count and geometry determine cut quality. More teeth mean smoother cuts but slower feed rates. I keep a 40-tooth combination blade mounted most days, with specialized blades ready when needed. Choosing the right table saw blade affects results more than almost any other factor.
The fence – This adjustable guide runs parallel to the blade for ripping operations. It must lock securely and stay perfectly parallel—any drift here causes binding and kickback. I check mine with a dial indicator every few weeks.
The miter gauge – Slides in the table’s miter slots (those grooves running perpendicular to the blade) to guide crosscuts. Stock gauges are usually terrible; I upgraded mine within a month.
Blade guard and splitter – The guard covers the blade for safety, while the splitter (or riving knife on modern saws) keeps the kerf open behind the blade to prevent pinching. These prevent the majority of serious accidents. Never remove them unless absolutely necessary.
The arbor and arbor nut – The shaft that holds the blade, secured with a special nut. Understanding how to change blades safely matters—I’ve helped three friends who struggled with stuck table saw blades because they didn’t know the nut was reverse-threaded.
Height and angle adjustment wheels – These raise/lower the blade and tilt it for bevel cuts. They should move smoothly without excessive play. Sticky adjustments mean it’s time for cleaning and lubrication.
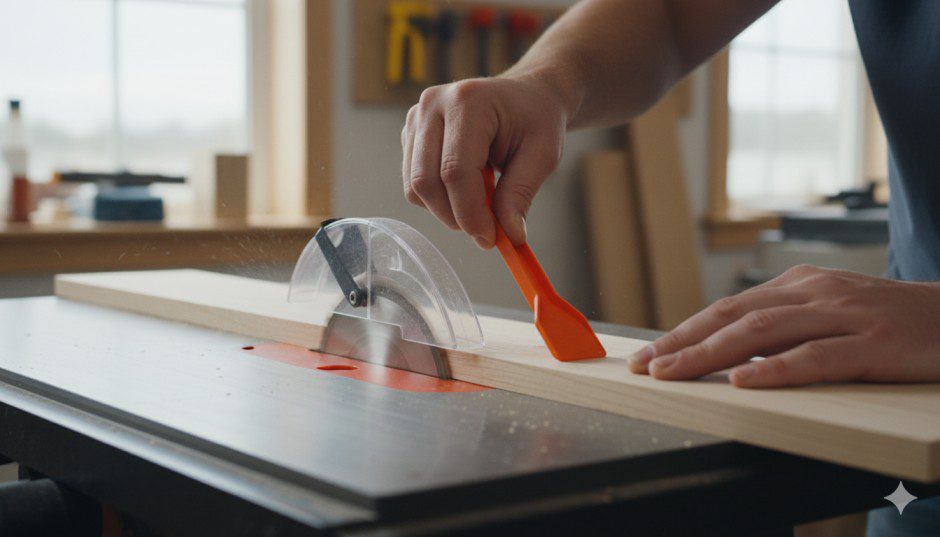
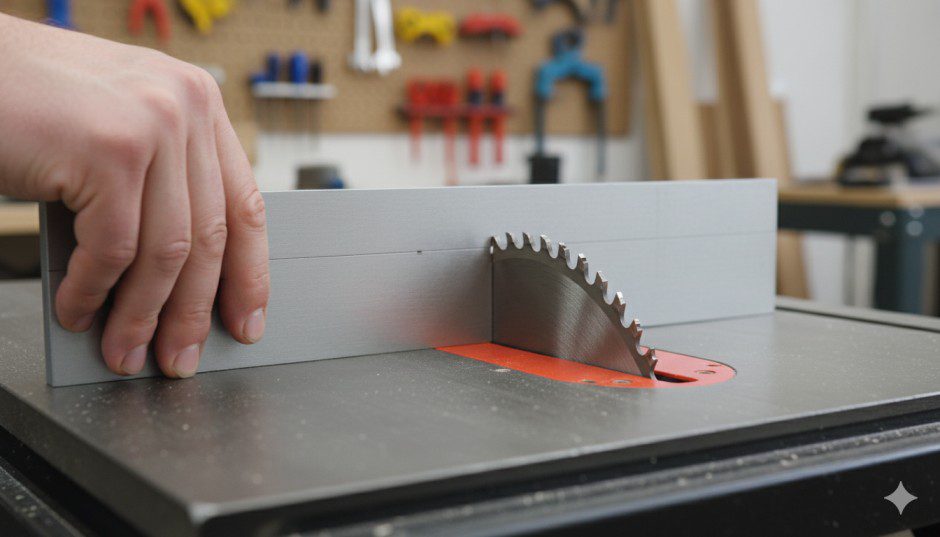
The throat plate (also called insert) – The removable plate around the blade. Stock plates have wide openings; zero-clearance inserts dramatically reduce tear-out on the bottom of cuts.
Understanding these parts helps you maintain your saw properly and troubleshoot issues when they arise. Speaking of maintenance, keeping the metal surface clean prevents most operational problems before they start.
Safety First (Because You Only Get Ten Fingers)
I’m going to be blunt here: table saws cause more serious injuries than any other woodworking tool. I’ve known three woodworkers who lost parts of fingers to table saw accidents. All three incidents were preventable with proper safety habits.
This isn’t meant to scare you away—table saws are incredibly useful and relatively safe when used correctly. But respect is required, not just recommended.
The Non-Negotiable Safety Rules
1. Keep blade guards and splitters installed
Every time you remove the guard for a specific cut and forget to reinstall it, you’re gambling with your fingers. Modern riving knives are even better because they move with the blade. If your saw lacks a splitter, adding a table saw splitter should be your first upgrade.
2. Use push sticks for anything under 6 inches wide
Your hands should never be within 6 inches of a spinning blade. Period. I keep four push sticks around my saw—different sizes for different cuts. They’re cheap insurance compared to medical bills.
3. Never reach over or behind a spinning blade
Wait for complete blade stop before retrieving anything. This rule has saved me twice from serious cuts when offcuts shifted unexpectedly.
4. Stand to the side, not directly behind the workpiece
Kickback launches wood backward with incredible force. I’ve seen a 2×4 punched through plywood because someone stood in the firing line. Position yourself so kickback won’t hit you.
5. Use featherboards for narrow ripping
Featherboards apply consistent pressure to keep workpieces against the fence, preventing the binding that causes kickback. I mount magnetic featherboards before every narrow rip cut.
6. Unplug when changing blades or making adjustments
Accidental startups have caused devastating injuries. It takes five seconds to unplug—there’s no excuse for skipping this step.
7. Keep your work area clean
Sawdust underfoot makes you slip. Offcuts on the table cause binding. I sweep between major cuts and have learned this habit prevents most “stupid accidents.”
What Causes Kickback (And How to Prevent It)
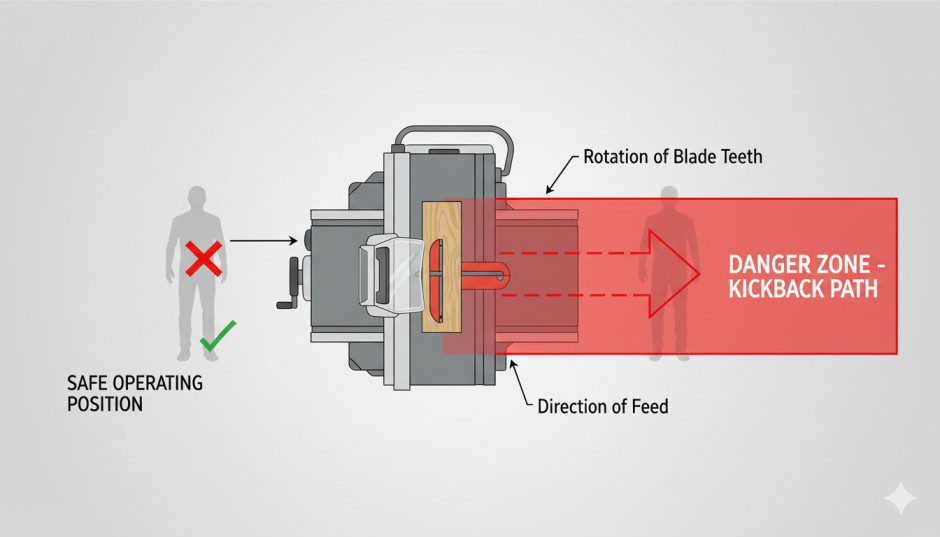
Kickback happens when the blade grabs the workpiece and throws it backward at high speed. It’s terrifying, dangerous, and completely preventable.
Common kickback causes:
- Ripping without a splitter (wood pinches blade as internal stresses release)
- Fence not parallel to blade (workpiece binds between fence and blade)
- Using dull blades (grabbing instead of cutting cleanly)
- Letting workpiece twist during the cut
- Cutting warped or twisted lumber without proper support
Prevention strategies that work:
Use a sharp blade and properly aligned fence. Install and maintain your splitter. Support long boards with roller stands so they don’t tip at cut completion. Apply consistent feed pressure without forcing—let the blade do the work.
I’ve had minor kickback incidents twice in ten years, both from trying to rip twisted 2x4s without adequate support. The wood bound mid-cut and shot back about a foot before I killed power. Scary, but the splitter prevented serious damage. Both times could’ve been avoided by recognizing the twist beforehand and planning the cut differently.
Setting Up Your Table Saw for Accurate Cuts
A perfectly good saw becomes useless when set up incorrectly. I spent my first year fighting inaccurate cuts because I didn’t know proper setup procedures. Once I learned how to check and adjust everything, my work quality jumped noticeably.
Initial Setup Checklist
1. Level the table
Place a quality level across the table in multiple directions. The surface should be perfectly level, or at least consistently flat. Shim the base if necessary—even a slight tilt affects accuracy.
2. Verify blade is perpendicular to table
Use a quality square against the blade and table. Adjust the blade tilt mechanism until you achieve perfect 90 degrees. This is critical for square cuts. I check this monthly because vibration slowly knocks things out of alignment.
3. Align the miter slots parallel to the blade
This is crucial but often overlooked. Measure from the miter slot to the front blade tooth, then to a rear tooth. The measurements should be identical. If not, you’ll need to adjust the trunnion bolts under the table—consult your manual for the specific procedure.
4. Ensure fence runs perfectly parallel to blade
Set your fence to some arbitrary distance. Measure from the fence to the front of the blade, then to the rear. If these measurements differ by more than 0.002 inches, adjust the fence. Most fences have adjustment bolts that let you dial in parallelism.
Non-parallel fences cause binding, burning, and kickback. This single adjustment has more impact than almost any other.
5. Install a zero-clearance insert
The wide gap around stock throat plates causes tear-out and catches small pieces. A zero-clearance insert solves both problems instantly. I make my own from Baltic birch, but quality aftermarket versions work great too.
Table Position and Support
Think about workflow before positioning your saw. You need clearance on all four sides—especially the outfeed side where boards exit after cutting.
I learned this the hard way when I positioned my saw against a wall, leaving only 18 inches of outfeed space. Cutting anything longer than 4 feet became an awkward, dangerous wrestling match. When I reorganized to give 6 feet of outfeed clearance, cutting became safer and more accurate.
For long rips or crosscuts, roller stands provide essential support. The workpiece should never tip downward at cut completion—that’s an instant kickback risk.
Blade Selection Changes Everything
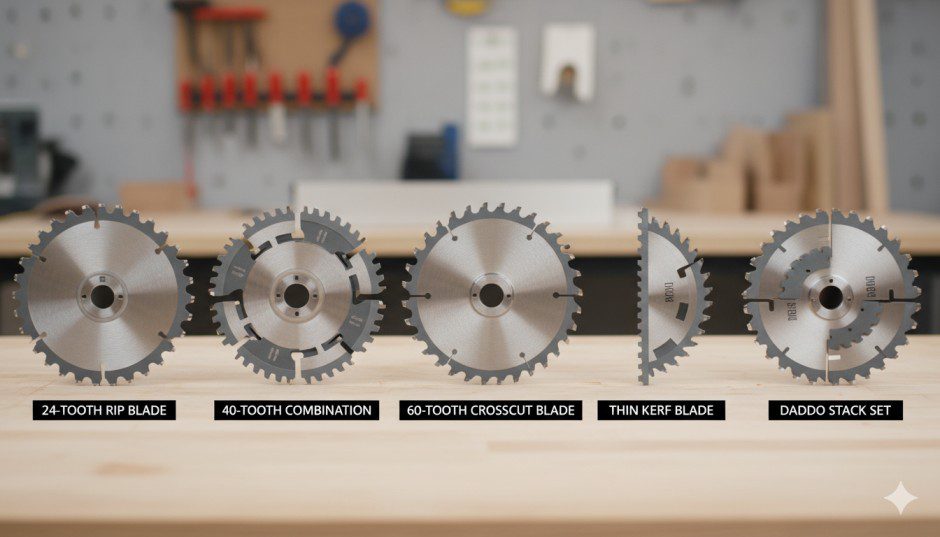
The blade that came with your saw exists for one reason: reducing the manufacturer’s cost. I used mine for about two weeks before the poor cut quality drove me crazy. Upgrading to a quality 40-tooth combination blade was transformative—cuts became cleaner, burning disappeared, and feeding became easier.
Basic Blade Guide
Combination blades (40-50 teeth) – Your everyday workhorse. Handles both ripping and crosscutting adequately. This stays in my saw 80% of the time.
Ripping blades (24-30 teeth) – Aggressive tooth geometry cuts quickly through thick hardwoods. The larger gullets clear sawdust efficiently. I switch to this when ripping 8/4 stock or working with green lumber.
Crosscut blades (60-80 teeth) – Fine teeth produce glass-smooth crosscuts with minimal tear-out. Essential for picture frames, trim work, or anywhere cut quality shows.
Dado sets – Actually a stack of blades and chippers that create wide grooves in one pass. If you build furniture, a dado set becomes essential for joinery. I use mine constantly for bookshelf dadoes and drawer construction.
Specialty blades – For specific materials. Cutting PVC board works better with triple-chip blades that don’t melt plastic. Melamine requires blades designed to minimize chipping. Aluminum needs non-ferrous blades.
Blade maintenance matters too. Pitch and resin buildup reduces cutting efficiency and causes burning. I clean mine every month or two, and when they finally dull, sharpening table saw blades restores performance for a fraction of replacement cost.
Mastering Basic Cutting Techniques
Understanding different cut types and when to use each one is fundamental. Each requires specific setup and safety considerations.
Ripping: Cutting With the Grain
Ripping on a table saw means cutting parallel to the wood grain, usually to reduce board width. This is what table saws do best.
Setup for ripping:
- Set fence to desired width, measuring from fence to blade at both front and rear
- Raise blade so teeth clear the workpiece by about 1/4 inch
- Install splitter and blade guard
- Position featherboard to hold work against fence
- Have push stick ready for the last 12 inches of the cut
Technique:
Stand beside the saw, not behind the workpiece. Start the cut with firm downward and sideways pressure—keeping the board flat on table and tight to fence. Maintain consistent feed rate; don’t force or hesitate. As your hand approaches the blade, transfer control to the push stick smoothly.
The board should glide through without burning. If you see smoke or burn marks, you’re either feeding too slowly, using a dull blade, or your fence isn’t parallel.
Crosscutting: Cutting Against the Grain
Crosscuts shorten boards by cutting across the grain. Use the miter gauge or crosscut sled—never the fence alone for crosscutting, as it can cause dangerous binding.
Setup for crosscutting:
- Remove fence or move it far from the blade’s path
- Adjust miter gauge to desired angle (usually 90 degrees)
- Mark cut line on workpiece
- Position board against miter gauge with good hand placement away from blade
Technique:
Hold the workpiece firmly against the miter gauge face. Start with the workpiece clear of the blade, turn on the saw, then smoothly push both gauge and workpiece through the blade. Don’t pull backward until the blade stops—offcuts can catch and kick.
For repeated crosscuts at the same length, clamp a stop block to your miter gauge. This lets you cut identical pieces without measuring each one.
Bevel and Compound Cuts
Tilting the blade creates angled cuts. This is essential for picture frames, roof rafters, and decorative edge treatments.
For bevel rips:
Tilt the blade to the desired angle. Everything else follows normal ripping procedure, but pay extra attention—the angled blade can grab more aggressively.
For compound miters:
Set both miter gauge angle and blade tilt. These cuts require careful setup and test pieces to verify angles before cutting actual project parts.
Using Jigs and Sleds Safely
Beyond basic miter gauges and fences, specialized jigs expand capabilities dramatically. Jigs for cutting angles handle compound miters and tapers that standard setups can’t manage.
Crosscut sleds are game-changers. A well-built sled rides in both miter slots, providing a huge, stable platform for crosscutting. The fence stays perfectly square to the blade, and you can add stop blocks for repeated cuts. I built mine from plywood and hardwood in an afternoon, and it’s become my most-used accessory.
Measuring and Marking for Accuracy
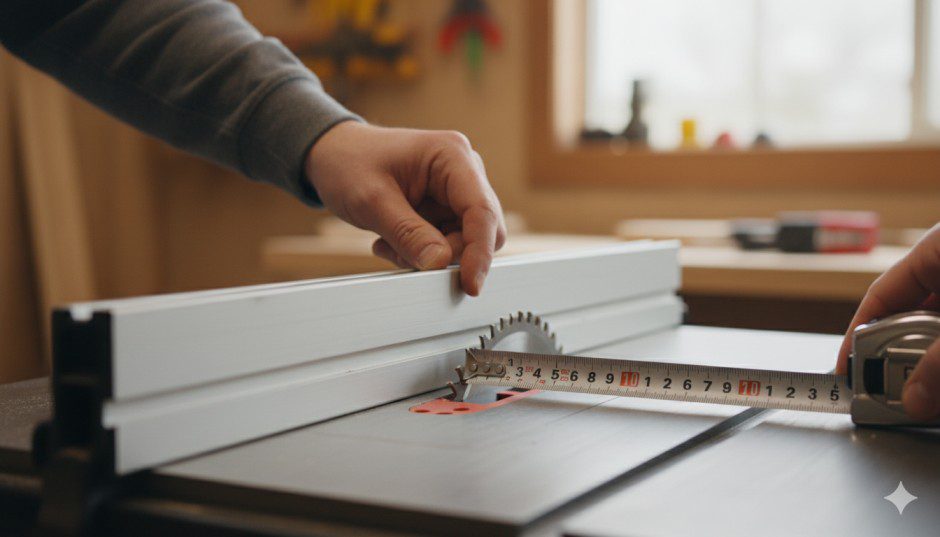
Perfect cuts start with accurate measurements. Here’s what actually works in practice:
Use a quality tape measure or ruler – Cheap tapes have slop in the hook that introduces error. A good Starrett or Stanley tape is worth the investment.
Mark with a knife, not a pencil – Pencil lines are fat and imprecise. A marking knife creates a hairline that shows exactly where to cut.
Measure from the fence, not the blade – When setting up rip cuts, measure to the fence position. The blade width doesn’t matter—what matters is fence-to-fence distance on your workpiece.
Use stop blocks for repetition – Clamp a block to your fence or miter gauge to establish length. Every piece then comes out identical without remeasuring.
Account for kerf – The blade removes material (the kerf width, usually 1/8 inch). When cutting multiple pieces from one board, this material loss adds up. Calculate kerf into your cutting plan.
I keep a digital caliper near my saw for verifying measurements. It’s overkill for construction work but essential when furniture joints need to fit perfectly.
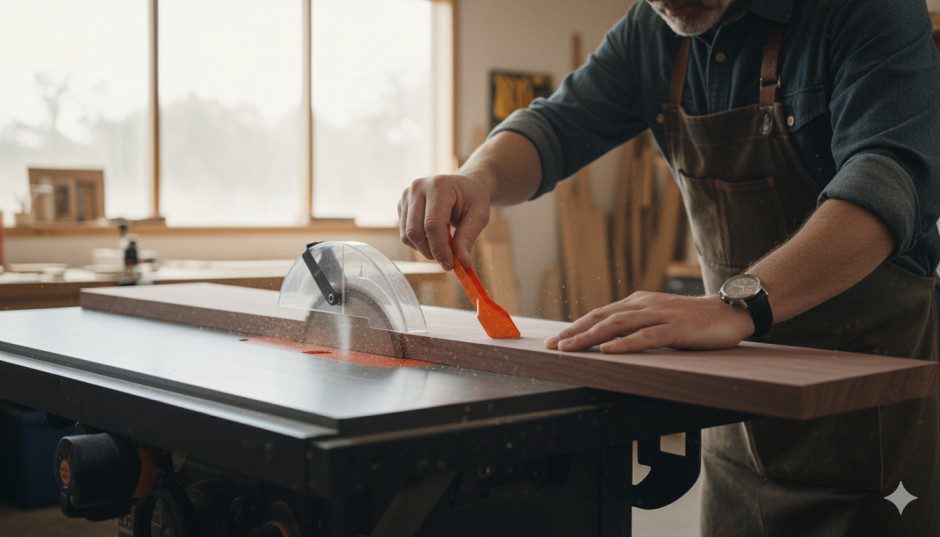
Dust Collection Makes Everything Better
Table saws produce shocking amounts of dust. Without collection, you’re breathing fine particles, your shop becomes a disaster, and dust on the table affects cut accuracy.
I started with no dust collection—just sawdust everywhere. Then I added a shop vac with a 4-inch hose adapter to my saw’s dust port. The improvement was immediate—not perfect, but vastly better.
Effective dust collection strategies:
- Connect a shop vac or dust collector to the saw’s dust port
- Seal gaps around the blade opening to improve suction
- Consider over-blade collection for airborne dust
- Keep the table clean between cuts—dust under workpieces affects accuracy
- Wear a dust mask even with collection; fine particles still escape
The best table saws include excellent built-in collection, but even budget saws improve dramatically with a decent shop vac attached.
Maintenance That Prevents Problems
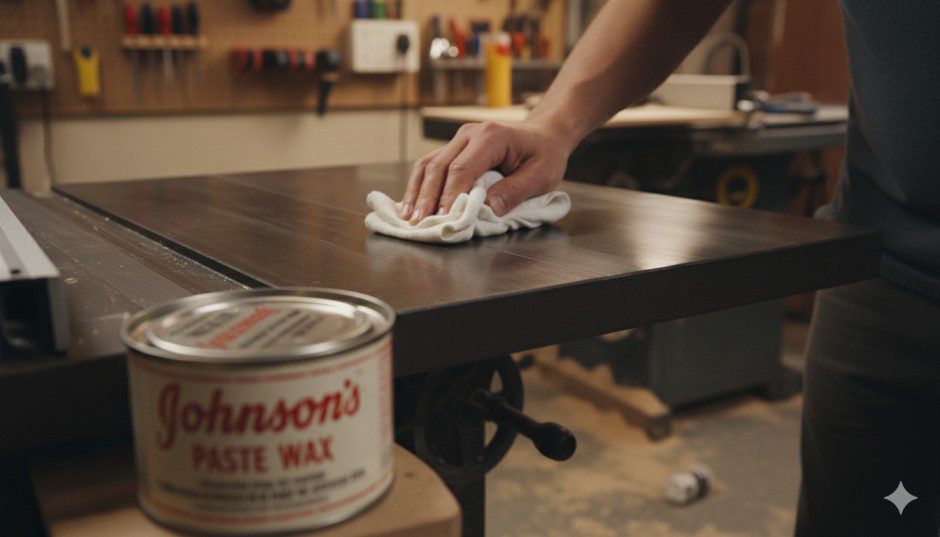
Regular maintenance keeps your saw accurate and safe. I follow a simple schedule that takes maybe 20 minutes monthly.
After every use:
- Brush sawdust from table, fence, and blade
- Check that blade guard and splitter move freely
Monthly maintenance:
- Clean table surface thoroughly and apply paste wax
- Check fence alignment to blade
- Verify blade is still square to table
- Clean pitch buildup from blade
- Check all belts and pulleys for wear
- Lubricate elevation and tilt mechanisms
Annual maintenance:
- Deep clean under the table
- Check and tighten all fasteners
- Inspect power cord for damage
- Replace worn throat plates
- Verify miter slot parallelism to blade
This schedule has kept my saws running accurately for years. The few times I skipped maintenance, small issues accumulated into real problems that took hours to fix.
Troubleshooting Common Issues
Burning on cuts – Usually means dull blade, slow feed rate, or fence not parallel to blade. Check and correct in that order.
Rough or splintered cuts – Wrong blade for material, dull blade, or feeding too fast. A zero-clearance insert also helps reduce tear-out significantly.
Workpiece binds during cut – Fence not parallel to blade. This is dangerous—stop and realign immediately.
Blade wobbles – Check that blade is properly mounted on arbor. Inspect for damaged arbor or bent blade. Clean any sawdust from arbor before mounting blades.
Motor bogs down – Blade too dull, cutting too thick material for saw’s power, or feeding too aggressively. Upgrade blade or take lighter passes.
Frequently Asked Questions
What’s the first thing I should learn on a table saw?
Master ripping with proper push stick technique. This is the fundamental table saw skill and also where most accidents happen. Practice on scrap lumber until muscle memory takes over. Starting with a guide for beginners using table saws builds the right foundation.
Do I really need a table saw, or can I use a circular saw instead?
For ripping multiple boards to identical widths or making precision repeated cuts, table saws are unbeatable. Circular saws excel at portability and breaking down sheet goods. Understanding the table saw versus circular saw tradeoffs helps you decide. Many woodworkers own both and use each for its strengths. You can even learn how to use a circular saw without a table for certain operations.
What’s the most important safety feature?
The splitter or riving knife prevents most kickback incidents, making it arguably the most critical safety feature. Never operate without one. A close second is proper push stick discipline.
How do I choose between a table saw and miter saw combo?
A miter saw and table saw combo gives you the best of both worlds—ripping on the table saw and crosscutting on the miter saw. If you can only afford one initially, buy based on your primary need: ripping and joinery = table saw; crosscuts and trim work = miter saw.
What’s better for small parts—table saw or jigsaw?
Table saws handle small parts well with proper jigs and zero-clearance inserts, but a jigsaw offers advantages for curved cuts and situations where holding small pieces safely becomes difficult. Use both tools for their strengths.
How often should blades be sharpened?
When you notice burning, increased feed resistance, or rough cut quality, it’s time. For hobby use, that might be annually. For professional shops, blades need sharpening every few months. Quality carbide blades can be sharpened 4-6 times before retirement.
What’s a reasonable budget for a first table saw?
Entry-level saws start around $250-300, with quality beginner table saws in the $400-600 range. The $500-1000 range offers contractor-grade saws that’ll handle serious work. Buy the best you can afford—cheap saws create frustration and safety issues.
Your Next Steps to Table Saw Mastery
You now have the foundational knowledge to use a table saw safely and effectively. But reading about techniques only goes so far—real skill comes from practice and continued learning.
Start with simple projects that build fundamental skills. Rip some scrap boards to practice feed technique and push stick coordination. Make crosscuts at various angles to master miter gauge control. Build a simple crosscut sled to experience how jigs improve accuracy.
As your confidence grows, explore specialized techniques and accessories. Learn about using featherboards for narrow rips, building dedicated jigs for specific angles, and expanding capabilities with dado sets for furniture joinery.
The resources linked throughout this guide provide deep dives into specific topics—from beginner tutorials to advanced techniques, from tool comparisons to specialized cutting methods. Each link leads to real workshop experience condensed into practical advice.
Most importantly, never rush and never compromise on safety. A table saw will serve you reliably for decades if you treat it with respect, maintain it properly, and continue refining your technique. Every cut is an opportunity to improve—pay attention to results, adjust when something isn’t working, and build those good habits that separate confident woodworkers from nervous beginners.
Now get in your shop and start making sawdust. That’s where real learning happens.