Table Saw Accessories That Are Actually Worth Your Money
Here’s something woodworking articles don’t say enough: you can spend $400 on table saw accessories and barely improve your work. Or you can spend $80 on two things and immediately make better furniture. The difference is knowing which accessories solve real problems versus which ones solve problems you don’t actually have.
I want to approach this differently from most accessory guides. Rather than listing everything that exists, I’m going to tell you what woodworkers actually reach for, what they consistently say changed how they work, and — just as importantly — what they bought, used twice, and never touched again.
The crosscut sled is the first real example. Everyone recommends it. Fewer people say that the first time you make your own sled and dial it to within a thousandth of an inch, you’ll stop using your miter gauge for anything that matters. The miter gauge doesn’t go away — it’s still useful for rough crosscuts — but the sled becomes the default. That’s a workflow change, not just a gear purchase. The accessories worth talking about are the ones that create that kind of shift.
The Crosscut Sled: Build One, Then Stop Arguing About Miter Gauges
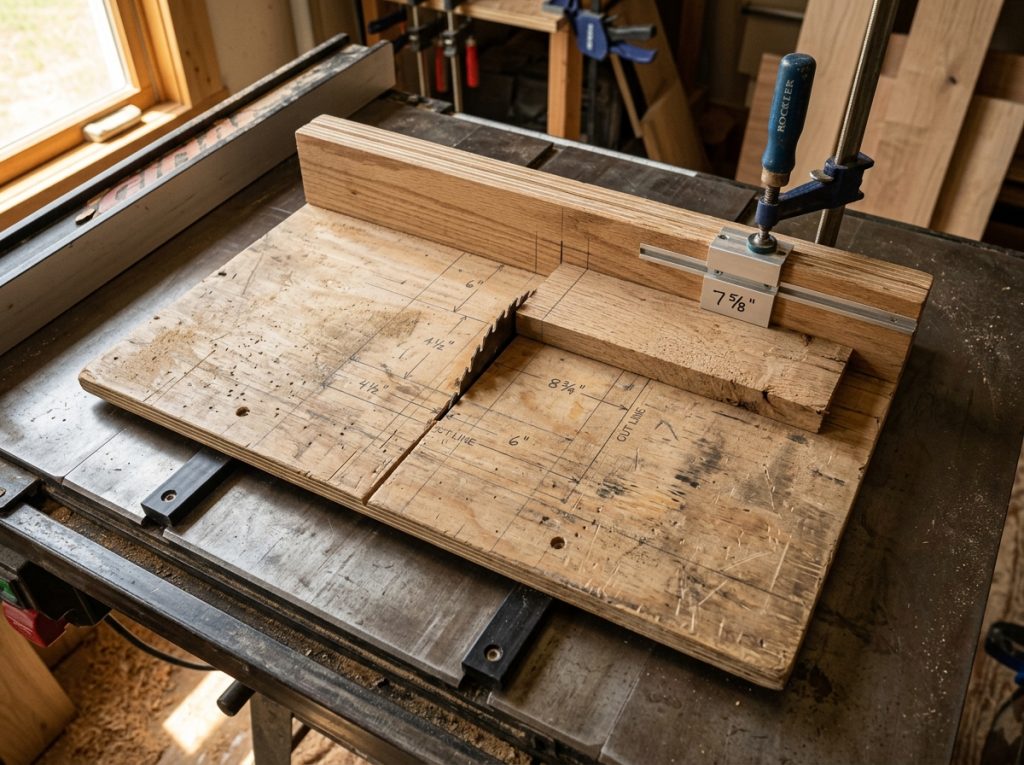
The internet spends enormous energy debating which $150 miter gauge to buy. The actual answer for most woodworkers is to build a crosscut sled, spend $20 in materials, and get results that no miter gauge at any price can match for the work it does.
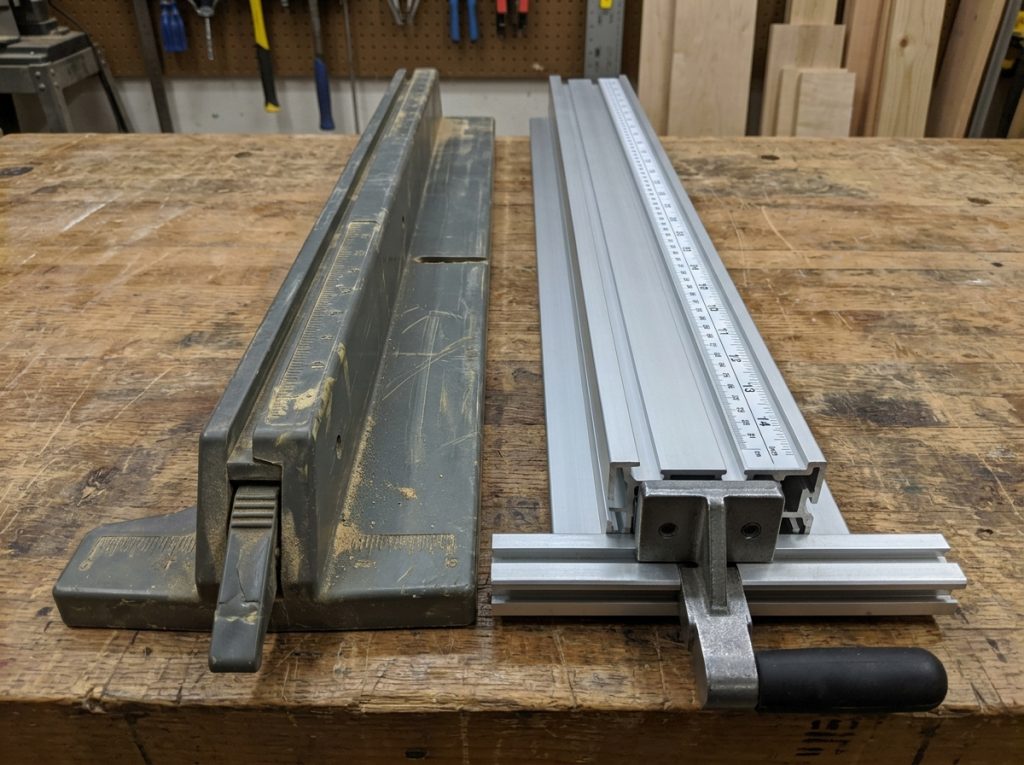
Here’s why the sled wins: a miter gauge rides in one slot and pivots at the front of the saw. By the time a board 12 inches wide is fully past the blade, the trailing end of the board has been guided by nothing but your hands for half the cut. The sled rides in both slots simultaneously. The fence is fixed and square. The whole thing moves as a unit. There’s no pivot point, no drift, no relying on your grip to keep a wide board from wandering.
A Slickdeals forum member put it plainly: “If you have a table saw, you should make a crosscut sled as your first project.” That’s been the consistent recommendation from experienced woodworkers for decades and it’s still right.
Making one isn’t complicated. You need a sheet of 3/4 inch plywood or MDF, a couple of miter bar runners that fit your slots, and about an afternoon. The runners are the only part worth buying — HDPE or aluminum runners from Powertec or similar run about $15-20 and slide smoothly year-round without the seasonal expansion that wooden runners develop. One forum user specifically noted that shop-made wooden runners would get annoyingly loose in winter and too tight in humidity — HDPE doesn’t do that.
Once the sled is square — and squaring it is a whole skill unto itself, worth looking up separately before you build one — you’ll use it for every precise crosscut. Cutting cabinet doors to identical lengths. Cutting box sides that need to be exactly equal. Cutting tenon cheeks. Any cut where “pretty square” isn’t good enough.
| To verify your sled is actually square: cut a board, flip one half over, put the two cut faces together. Any error doubles and becomes visible. If there’s a gap at one end, your sled isn’t square regardless of what the blade looks like. Keep adjusting until there’s zero gap when you flip and match the pieces. |
The Blade Question — And Why It’s Not Actually About Which Brand
The stock blade that came with your saw is a placeholder. It’s included because the alternative — selling the saw without one — would feel weird at the price point. It’s not designed to be the blade you use. Almost everyone who’s been woodworking for more than a year has the same story: swapped the stock blade, immediately understood why people spend money on blades.
But here’s the thing most blade articles get wrong: the decision isn’t primarily about brand. It’s about configuration. A 40-tooth combination blade from a quality manufacturer handles most woodworking — ripping and crosscutting both — at a level the stock blade can’t match. A 24-tooth rip blade through 8/4 hardwood is faster and cleaner than running that same material through a combination blade because the geometry is optimised for the direction you’re cutting. An 80-tooth blade on a miter saw or crosscut sled makes faces you barely need to sand.
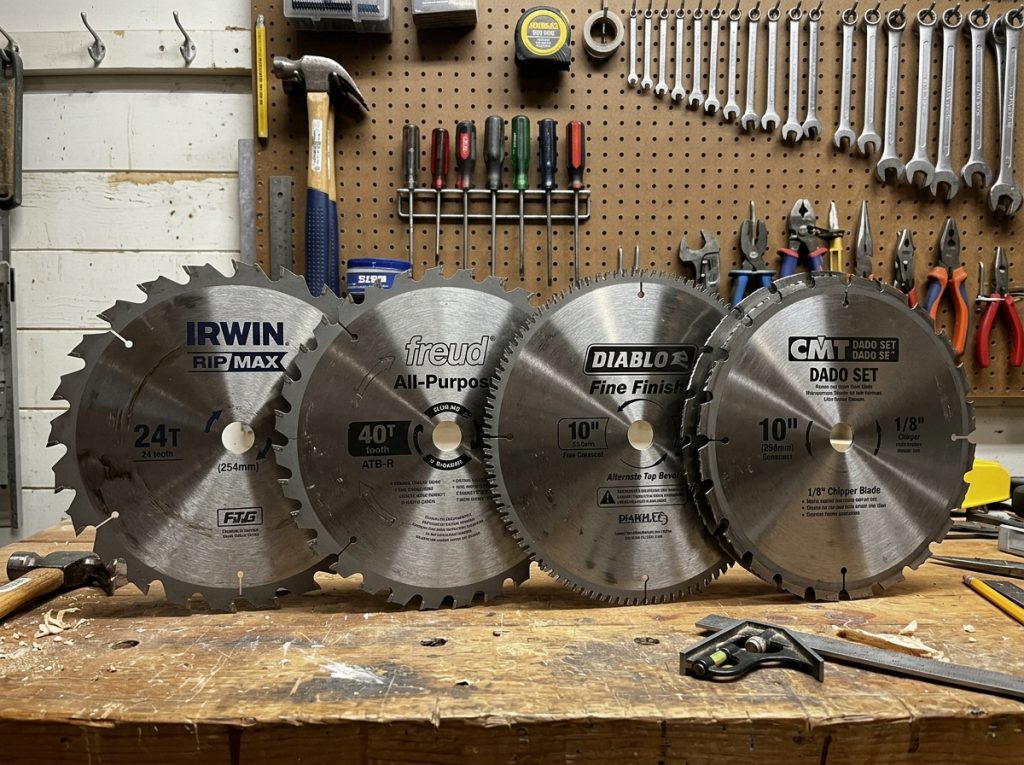
The combination blade is the one that matters first. Get a quality 40-tooth and most of your work improves immediately. Freud Industrial, Diablo D1040X, Infinity Super General — any of these transforms the experience. Clean up with a quality 24T rip blade for heavy ripping sessions and maybe an 80T crosscut blade if you do a lot of finish work. That’s three blades. Some shops run on one combination blade for years and it’s enough.
| Blade Type | Teeth | Best For | Skip If | Price Range |
| Combination 40T | 40 | Everything — daily driver | You only do one thing | $40–$100 |
| Rip Blade 24T | 24 | Fast ripping thick hardwood | Mostly plywood work | $40–$90 |
| Crosscut 80T | 80 | Finish crosscuts, miter saw | Don’t need glassy faces | $60–$150 |
| Dado Stack | Multi | Dadoes, rabbets, grooves | No furniture joinery work | $100–$350 |
| Thin Kerf 40T | 40 | Lower HP saws, expensive lumber | Have 3HP+ on 240V | $35–$75 |
| Plastic / TCG | 60–80 | HDPE, PVC, acrylic | Never cut plastic | $60–$120 |
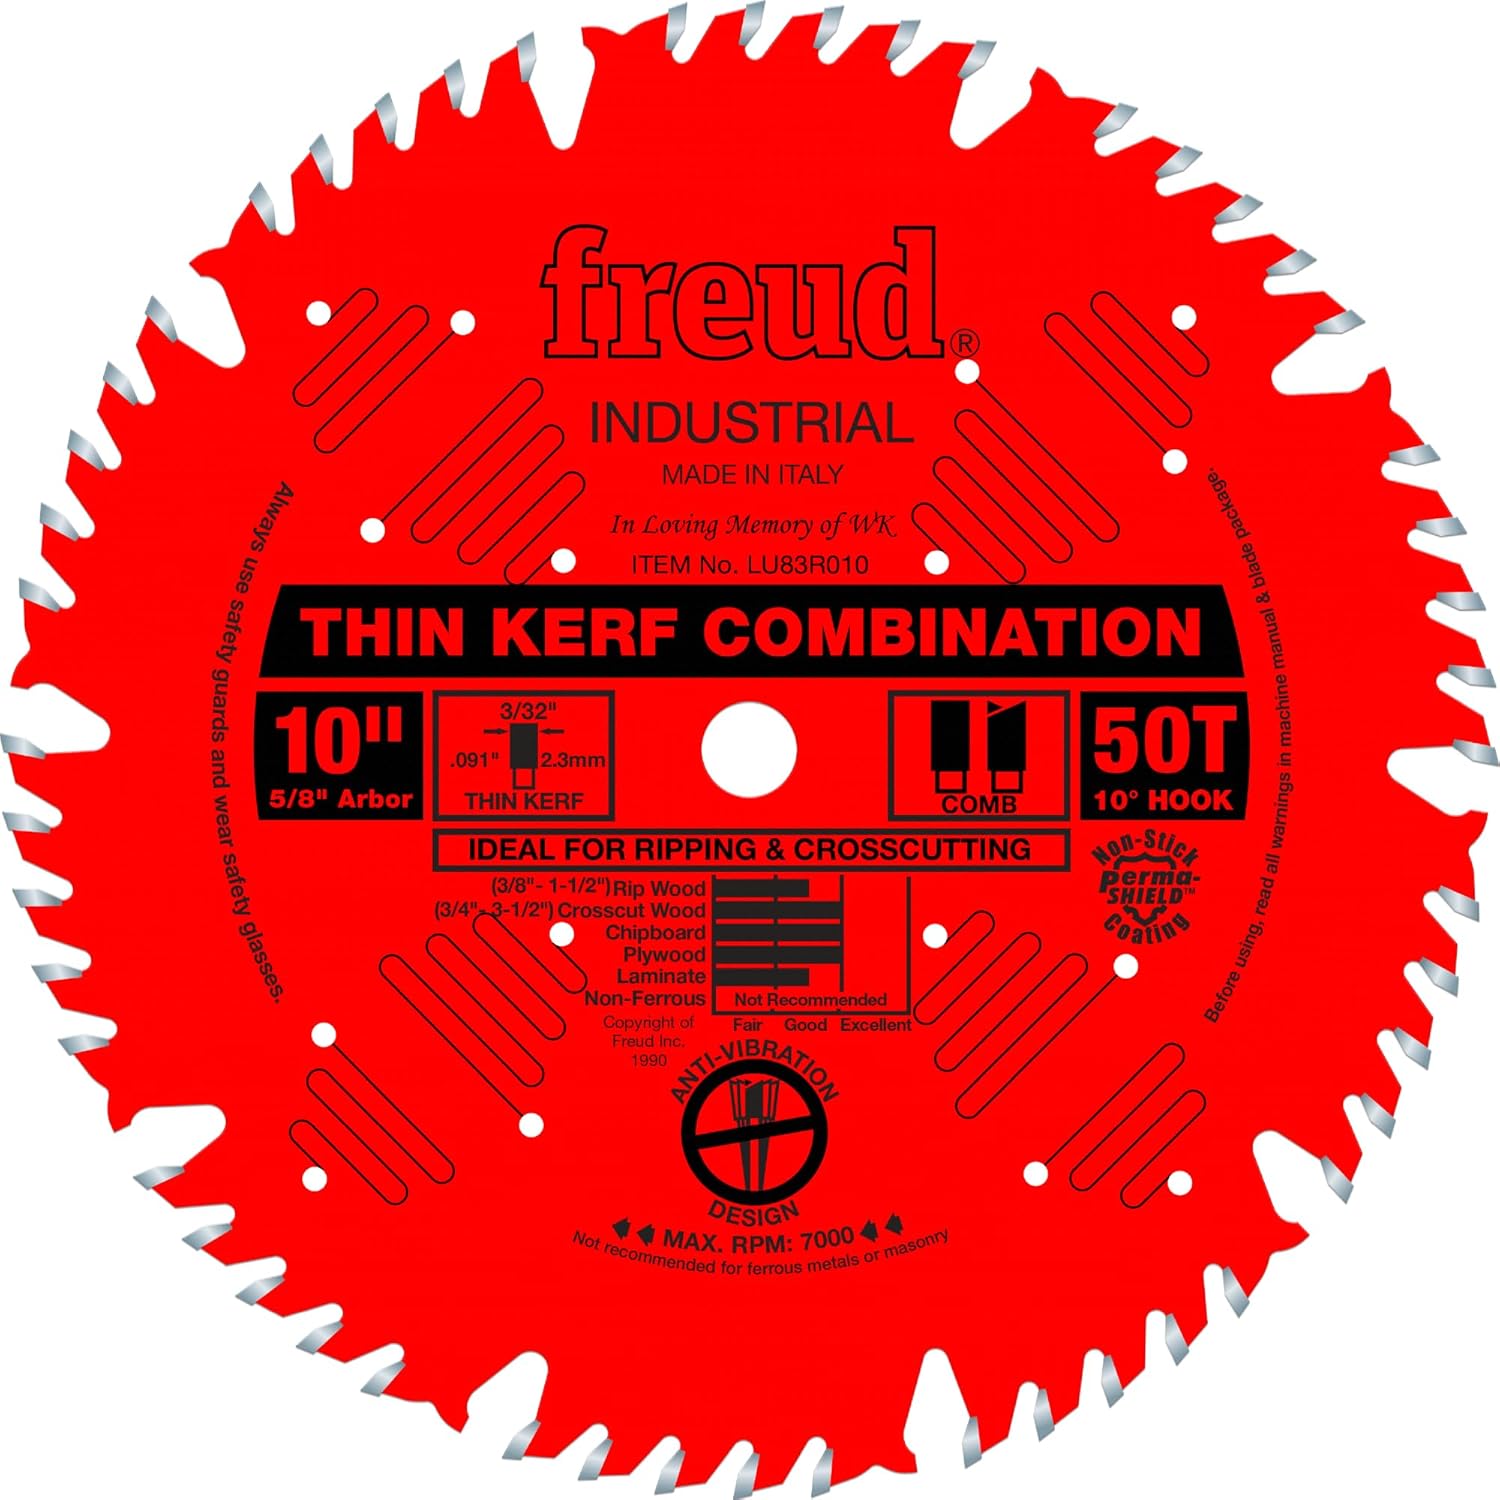
Freud 10-Inch Combination Saw Blade
Premium 10-inch combination table saw blade designed for smooth rip cuts, clean crosscuts, and long-lasting woodworking performance on hardwood, softwood, and plywood.
- Premium TiCo Hi-Density carbide teeth
- Excellent balance of ripping & crosscutting
- Laser-cut anti-vibration design
- Clean, professional-quality finish cuts
*As an Amazon Associate, we may earn from qualifying purchases.
One more thing on blades: clean them. Pitch and resin buildup does more damage to cut quality than most people realise. A coated, gummy blade generates heat, burns wood, and makes the motor work harder. Simple Green dissolved in warm water, a few minutes of soaking, a brass brush. Clean blades cut better than expensive blades that haven’t been touched in two years.
The Dado Stack — Buy It When You Actually Need It
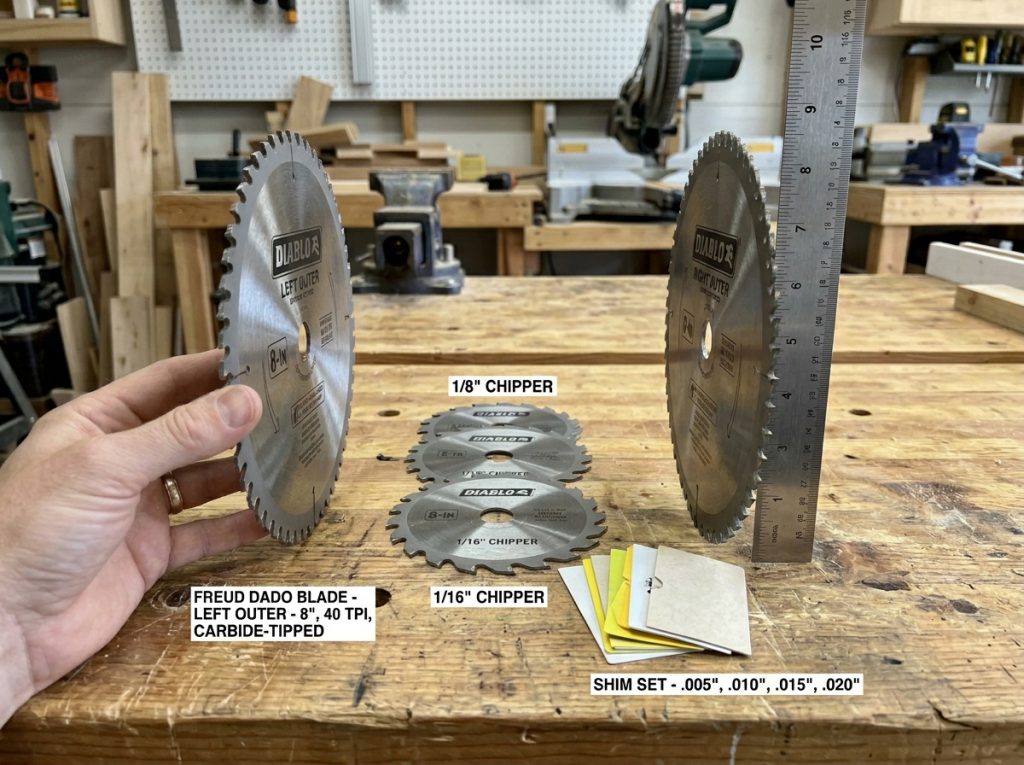
The dado stack is not a day-one purchase. Buy it when you’re building furniture with real joinery — when you’ve got a bookshelf project that needs eight dadoes for shelves, or a drawer box where every side needs a groove for the bottom panel. Before that point, you can fake dadoes with multiple passes of a standard blade and it’s fine.
When you do need one, a stacked dado set beats a wobble dado or a router-based solution for the kind of work a table saw is designed for. The Freud SD208 is the one that comes up most consistently in recommendations — it cuts clean, the chippers are well-made, and it doesn’t require the shimming ritual that some cheaper dado sets demand to hit exact widths. The Diablo 8-inch stack is cheaper and works well for most hobbyist use. The Forrest Dado King is the premium option that woodworkers who do a lot of joinery talk about the way they talk about their Forrest WWII blade — as a tool they expect to use for twenty years.
One practical note: before buying a dado stack, verify your saw accepts one. Some contractor saws and jobsite saws have arbors too short to accommodate a full-width dado stack. Check the specs. The DeWalt DWE7491RS specifically does not support standard dado stacks for this reason.
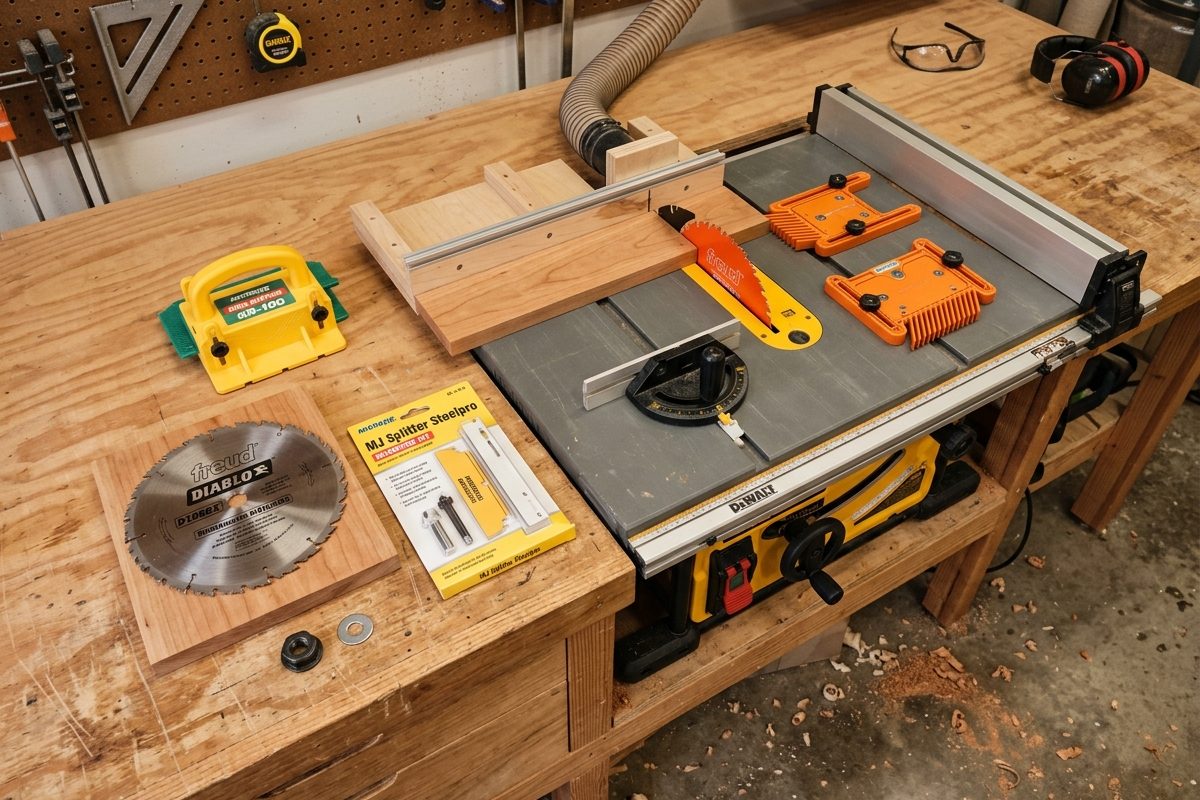
The Safety Stuff — Featherboards, Splitters, and the MJ Splitter in Particular
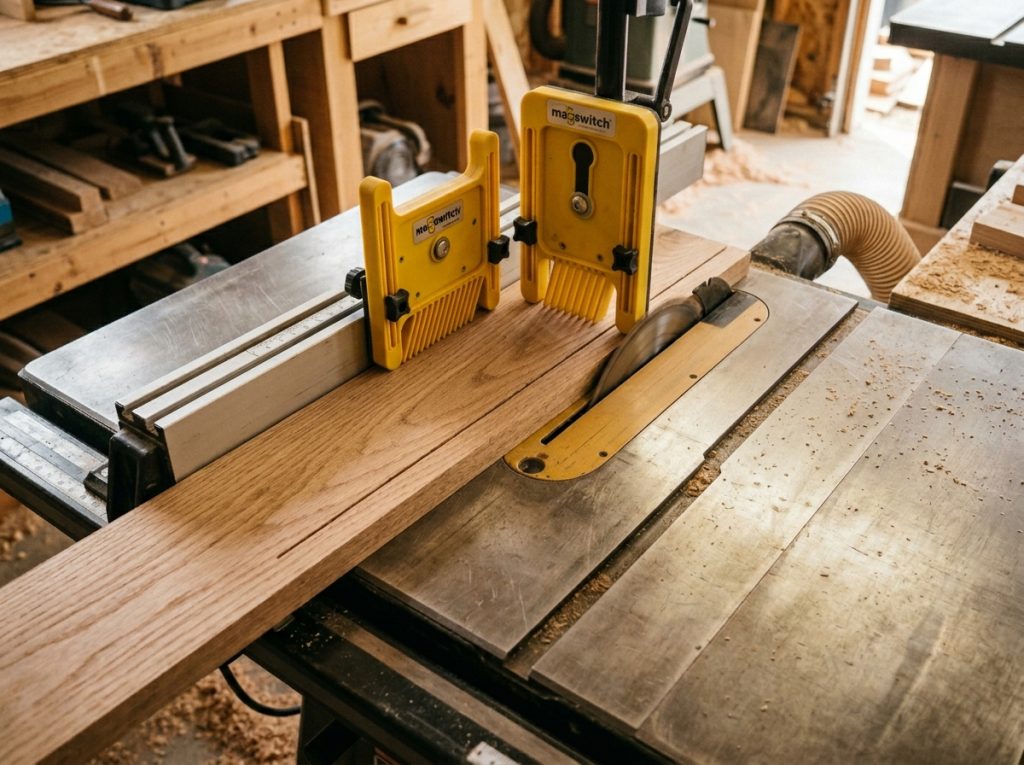
Most woodworkers don’t really think about kickback until they’ve had it happen. Then they think about it all the time. A featherboard holding a board firmly against the fence throughout a rip cut is prevention, not paranoia. The spring fingers allow wood to move forward and resist any rearward movement, which is exactly the motion that causes kickback — board lifts or shifts away from the fence, catches the back of the blade, and comes back at you.
Magnetic featherboards are genuinely better than the T-slot clamp variety for most setups. They position in seconds, hold firmly on cast iron tables, and adjust without tools. Magswitch makes the best-regarded magnetic featherboard. The only caveat: magnets don’t work on aluminum tables. If your saw has an aluminum table surface, you’re using T-slot mounting or clamping.
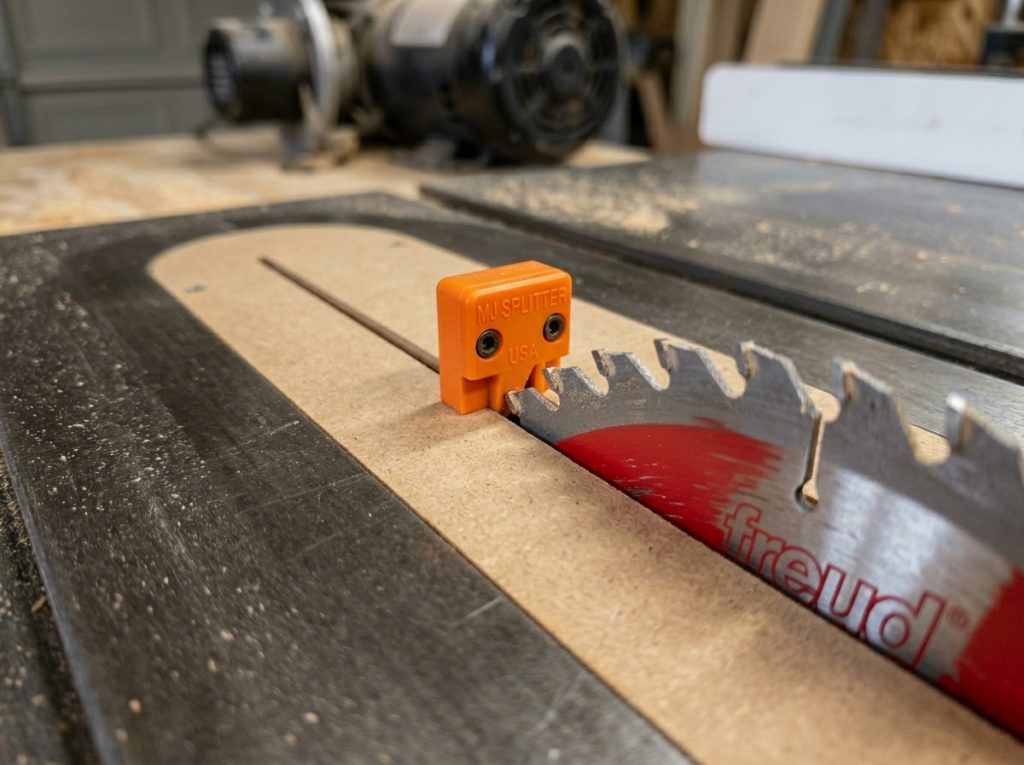
The MJ Splitter is the separate thing worth calling out specifically. It’s a $22 set of plastic splitters that install in a shop-made zero-clearance insert and sit right behind the blade in the saw kerf. Unlike the blade guard/splitter assembly that most saws include, the MJ Splitter doesn’t have to come off when you remove the guard for a jig or sled. You keep it in the throat plate regardless of what’s happening above the table. Multiple woodworkers describe adding one as the single best $22 they’ve spent on their saw.
The MJ Splitter isn’t a riving knife. It doesn’t move with the blade. But it does what a splitter is supposed to do — keep the kerf open behind the blade — and the fact that it stays in place when you’re using a jig or sled means you have kickback prevention in situations where traditional guard setups leave you unprotected.
| The zero-clearance insert is the thing the MJ Splitter lives in, and it’s worth mentioning on its own. A ZCI eliminates the gap around the blade that causes tearout on the bottom face of cuts, prevents small pieces from dropping into the cabinet where the blade can grab them, and generally makes crosscuts cleaner. You can make one from 1/2″ MDF in 20 minutes. Raising the blade slowly through the blank creates a kerf that exactly matches your blade. Make several — one for each blade and one without a splitter for dado work. |
The Push Block Question — GRR-RIPPER vs Everything Else
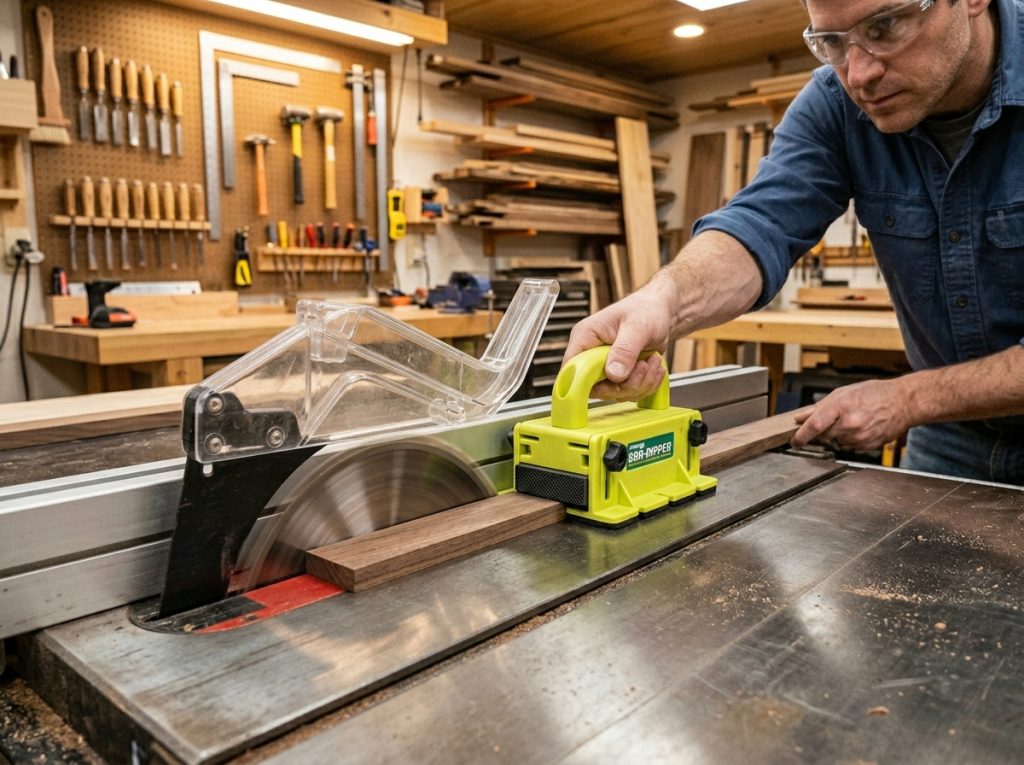
The GRR-RIPPER from MicroJig is the push block that changed how a lot of woodworkers think about ripping. The standard push stick keeps your hands clear, which is its job. The GRR-RIPPER keeps your hands clear AND applies three-directional force — down onto the workpiece, forward through the blade, and inward against the fence. The result is that the board stays flat, stays against the fence, and moves through the blade in a controlled way that a standard push stick can’t quite manage on thin or irregular stock.
The GRR-RIPPER Pro runs about $65. The 2GO version — simpler, no assembly, ready immediately — is about $45. For someone who does a lot of ripping, either version is the upgrade that makes you wonder why you used a standard push stick as long as you did. For someone who rips occasionally on standard-width boards, a good push block at $15 is sufficient.
The real-world test for whether you need a GRR-RIPPER: how often are you ripping boards under 3 inches wide? That’s where conventional push sticks get uncomfortable and where the GRR-RIPPER’s control is most obvious. Ripping 1-inch strips for a project, the GRR-RIPPER turns a sketchy operation into a controlled one.

MICROJIG GRR-RIPPER GR-100 Pushblock
Innovative 3D pushblock designed to improve table saw safety, control, and cutting precision while helping reduce kickback during woodworking projects.
- Advanced 3D pushblock safety design
- Provides superior grip and workpiece control
- Helps reduce kickback during cuts
- Compatible with table saws and router tables
*As an Amazon Associate, we may earn from qualifying purchases.
Fence Upgrades — When It’s Worth It and When It Isn’t
A lot of woodworkers assume they need a better fence when they actually just need to tune the fence they have. Most stock fences — particularly on saws in the $500-$800 range — are capable of accurate work once they’re properly adjusted and the mounting bolts are torqued correctly. Before spending $350-$500 on a Biesemeyer or Vega Pro fence, spend an afternoon with an accurate square and a dial indicator making sure the current fence is actually failing.
That said, some fences genuinely are not good enough and no amount of adjustment fixes them. The signs: the fence locks at different positions depending on which side of the saw you’re standing on, the measurement scale is consistently wrong by the same amount at different positions, or the fence face isn’t perpendicular to the table. These are mechanical problems that tuning doesn’t solve.
The Biesemeyer T-square is the fence that everyone points to as the standard. It’s been the reference design for decades — front-locking, T-square geometry, aluminum extrusion face. A lot of better-quality stock fences are Biesemeyer-pattern derivatives. The Vega Pro 40 is the frequently-recommended aftermarket option that offers Biesemeyer-level performance at slightly lower cost. Either one is an excellent fence. The question is whether your saw’s current fence is actually failing you or whether you just want a new fence.
Outfeed Support — More Important Than It Sounds
The most dangerous moment in a rip cut is the end of it. As the trailing end of the board approaches the blade, you’ve lost most of your control surface. If there’s nothing supporting the board on the outfeed side, the board tips downward as it exits the saw, which can cause binding, kickback, or simply a cut that wanders at the end.
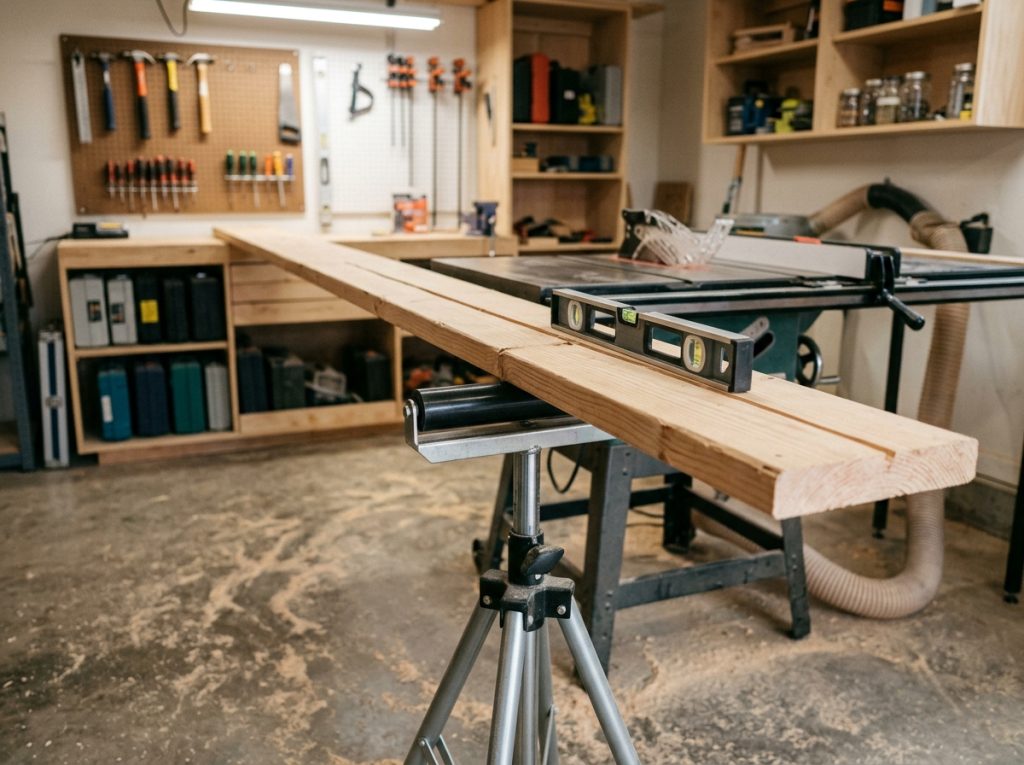
Outfeed support doesn’t have to be elaborate. A shop-made table at exact saw height, a roller stand from Amazon, or even a folding workbench positioned correctly all work. The requirement is simple: the board needs to be supported at the same height as the table surface as it exits the blade. Nothing else matters.
For a garage shop where the saw moves around: a couple of adjustable roller stands work fine and store flat. For a dedicated shop with a permanent saw location: a flip-down outfeed table mounted directly to the saw’s back is the cleanest solution. One version that several woodworkers have documented online uses a piece of 3/4″ plywood on a piano hinge — folds up flat against the saw cabinet when not in use, folds down to exact table height when you need it. About $40 in materials.
What Most People Buy That Doesn’t Actually Help
Digital miter angle gauges get purchased a lot and used for about a week before people realise they already know how to set a bevel by locking the scale, tilting until it hits the stop, and verifying with a square. The digital readout is useful for non-standard angles — anything between 0 and 45 where you can’t rely on a positive stop. For standard 45° bevels and square cuts, the saw’s own stops are adequate and a $40 digital gauge adds a step without adding value.
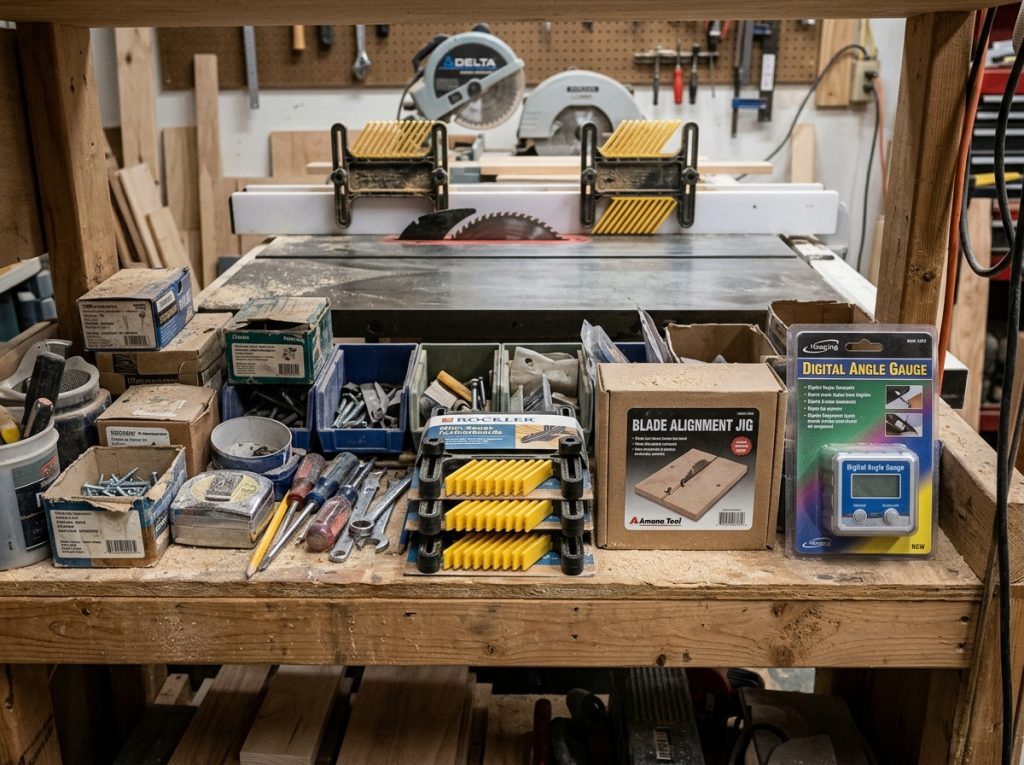
Table saw alignment tools — the fancy jigs for setting blade-to-miter-slot parallel — are useful once or twice during initial setup and then rarely touched. A reliable machinist square or a good set of feeler gauges accomplishes the same alignment task. One dial indicator on a mag base is more useful than any saw-specific alignment tool and works across every machine in your shop.
Blade stabilisers are a genuine product that helps with specific thin-blade vibration problems. But for standard 10-inch table saw blades with appropriate body thickness, they solve a problem that usually doesn’t exist. If you’re buying specialty thin blades for resawing — different conversation. For standard woodworking blades, you probably don’t need them.
A third or fourth featherboard before you’ve fully used the first two. Two featherboards — one on the fence, one on the table — is the standard setup. Some operations benefit from a third, but buying three immediately and then realising the second one is positioned wrong for most of your cuts is a common pattern.
If I Were Starting Over: The Order I’d Buy Things
First: a quality combination blade. $60–$100. This improves every cut immediately and costs relatively little. It should be the first purchase after the saw itself.
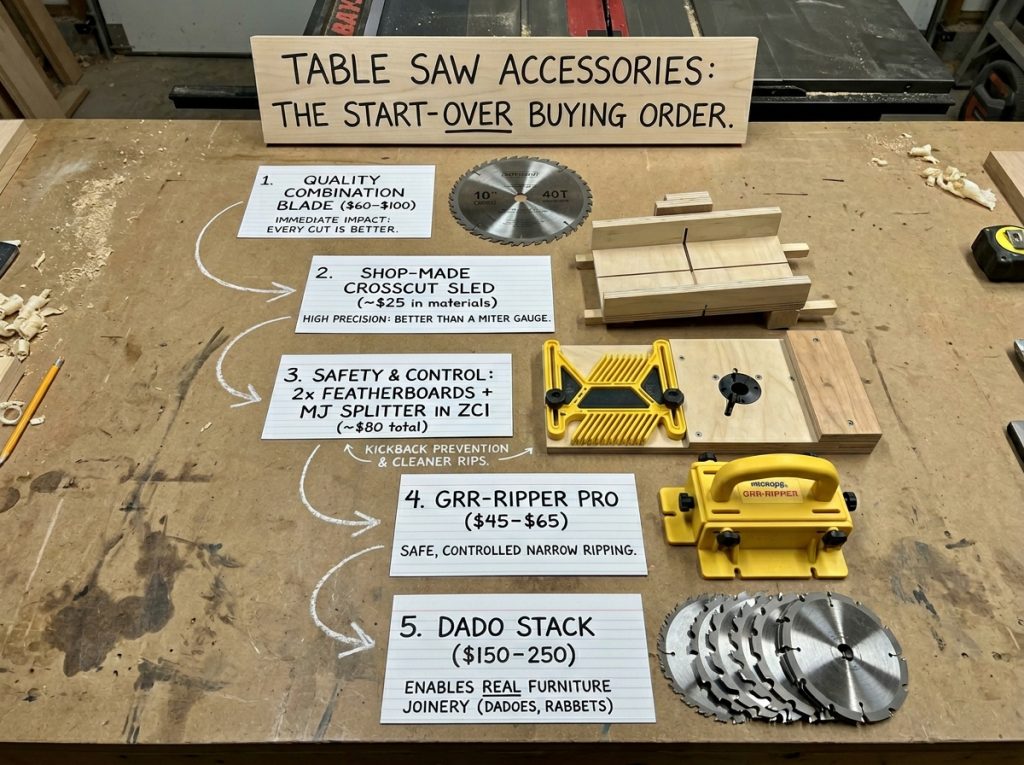
Second: a crosscut sled. Build it rather than buy it. Cost is $20–$30 in materials plus an afternoon. Everything it does, it does better than a miter gauge.
Third: magnetic featherboards (2) and an MJ Splitter in a shop-made ZCI. Total cost around $80. These handle the safety side of ripping in a way that works with your workflow rather than against it.
Fourth: a GRR-RIPPER Pro or 2GO if you do regular ripping, especially of narrow stock. $45–$65.
Fifth: a dado stack when you start building furniture with dadoes and rabbets. $150–$250 for a quality set that handles most work.
Everything else — a second blade, fence upgrade, outfeed table, digital measuring tools — comes later, driven by actual problems you’ve encountered rather than gear you think you should own.
| Order | Accessory | Cost | Impact |
| 1 | Quality combination blade (40T) | $60–$100 | Immediate — every cut |
| 2 | Crosscut sled (shop-made) | $20–$30 materials | High — precision crosscuts |
| 3 | 2x Featherboards + MJ Splitter in ZCI | ~$80 total | Safety — ripping operations |
| 4 | GRR-RIPPER Pro or 2GO | $45–$65 | Safety + control for narrow rips |
| 5 | Dado stack (when joinery work begins) | $150–$250 | Enables real furniture joinery |
| 6 | Rip blade 24T (when heavy ripping matters) | $40–$90 | Motor efficiency on thick stock |
| 7 | Outfeed support (roller stands or shop-made) | $30–$80 | Safety — long boards |
| 8 | Fence upgrade (only if current fence fails) | $300–$500 | Precision — only when needed |
The thing about table saw accessories is that the best ones don’t feel like accessories after a while. The crosscut sled becomes part of how you crosscut. The featherboards go on before every ripping session without thinking about it. The quality blade just cuts. They stop being gear and start being how the saw works.
That’s the goal. Not a collection of tools that have their own drawer. Just a saw that, through a handful of well-chosen additions, does what you need it to do consistently and safely. Most of that is achievable for under $200 if you build your own sled and choose carefully. The rest can wait.
Finlay Connolly is a woodworking enthusiast and power tool specialist with over a decade of hands-on experience in the workshop. As the founder and lead writer at ProTableSawReviews.com, Finlay combines expert knowledge with real-world testing to help woodworkers, DIYers, and professionals choose the best tools for the job. With a sharp eye for detail and a passion for precision, Finlay is committed to providing trustworthy, practical advice backed by years of experience and research in the field. Whether you’re cutting dados or comparing fence systems, you can count on Finlay for honest, reliable reviews that make your next cut your best one.