
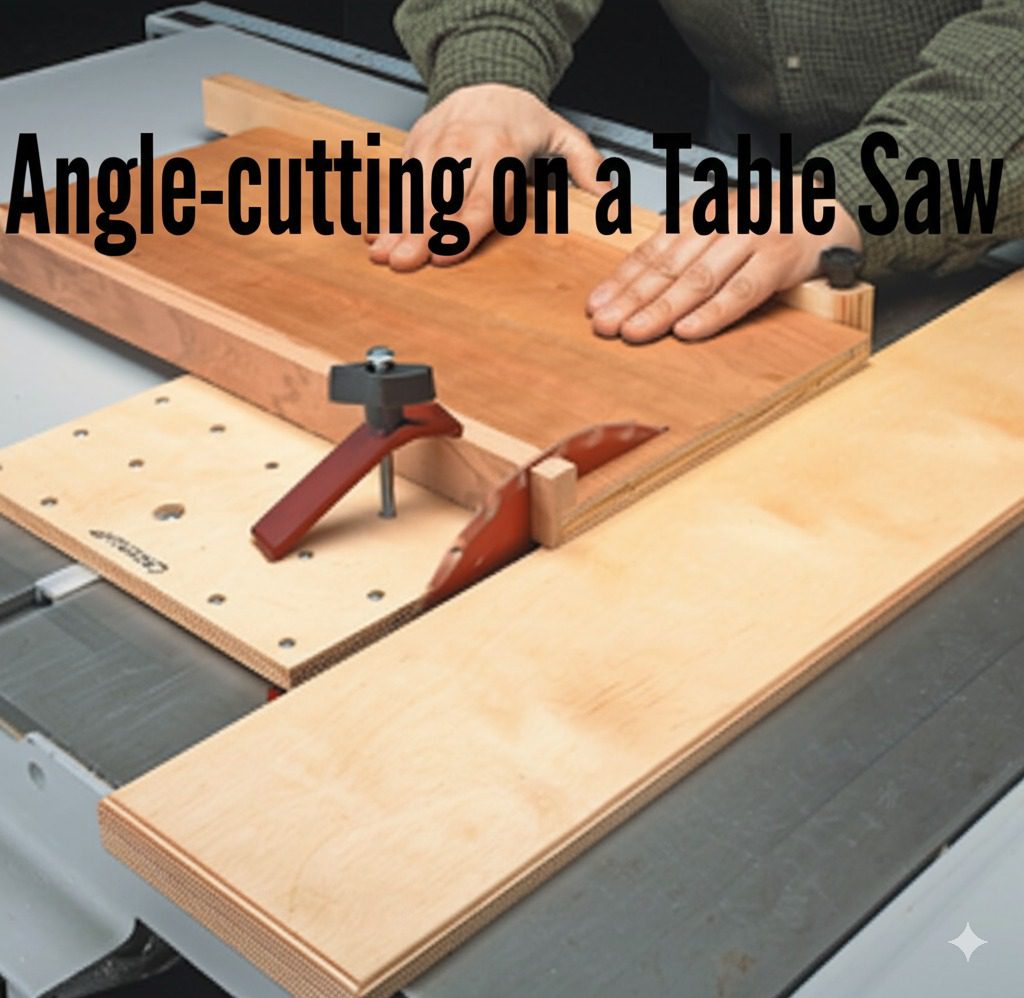
Introduction to Angle-Cutting on a Table Saw
Cutting precise angles on wood can feel like a mix of math class and craftsmanship. Whether you’re building furniture, crafting picture frames, or creating decorative moldings, clean and accurate angled cuts are essential. That’s where the table saw jig comes in—it transforms your basic table saw into a precision angle-cutting powerhouse.
The magic of using a jig is all about control. Woodworking is more than pushing a board through a spinning blade; it’s about shaping materials into something beautiful, sturdy, and useful. If your angles are even slightly off, the whole project can suffer. So, this guide is for anyone who wants better, cleaner, and more reliable angle cuts using a table saw and a well-crafted jig.
Why Accuracy Matters in Angle Cuts
Let’s be real—angle cuts aren’t just about looking good (though that’s a big part of it). They’re also crucial for structural integrity. Take furniture joints for example: even a half-degree mistake in your miter cut can lead to gaps, weak joints, and frustration.
Here’s what happens when your cuts aren’t precise:
- Your pieces won’t fit flush, leaving visible seams.
- You’ll waste material trying to fix or redo cuts.
- Structural strength is compromised, especially in load-bearing joints.
This is why a jig is a must. It holds your material in place at the exact angle you need, guiding it through the blade safely and precisely. It’s like having a co-pilot while navigating tricky terrain.
Common Projects That Require Angled Cuts
You’d be surprised how many woodworking projects demand angled cuts. Here’s a quick look at where this skill really shines:
- Picture Frames: The classic 45-degree miter is the hallmark of frame-making.
- Table Legs: Angled cuts for tapering or splayed legs.
- Boxes and Chests: Beveled edges add flair and tight joints.
- Crown Molding: A true test of angle mastery with compound miters.
- Shelves and Brackets: For strength and aesthetics, angled supports matter.
So whether you’re a weekend DIYer or a seasoned woodworker, understanding how to cut angles effectively opens up a whole world of creative possibilities.
Understanding Table Saw Jigs
What Is a Table Saw Jig?
Think of a jig as a custom guide or accessory for your table saw. Its job? To hold your material steady, at the right angle, and feed it through the blade safely and consistently. In essence, a jig removes the human error from the cutting process.
Here’s what makes a jig special:
- Customized Control: Tailored for specific angles or repetitive cuts.
- Safety First: Keeps your hands away from the blade.
- Consistency: Produces identical cuts over and over again.
Jigs come in all shapes and sizes—some are simple DIY builds from scrap wood, others are high-tech adjustable models you can buy. Either way, they’re indispensable when cutting angles on a table saw.
Types of Jigs Used in Woodworking
The woodworking world has a jig for just about everything. Here are a few you’ll encounter:
- Crosscut Sled: Great for square and straight cuts, but can be modified for angles.
- Miter Sled: Designed for precise angled cuts, especially miters.
- Taper Jig: Ideal for making long, gradual angle cuts—think furniture legs.
- Bevel Jig: Helps when tilting the blade isn’t enough or isn’t safe.
Each jig has its own role. Knowing when and how to use them is the secret sauce to a clean, accurate cut every time.
Benefits of Using a Jig for Angle Cuts

You might be wondering, “Do I really need a jig?” Short answer: yes. Longer answer? Let’s break down the benefits.
Improved Precision and Consistency
Even the steadiest hands can wobble. A jig eliminates that risk. Once you set the desired angle and lock it in, you’re guaranteed to get repeatable results. This is key when building multi-piece projects like cabinets, boxes, or trim where every piece has to align perfectly.
For instance:
- Mitered frames require four identical 45-degree cuts.
- Hexagon tables need six exact 60-degree joints.
Trying to eyeball that without a jig? Good luck.
Enhanced Safety Measures
Let’s face it—table saws can be dangerous. One slip, one kickback, and you’re in trouble. Jigs act as a buffer between your hands and the blade. They provide better grip, control, and guidance, which drastically reduces the chances of accidents.
Some safety features include:
- Push blocks or handles to keep hands away from the blade.
- Clamps or fences to secure the workpiece.
- Smooth feeding to avoid binding or kickback.
Efficiency in Repetitive Cuts
If you’re making dozens of identical angled cuts, a jig is your best friend. Set it once and you’re off to the races—no measuring, no guesswork, no inconsistencies.
This is especially useful in:
- Batch furniture production.
- Trim and molding installations.
- Joinery-heavy projects like cabinets or boxes.
In short, using a jig saves time, boosts precision, and makes your workshop a safer place.
Different Types of Angle-Cutting Jigs
Every angle-cutting jig serves a slightly different purpose. Let’s explore the most popular ones and what they’re best suited for.
Miter Sled Jig
If you’re into picture frames or box making, this is the one you’ll use the most. The miter sled rides in the miter slots of your table saw and holds your wood at a set angle (usually 45°) relative to the blade.

Peachtree Woodworking Supply Dubby Jr. Cut-Off Crosscut Sled (Left Side) Table Saw Jig, Quickly Cut Precise Accurate Miters, Left Side Table Saw Sled Kit, Angle Crosscut Sled for Table Saw
- ACCURACY & PRECISION – The Dubby Jr. Crosscut Sled enhances your table saw precision, enabling accurate miter joints and 90-degree cuts. Easy setup and easy-to-read scale with clearly marked shapes.
- SMALLER IN STATURE – The Dubby Jr. is a compact crosscut sled for table saws, perfect for precision woodworking minus the cost of larger machinery. Get accurate cuts with our handy table saw sled kit!
- SMOOTH SLIDING PARTS – Adjustable MDF face and a stop block for precise, repeatable cuts. These smooth sliding components on the cross cut sled kit work together to produce accurate cuts every time.
New starting from: 139.99
Go to AmazonPerks of the miter sled:
- Dual fences for mirrored cuts.
- High repeatability.
- Supports small and large workpieces.
It’s great for any angled cut where both sides need to meet seamlessly.
Bevel Cutting Jig
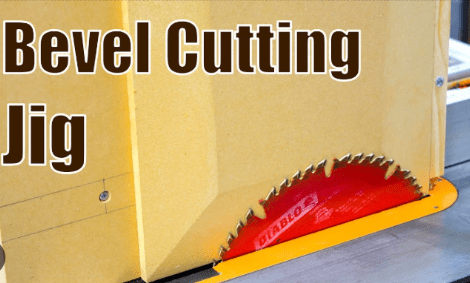
Sometimes, you need the edge of your board beveled, not just the end cut at an angle. While most table saws can tilt the blade, a bevel cutting jig helps stabilize the workpiece, especially on large or awkward boards.
Perfect for:
- Panels and tabletops with decorative bevels.
- Custom moldings or edge treatments.
Taper Jig
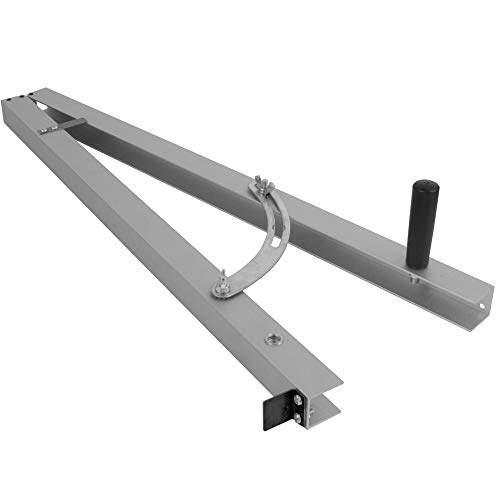
Fulton Taper Cutting Jig For Creating Tapered Angles Up to 15 Degrees on Your Table Saw 24 Inch Long Aluminum Rails with Scale and Stop
- Table saws are designed to rip stock parallel to the fence or cross-cut stock at various angles with a miter gauge. Making long rip cuts at angles from 1 deg to 15 degrees on a table saw without a jig can be challenging and dangerous attempting free hand
- The Fulton Taper Cutting Jig has been designed to make long rip cuts at angles from 1 deg to 15 degrees using your table saw. Perfect for building woodworking projects like table legs, chair legs, magazine racks and more where slight tapers are common.
- Our taper jig will most certainly enhance your woodworking abilities and your woodworking projects. This easy to use jig is fully adjustable for right or left hand use. As well as its ability to work on either the left or right side of your table saw fence.
New starting from: 31.99
Go to AmazonWant to make table legs with a subtle taper? This jig is your go-to. It allows you to gradually angle the entire length of the wood, giving that refined look you see in fine furniture.
Bonus: Some taper jigs are adjustable for multiple degrees and directions of taper.
Adjustable Angle Jig
This is the Swiss Army knife of jigs. Fully adjustable from 0° to 90°, it’s ideal for custom angles or when your project demands flexibility. Some models include angle indicators, clamps, and even digital readouts.
They’re a bit more complex to build or buy, but worth it if your work covers a wide range of angle cuts.
Building Your Own Angle-Cutting Jig
Tools and Materials Needed
Building your own jig doesn’t require a full-blown woodworking shop—you just need the right tools and a bit of patience. Here’s what you’ll want to gather before starting:
Essential Tools:
- Table saw
- Drill and drill bits
- Clamps
- Square
- Tape measure
- Wood glue
- Screwdriver or impact driver
Materials:
- High-quality plywood or MDF (for the base and fence)
- Hardwood strips (for guides or fences)
- Screws and bolts
- T-track and knobs (optional for adjustability)
- Sandpaper or a sanding block
Optional, but highly recommended, is a digital angle finder to help you dial in precise settings. Using scrap wood to test your jig before actual use can also save a lot of heartache (and material).
Step-by-Step Guide to Building a Miter Sled Jig
Building a basic 45-degree miter sled is a great starting project. It’ll improve your cuts for picture frames, boxes, and trims significantly. Here’s how to do it:
Step 1: Cut the Base Start with a rectangular piece of MDF or plywood—around 18″ x 24″ is a good size. Make sure it’s flat and square. This will be your sled base.
Step 2: Install the Runners Cut hardwood strips to fit your table saw’s miter slots. Attach them to the bottom of your base using glue and screws. Make sure they slide smoothly.
Step 3: Add Fences Cut two fences at a 45-degree angle. Position them in a V-shape so they guide your workpieces into the blade at a perfect angle. Secure them with screws and reinforce with glue.
Step 4: Add a Stop Block (Optional) If you’re doing batch cuts, a stop block helps maintain consistency. Attach it to one of the fences using a clamp or adjustable knob system.
Step 5: Test and Fine-Tune Run a few test cuts with scrap wood. Check the angles using a square or protractor. Adjust if needed and sand the edges to smooth things out.
And just like that, you’ve built a miter sled! Personalizing your jig makes woodworking feel more intuitive—you’ll start thinking in angles and seeing the potential of every offcut.
Custom Modifications for Specific Projects
Depending on what you’re building, you might want to tweak your jig setup. Here are some smart mod options:
- Swappable Inserts: Create replaceable insert plates so you can switch between different blade kerfs.
- Adjustable Angle Fence: Add a hinge and locking knob so the fence angle can be adjusted from 0° to 90°.
- Hold-Down Clamps: Secure odd-shaped or small pieces to avoid kickback.
- T-Track Additions: Add T-tracks for movable stops, clamps, or guides.
- Dust Collection Port: Cut a small slot and connect a vacuum hose for cleaner work.
Your jig doesn’t have to be one-size-fits-all. The beauty of building your own is that you can adapt it to your workflow. Whether you’re making angled cuts for picture frames, chair legs, or wooden signs, your jig should fit the job—not the other way around.
Setting Up and Aligning Your Jig Properly
Ensuring Square and Flush Cuts
So, you’ve built or bought a fancy angle jig—now what? It’s all about the setup. Even the best jig will give you poor results if it’s not aligned properly.
Here’s a foolproof way to ensure your cuts are square and accurate:
1. Calibrate the Table Saw Fence Start by confirming your table saw fence is parallel to the blade. Use a dial indicator or a simple measuring tape method to measure distance from the fence to the blade front and back. Any variation? Adjust the fence until it’s perfect.
2. Check the Blade for Squareness Using a digital angle gauge or a reliable square, confirm that your blade is exactly at 90° (or your intended bevel) to the table. Even a tiny tilt can throw off your cuts.
3. Install the Jig Properly Slide your jig into the miter slots. Make sure it doesn’t wobble. If it does, add adhesive tape or shim material to the runners until it fits snugly but slides easily.
4. Align the Workpiece Place your wood against the jig’s fence. Use a square to ensure it’s flush with both the base and the angled fence. You don’t want any gaps, twists, or bends in the wood before making a cut.
5. Test Cut and Inspect Always do a test cut. Use a digital protractor or miter gauge to inspect the result. If it’s off, tweak the jig’s position slightly or readjust the fence angle.
Calibrating Your Jig for Accuracy
No jig is set-it-and-forget-it—calibration is key. Here’s how to stay dialed in:
- Mark Reference Points: Use clear markings or tape to label 45°, 60°, 30°, and other commonly used angles.
- Use a Square Often: Check the jig’s fences regularly against a carpenter’s square or machinist square.
- Adjust Screws or Knobs: If your jig has adjustable settings, use locking knobs or bolts that allow for micro-adjustments.
- Recheck After Blade Changes: Switching blades? Always recalibrate. New kerf sizes can throw off alignments.
Keeping your jig finely tuned not only ensures clean angles—it saves time, material, and stress.
Using a Table Saw Jig for Bevel and Miter Cuts
Differences Between Bevel and Miter Cuts
Angle cuts can get confusing fast—especially when terms like “miter” and “bevel” are thrown around. Let’s clear that up:
- Miter Cut: This is an angled cut across the face or width of a board. Imagine cutting the corners of a picture frame—those 45° angled ends are miter cuts.
- Bevel Cut: This cut changes the angle of the board’s edge, often by tilting the saw blade. If you tilt your blade to 45° and slice through a board’s thickness, you’re making a bevel.
Understanding the distinction is crucial when setting up your jig and adjusting your blade.
Techniques for Perfect Execution
Here are a few pro tips to get clean, tear-out-free bevel and miter cuts using your jig:
- Use a Zero Clearance Insert: This reduces tear-out on the bottom of your workpiece.
- Support the Cut: Always have the board supported on both sides—especially for bevel cuts where the surface contact is less.
- Cut Slowly: Let the blade do the work. Pushing too fast can cause the wood to shift or the blade to bind.
- Use a Sharp Blade: A high-tooth-count blade (like 60–80 teeth) is best for clean, finish-quality cuts.
- Secure the Workpiece: Use clamps or hold-downs so the wood doesn’t move during the cut.
Whether you’re cutting trim for crown molding or building a geometric art piece, mastering both types of cuts opens up a lot of creative potential.
Safety Tips While Using Angle-Cutting Jigs
Essential PPE
We get it—woodworking is exciting, but safety is never optional. When using jigs on a table saw, always suit up with proper Personal Protective Equipment (PPE):
- Safety Glasses: Protect your eyes from flying sawdust and chips.
- Hearing Protection: Table saws are loud—protect your ears.
- Dust Mask or Respirator: Fine sawdust can be hazardous if inhaled.
- Non-slip Footwear: Stability is key when standing near spinning blades.
- Tight-fitting Clothing: Loose sleeves can get caught in moving parts.
These basics can be the difference between a smooth session and a trip to the ER.
Table Saw and Jig Maintenance Tips
A well-maintained setup is a safe setup. Here’s how to keep things in working order:
- Clean Your Jig Regularly: Sawdust buildup can affect accuracy and cause slippage.
- Check for Warping: Wood can warp over time. If your jig isn’t flat, it’s time for a rebuild.
- Inspect the Blade Often: A dull blade can overheat, bind, and kick back.
- Lubricate the Table Surface: Use paste wax to keep things sliding smoothly.
- Tighten All Fasteners: Loose screws or knobs on your jig can cause it to shift mid-cut.
It’s easy to get focused on the project and forget the gear—but keeping your tools in top shape is just as important as your measurements.
Common Mistakes to Avoid When Using Angle Jigs
Misalignment Issues
One of the biggest problems users face is jig misalignment. Even if your jig is well-built, improper placement on the table saw or incorrect blade angle can ruin your cut.
Key issues include:
- Fence not being square to the blade
- Runners not fitting snugly in miter slots
- Improperly secured workpieces
Solution: Always double-check with a square and do test cuts with scrap wood before committing to your project pieces.
Using the Wrong Type of Jig
Not all jigs are created equal. Using a taper jig for miters or vice versa will produce poor results and possibly dangerous cuts.
Fix it by:
- Matching the jig to your specific cut (bevel, miter, taper, compound)
- Reading the angle requirements of your project and selecting accordingly
- Keeping a few go-to jigs for different types of cuts
The more specific your jig is to the task, the better and safer the outcome will be.
Pro Tips for Advanced Woodworkers
Precision Enhancements
Want surgical precision? Add these tweaks to your jig:
- Digital angle gauges for exact blade tilt
- T-track stops for repeatable cuts
- Adjustable fences for flexible angles
You can also incorporate sacrificial fences to reduce tear-out or design modular jigs that allow inserts for different angles.
Combining Jigs for Complex Cuts
For compound angles or segmented pieces (like hexagonal boxes), use multiple jigs in sequence:
- Start with a miter sled for angled ends
- Switch to a bevel jig for edge shaping
Layering techniques allows for intricate joints and professional finishes—ideal for high-end furniture or art pieces.
Best Materials for Jig Construction
Plywood vs MDF
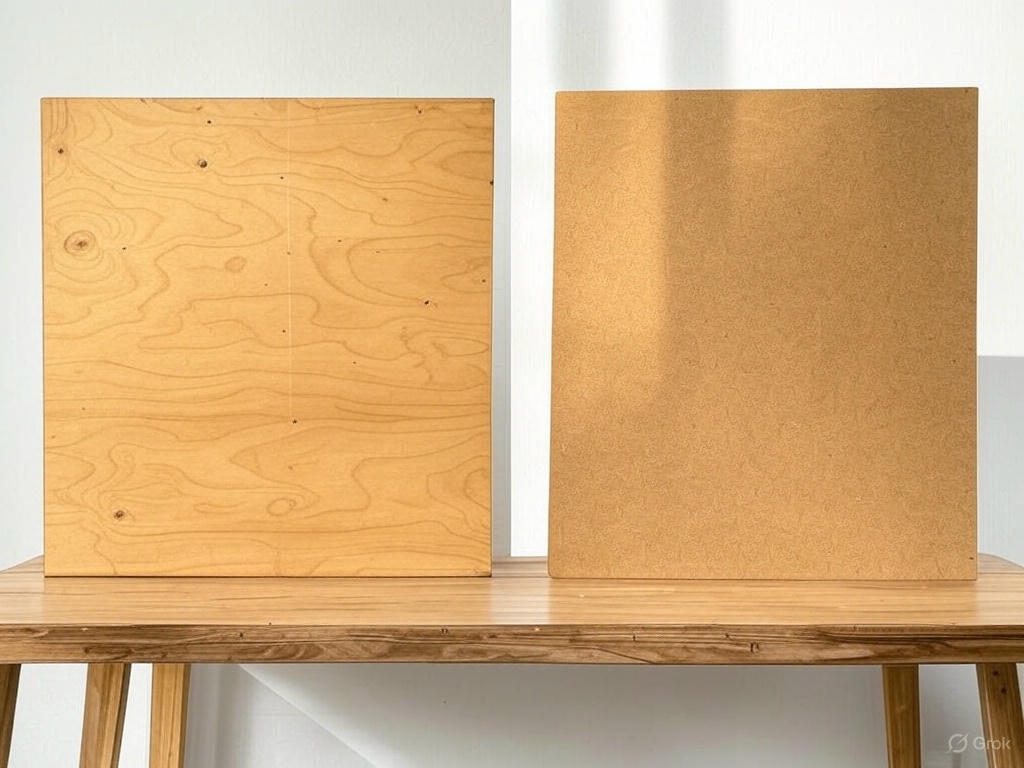
Plywood is durable, holds screws well, and resists warping. Use it for runners and fences.
MDF is ultra-flat and smooth—great for bases, but fragile around fasteners.
Combine both: MDF base + plywood supports = sturdy and accurate.
Using Metal Parts for Durability
- Add aluminum T-tracks for movable stops
- Use bolts or threaded inserts instead of wood screws for repeated adjustments
Metal reinforcements increase longevity, especially in adjustable jigs used often.
Buying vs Building: Which Is Better?
Cost Analysis
Buying a commercial jig can save time but costs more—anywhere from $50 to $300+. Building your own costs less (around $10–$30 in materials) and lets you customize for your projects.
Go for buying if:
- You value time over customization
- You need high-end features like digital readouts
Build if:
- You enjoy DIY
- You want a budget-friendly and tailored solution
Customization and Personalization Factors
Building gives you control—make it the exact size, angle range, and style you need. Plus, the satisfaction of using your own creation? Priceless.
Recommended Commercial Angle Jigs
Top Brands in the Market
Here are a few highly rated jigs for precision angle cuts:
- INCRA Miter 1000SE – Super precise with micro-adjustments
- Kreg Miter Gauge System – Excellent for repeated cuts
- Rockler Adjustable Angle Sled – Versatile and user-friendly

Rockler Crosscut Sled for Table Saw – Table Saw Sled w/Large Protractor – Sled for Table Saw Contains Adjustable 900 Stop – Easy to Read 1/20 Graduations – Woodworking Tools and Accessories
- Rockler’s Crosscut Sled For Table Saw: No more squinting at those tiny scales – this cross cut sled’s large protractor scale lets you precisely tune your angles for air-tight miters and crosscuts. Our table saw sled kit also has an optional crosscut sled drop-off platform (sold separately)
- Easy To Read: This table saw crosscut has a 1/2° graduations and a hair-line indicator to ensure error-free setups, while a heavy-duty aluminum fence, adjustable MDF fence face, and smooth-sliding components deliver versatile and precise operation.
- Fit Your Saw Perfectly: The extra material of this cross cutting sled allows you to cut the sled down to fit your saw perfectly. The guidance booklet in our saw sled kit is available so you can make it your very own. *Not compatible with DeWalt 7491RS jobsite saw
New starting from: 199.99
Go to AmazonFeatures to Look For
- Easy angle adjustments with locking mechanisms
- Smooth gliding runners
- Built-in stops for repeat cuts
- Compatibility with your table saw’s miter slots
These tools offer a plug-and-play experience for those who don’t want to build their own—but still demand high-quality results.
Maintaining and Storing Your Jigs
Cleaning and Lubrication
Keeping your jigs clean directly impacts cut quality and lifespan. Sawdust buildup leads to misalignment, sticky movement, and poor contact between jig and table.
Maintenance tips:
- Wipe down the base and runners after every use
- Apply paste wax or silicone spray to the bottom for smooth sliding
- Check screws and bolts regularly to prevent loosening
If your jig has moving parts (like adjustable fences), keep those mechanisms free from debris and lubricate metal components occasionally.
Smart Storage Ideas for Longevity
Storing your jigs properly prevents warping, accidental damage, and misplacement.
Try these smart storage methods:
- Hang on a pegboard using hooks
- Install a wall-mounted jig rack in your workshop
- Label each jig clearly with its angle type and purpose
- Store flat in a dry, temperature-controlled space
Organizing your jigs not only saves time during projects but keeps your tools in peak condition for years.
Conclusion
Cutting angles on a table saw doesn’t have to be intimidating or imprecise. With the right jig, you turn your table saw into a fine-tuned instrument capable of executing miter, bevel, and compound angle cuts with confidence and accuracy.
Whether you’re building furniture, crafting frames, or doing trim work, angle jigs can save you time, boost your accuracy, and most importantly—keep you safe. From simple DIY sleds to high-end commercial jigs, there’s an angle-cutting solution for every skill level and budget.
Investing the time to build or buy the right jig is an investment in your craft. The smoother your cuts, the cleaner your joints—and the better your finished project looks and functions. Master your angles, and you’ll take your woodworking to a whole new level.
FAQs
1. What angle is best for cutting picture frames?
The most common angle for cutting picture frames is 45 degrees, creating a perfect 90-degree corner when two pieces are joined.
2. Can I use a crosscut sled for angles?
You can modify a crosscut sled with adjustable fences to cut angles, but a dedicated miter sled or adjustable angle jig is more accurate.
3. How do I prevent tear-out with jigs?
Use a sharp, high-tooth-count blade and apply painter’s tape along the cut line. Adding a sacrificial fence can also help reduce tear-out.
4. Are table saw jigs universal?
Not exactly. Jigs need to match your table saw’s miter slots. However, many jigs are adjustable or modifiable to fit different models.
5. What’s the safest way to test a new jig?
Always run a test cut with scrap wood first. Check alignment, movement, and results before using it on your actual project material.

Finlay Connolly is a woodworking enthusiast and power tool specialist with over a decade of hands-on experience in the workshop. As the founder and lead writer at ProTableSawReviews.com, Finlay combines expert knowledge with real-world testing to help woodworkers, DIYers, and professionals choose the best tools for the job. With a sharp eye for detail and a passion for precision, Finlay is committed to providing trustworthy, practical advice backed by years of experience and research in the field. Whether you’re cutting dados or comparing fence systems, you can count on Finlay for honest, reliable reviews that make your next cut your best one.