
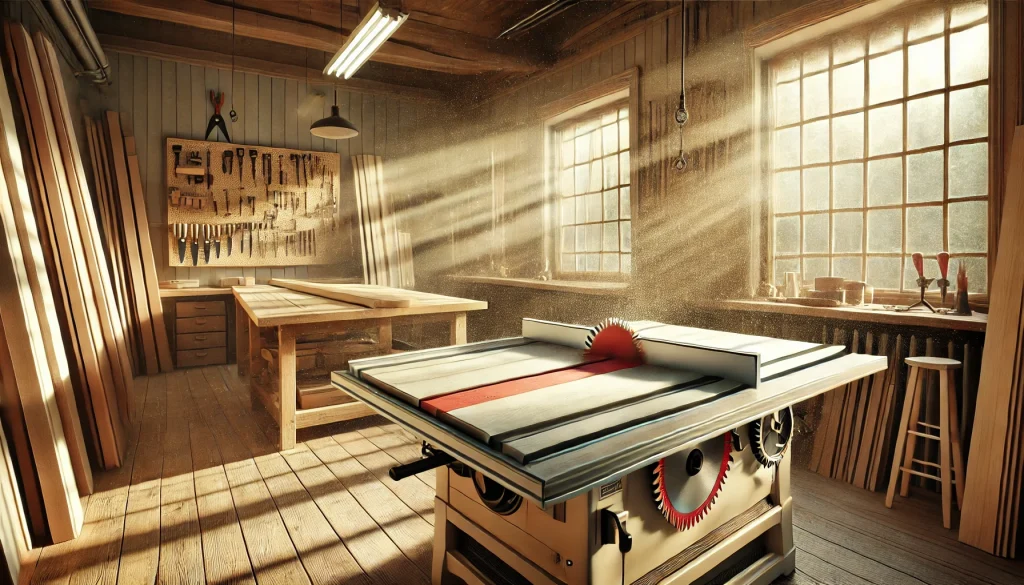
Have you ever experienced that heart-stopping moment when your workpiece suddenly kicks back from your table saw, becoming a dangerous projectile? If you’ve spent any time in a woodworking shop, you know exactly what I’m talking about. That terrifying experience is why understanding and properly using a table saw splitter is absolutely crucial for anyone who operates this powerful tool.
In my 15+ years of woodworking experience, I’ve witnessed too many craftspeople remove this vital safety component for convenience, often with painful consequences. Today, I’ll walk you through everything you need to know about table saw splitters – what they are, why they’re essential, how to install them correctly, and how they might just save your fingers or even your life.
What Is a Table Saw Splitter and Why Is It Critical for Workshop Safety?
Definition and Core Function of Saw Splitters
A table saw splitter (sometimes called a saw kerf splitter) is a vertical metal plate positioned directly behind the blade that prevents the freshly cut wood (kerf) from closing back on itself after passing through the saw blade. This unassuming safety device is that simple metal fin that sits in perfect alignment with your circular blade.
The primary function of a table saw blade splitter is straightforward but vital: it maintains the separation between the two pieces of wood after they’ve been cut, keeping the kerf open. This prevents the wood from pinching the spinning blade – a leading cause of dangerous kickback incidents in woodworking shops everywhere.
The Life-Saving Role of Proper Splitter Usage
The statistics paint a sobering picture about the importance of saw blade splitters. According to the Consumer Product Safety Commission, table saws cause approximately 67,000 injuries annually in the US alone, with kickback being a primary culprit. Research demonstrates that properly installed anti-kickback splitters can reduce these dangerous incidents by over 80%.
What makes saw kerf splitters particularly valuable is that they work passively – you don’t need to remember to activate them or use them correctly. Once properly installed, they’re constantly working to protect you from one of woodworking’s most sudden and violent accidents.
Think of your table saw rip splitter as the seatbelt of your workshop – you might complete thousands of cuts without needing it, but when something goes wrong, you’ll be eternally grateful it was there.
Types of Table Saw Splitters Available in Today’s Market
Traditional Fixed Splitters: The Original Design
The traditional fixed splitter is the classic design that has been around for decades. Typically attached to the blade guard assembly, it consists of a metal plate that extends from behind the blade. These fixed kerf splitters have served woodworkers well for generations but come with notable limitations.
For one, these conventional splitters must be removed for certain operations like dadoing or non-through cuts. This removal process can be cumbersome, leading many woodworkers to leave them off permanently – a dangerous compromise. Additionally, fixed splitters often come with blade guards that can obscure the cutting line, tempting users to remove the entire safety assembly.
Despite these drawbacks, a properly installed fixed table saw splitter is infinitely better than no splitter at all. If your saw has one of these traditional designs, I strongly encourage you to keep it installed whenever possible.
Riving Knives: The Modern Safety Standard
The riving knife represents a significant evolution in splitter design and has become the gold standard in modern table saw safety equipment. Unlike fixed splitters, riving knives are attached to the saw’s arbor assembly, meaning they move up, down, and tilt with the blade. This design breakthrough offers several advantages that have revolutionized table saw safety.
Most importantly, saw riving knives stay close to the blade at all times, providing protection during partial-depth cuts when traditional splitters would have to be removed. They also sit lower than the top of the blade, meaning they don’t need to be removed for non-through cuts in most cases.
Since 2009, all new table saws sold in the United States must come equipped with riving knives, reflecting the industry’s recognition of their superior safety benefits. If you’re using an older saw without a riving knife splitter, consider whether upgrading might be worthwhile for the safety advantages alone.
Aftermarket Splitter Solutions for Enhanced Protection
MicroJig Splitter Technology
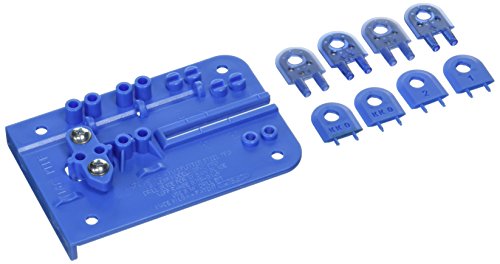
MICROJIG GRR-RIPPER SP-2 Mircojig Mj Splitter Steelpro, Blue
- Finally, a table saw splitter that is easy to install, easy to use, easy to align, and doesn’t get in the way
- Tough to the core. The MJ Splitter Steelpr has a 100% polycarbonate shell reinforced with a solid stainless steel foundation. Able to take on the stress caused by many solid woods. The Steelpro will greatly reduce the chance of kickback on your table saw and virtually eliminate burning.
- Fool-Proof Installation
New starting from: 40.00
Go to AmazonFor those with older saws or those seeking alternatives to factory splitters, the market offers several excellent aftermarket options. MicroJig splitters have become particularly popular, featuring their MJ Splitter which installs directly into your saw’s throat plate.
These innovative aftermarket table saw splitters are especially useful because they can be used with zero-clearance inserts, providing both the safety benefits of a splitter and the clean-cutting advantages of a zero-clearance throat plate. Their design includes twin splitters – one on each side of the blade – offering excellent kerf separation and enhanced kickback prevention.
DIY Splitter Alternatives for Budget-Conscious Woodworkers
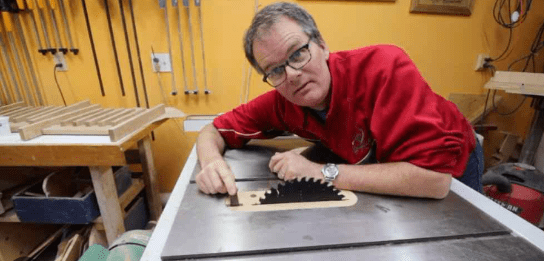
With some basic materials and careful measurements, you can craft your own homemade table saw splitter solutions. Many woodworkers have successfully created DIY splitters using materials like hardwood, HDPE plastic, or metal plate.
A popular approach involves creating a zero-clearance insert with an integrated custom splitter. By cutting a slot through a homemade insert and attaching a carefully sized piece of plastic or metal, you can fashion an effective DIY saw splitter that serves admirably in many situations.
Remember though, homemade splitter solutions should be approached with careful consideration of materials and proper alignment. A misaligned splitter can actually increase rather than decrease risk in your woodworking safety setup.
How a Table Saw Splitter Prevents Dangerous Kickback
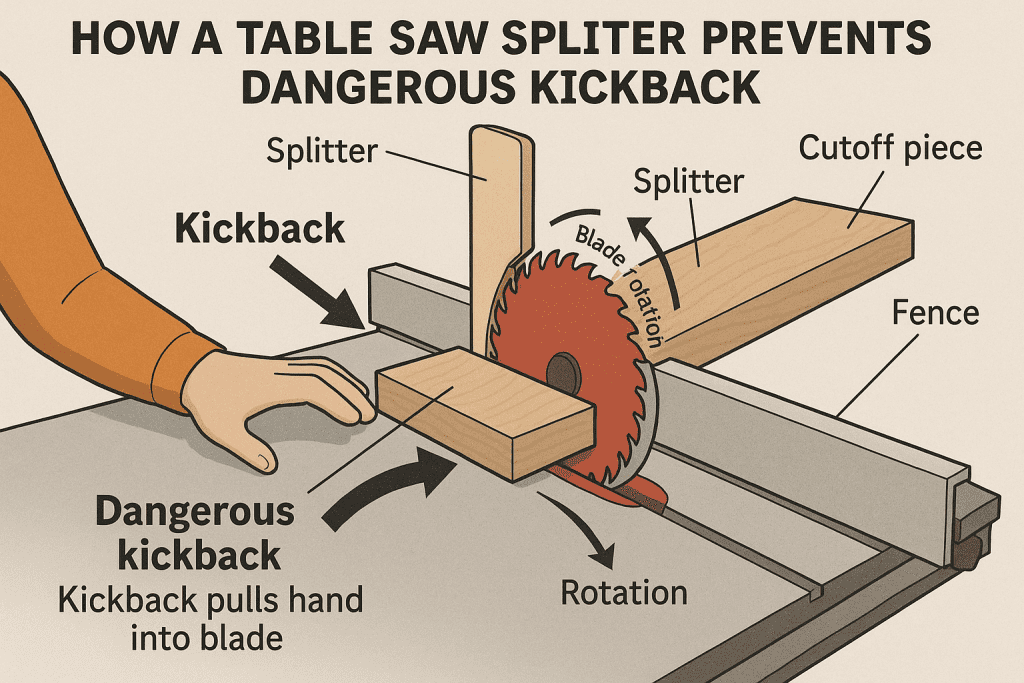
Understanding the Mechanics of Table Saw Kickback
Before we can fully appreciate how splitters prevent kickback, we need to understand what causes this dangerous phenomenon in the first place.
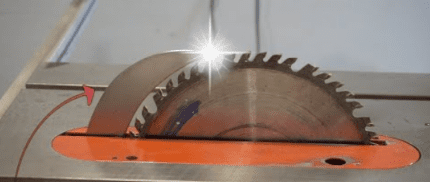
Table saw kickback typically occurs in one of two ways. First, when the material pinches the back of the blade, the teeth grab the wood and launch it back toward the operator at alarming speeds – often exceeding 100 miles per hour. The second common scenario happens when a cutoff piece catches between the blade and the fence, causing it to rise up and get thrown with tremendous force.
In both cases, the results can be devastating. Beyond the projectile danger, kickback often pulls hands into the blade as the workpiece suddenly disappears, leading to severe injuries that can permanently affect a woodworker’s career and life.
How Splitters Interrupt the Kickback Sequence
A properly installed anti-kickback device like a quality splitter works brilliantly to interrupt this dangerous sequence of events before it can fully develop.
By keeping the kerf open, the saw kerf splitter prevents the two sides of the cut from pinching the back of the blade. It’s a simple mechanical intervention that eliminates one of the primary causes of kickback before it can begin, making your woodshop safety significantly more robust.
Additionally, the splitter helps prevent cut-off pieces from rotating into the rising teeth at the back of the blade. As the blade rotates, the teeth at the back move upward – if a loose piece contacts these teeth, it can be lifted and thrown. The table saw safety splitter serves as a physical barrier between these rising teeth and any cut-off pieces.
Think of your saw blade splitter as a mediator between the two halves of your workpiece, ensuring they remain separated and can’t conspire to cause trouble by pinching the blade. This simple function makes it one of the most important pieces of woodworking safety equipment you’ll ever use.
Proper Installation and Adjustment of Your Table Saw Splitter
Essential Alignment Techniques for Maximum Protection
Proper alignment is absolutely critical for a table saw blade splitter to function effectively. A misaligned splitter can actually create problems rather than solve them, potentially binding the workpiece and causing the very kickback it’s meant to prevent.
The golden rule of splitter alignment is that it must be perfectly aligned with the blade. Not slightly to the left, not slightly to the right – but precisely aligned with the blade’s cutting plane. This ensures the splitter sits exactly in the kerf created by the blade, optimizing your table saw safety system.
To check alignment, use a straightedge placed against the side of your blade (with the saw unplugged, of course). The straightedge should also touch the splitter along its entire length without any gaps. Perform this check from both sides of the blade for absolute certainty about your splitter position.
Height and Position Considerations for Different Cutting Operations
The height setting of your table saw kerf splitter is another crucial factor in its effectiveness. Generally, the splitter should be set so that its top is just slightly lower than the top of the blade. This allows it to work effectively while staying out of the way of the workpiece during various cutting operations.
For riving knives, the position is less of a concern since they move with the blade assembly. For fixed splitters, however, you’ll need to adjust the height whenever you change the blade height to maintain optimal kickback protection.
The distance between the splitter and the blade should be close enough to effectively keep the kerf open, but not so close that sawdust builds up between them. Most manufacturers recommend 3 to 8 millimeters of clearance, but always check your saw’s manual for specific guidance on your splitter setup.
Common Installation Mistakes That Compromise Safety
In my experience helping fellow woodworkers, I’ve encountered several common installation mistakes that compromise safety:
- Installing the splitter too far from the blade, allowing the kerf to close before reaching the anti-kickback splitter
- Using a splitter that’s too thin for the kerf width created by the blade
- Failing to reinstall the table saw safety device after removing it for special cuts
- Not checking alignment after changing blades or making adjustments
Remember, a properly installed table saw splitter is a joy to work with because you’ll barely notice it’s there – until that critical moment when it prevents a dangerous kickback incident that could have resulted in serious injury.
Using Your Table Saw Safely With a Properly Installed Splitter
When Removal Is Necessary (And When It’s Not)
One of the biggest safety compromises I see in workshops is the permanent removal of table saw splitters for convenience. Let’s be crystal clear: you should remove your splitter only when absolutely necessary for specific cuts, and reinstall it immediately afterward to maintain your workshop safety standards.
Operations that might require temporary splitter removal include:
- Dado cuts (though riving knives can often remain installed)
- Certain non-through cuts where the blade doesn’t completely penetrate the workpiece
- Extremely narrow cuts where the splitter physically interferes (though this is rare with modern designs)
That’s a very short list, and for good reason. For the vast majority of cuts – including all through cuts with a standard blade – your table saw rip splitter should remain firmly in place as a critical component of your woodworking safety protocol.
I’ve heard every excuse for removing splitters permanently: “It gets in the way,” “I’m careful,” “I’ve never had kickback before.” Remember, kickback happens in milliseconds, and no amount of experience or caution can react quickly enough when things go wrong with a powerful table saw.
Complementary Safety Features That Work With Your Splitter
While the table saw splitter is essential, it works best as part of a comprehensive safety system for table saws:
- Blade guards: These clear shields prevent accidental contact with the blade from above and help contain flying debris, complementing your splitter protection.
- Anti-kickback pawls: These toothed devices ride on top of the wood and dig in if the wood tries to move backward, providing additional kickback protection alongside your saw splitter.
- Push sticks and push blocks: These keep your hands safely away from the blade during cuts, adding another layer to your table saw safety strategy.
- Featherboards: These hold the workpiece firmly against the fence or table, reducing the chance of binding or wandering during cuts.
Using these features in concert with your table saw kerf splitter creates multiple layers of protection. Think of them as your woodworking safety net – you hope you’ll never need them, but you’ll be grateful for every layer if something goes wrong during operation.
Maintenance and Care of Your Table Saw Splitter
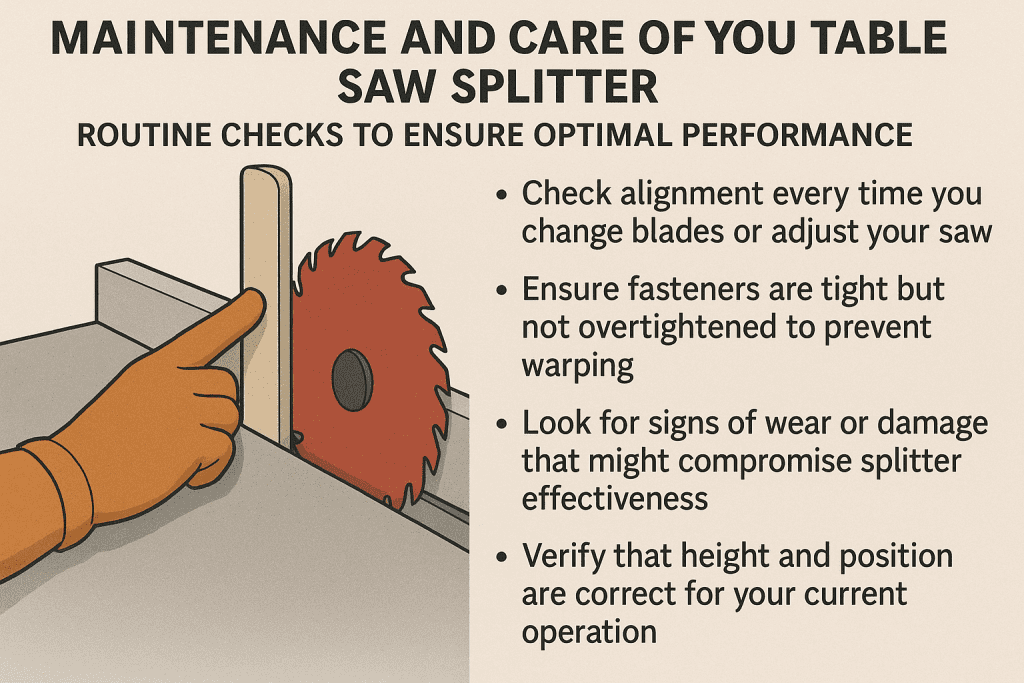
Routine Checks to Ensure Optimal Performance
Like any safety equipment, your table saw splitter needs regular attention to function correctly:
- Check alignment every time you change blades or adjust your saw
- Ensure fasteners are tight but not overtightened to prevent warping
- Clean any pitch or resin buildup regularly to maintain smooth operation
- Look for signs of wear or damage that might compromise splitter effectiveness
- Verify that height and position are correct for your current operation
I recommend making a quick splitter check part of your pre-cutting routine. It takes just seconds to verify that your splitter is present, properly aligned, and secure – seconds that could save fingers or prevent serious injury in your woodworking shop.
When to Replace Your Splitter for Maximum Safety
Even the best table saw splitters don’t last forever. Signs that your splitter needs replacement include:
- Visible damage or deformation that affects alignment
- Difficulty achieving proper alignment with your blade
- Excessive wear that has changed its thickness or integrity
- Rusting or corrosion that roughens the surface (which can increase friction)
- Any modification that compromises its structural integrity
Don’t hesitate to replace a questionable table saw safety splitter. Compared to the cost of medical bills or lost work due to injury, a new splitter is an insignificant expense for any serious woodworker concerned about workshop safety.
Conclusion: Making Table Saw Safety Your Workshop Priority
Throughout this comprehensive guide, we’ve explored the critical role that table saw splitters play in workshop safety. From preventing dangerous kickback to keeping your fingers safely away from spinning blades, these simple devices offer protection far beyond their humble appearance and cost.
Whether you’re using a traditional fixed splitter, a modern riving knife, or an aftermarket solution like a MicroJig splitter, the key is consistent use. The best table saw safety device in the world can’t protect you if it’s sitting on a shelf instead of installed on your saw where it belongs.
As woodworkers, we often focus on the quality of our cuts, the beauty of our joinery, or the finish of our projects. But none of that craftsmanship matters if we suffer a serious injury. I encourage you to make safety your first priority by keeping your table saw splitter installed, properly adjusted, and in good working condition.
Remember, in woodworking as in life, an ounce of prevention is worth a pound of cure. Your table saw splitter might be the most important ounce in your entire workshop safety arsenal.
FAQs About Table Saw Splitters
1. Can I use my table saw without a splitter if I’m just making a few quick cuts?
No, this is a dangerous practice that significantly increases your risk of kickback. Modern riving knives and table saw splitters are designed to be convenient and minimally intrusive. The few seconds it takes to ensure your splitter is installed could prevent a serious injury. Even “just a few quick cuts” can result in kickback if conditions are right, making your splitter installation essential for every cutting operation.
2. My older table saw didn’t come with a splitter. What are my options for improving safety?
Several good aftermarket options exist for older saws lacking factory splitter protection. Look into the MicroJig Splitter system, which can be installed in custom throat plates. Some woodworkers also create DIY table saw splitters using thin metal or plastic. If you’re using an older saw regularly, consider whether upgrading to a model with a modern riving knife system might be a worthwhile safety investment to protect yourself from kickback hazards.
3. How can I tell if my table saw splitter is properly aligned with my blade?
With the saw unplugged, place a straightedge against the side of your blade and extend it to the splitter. The splitter alignment should be perfectly in line with the plane of the blade – not offset to either side. Check from both sides of the blade for accuracy. There should be no gap between the straightedge and either the blade or the splitter. Proper alignment is essential for your splitter to function correctly as a kickback prevention device.
4. Do I need different splitters for different blade thicknesses on my table saw?
Ideally, yes. Your table saw splitter should match or be slightly thinner than the kerf width created by your blade. Using a splitter that’s too thick can cause binding, while one that’s too thin won’t effectively prevent the kerf from closing. Some premium aftermarket splitter systems include multiple splitter sizes for different blade types, ensuring optimal table saw safety regardless of the cutting operation you’re performing.
5. Can I use a splitter when making bevel cuts on my table saw?
For fixed splitters, probably not, as they typically don’t tilt with the blade. This is one of the major advantages of modern riving knives, which do tilt with the blade and can be used for bevel cuts. If your saw has a fixed table saw splitter and you must make bevel cuts, use extra precautions like featherboards and push sticks, and be especially alert for signs of binding that could lead to dangerous kickback situations.
Please don’t forget to leave a review.
Explore more by joining me on Patreon

Finlay Connolly is a woodworking enthusiast and power tool specialist with over a decade of hands-on experience in the workshop. As the founder and lead writer at ProTableSawReviews.com, Finlay combines expert knowledge with real-world testing to help woodworkers, DIYers, and professionals choose the best tools for the job. With a sharp eye for detail and a passion for precision, Finlay is committed to providing trustworthy, practical advice backed by years of experience and research in the field. Whether you’re cutting dados or comparing fence systems, you can count on Finlay for honest, reliable reviews that make your next cut your best one.