
Rust is the enemy of every tool, especially your trusty table saw. If you’ve noticed orange or brown spots on your table saw’s surface or blade, don’t worry—it’s not the end of the world! With a little effort and the right tools, you can remove rust and restore your table saw to its former glory. Whether you’re a seasoned woodworker or just starting out, this guide will walk you through the process step-by-step. Even an 11-year-old can follow along! Let’s get started.
Why Does Rust Form on a Table Saw?

Before we dive into the cleaning process, let’s understand why rust forms in the first place. Rust happens when metal is exposed to moisture and oxygen over time. Here are some common reasons your table saw might rust:
- Humidity: If you store your table saw in a damp garage or basement, moisture in the air can cause rust.
- Lack of Use: Tools that sit unused for long periods are more likely to rust.
- Sawdust Buildup: Sawdust can trap moisture against the metal, leading to rust.
- Improper Cleaning: If you don’t clean your table saw after use, leftover debris can promote rust.
The good news? Rust is preventable and removable! Let’s learn how.
Tools and Materials You’ll Need
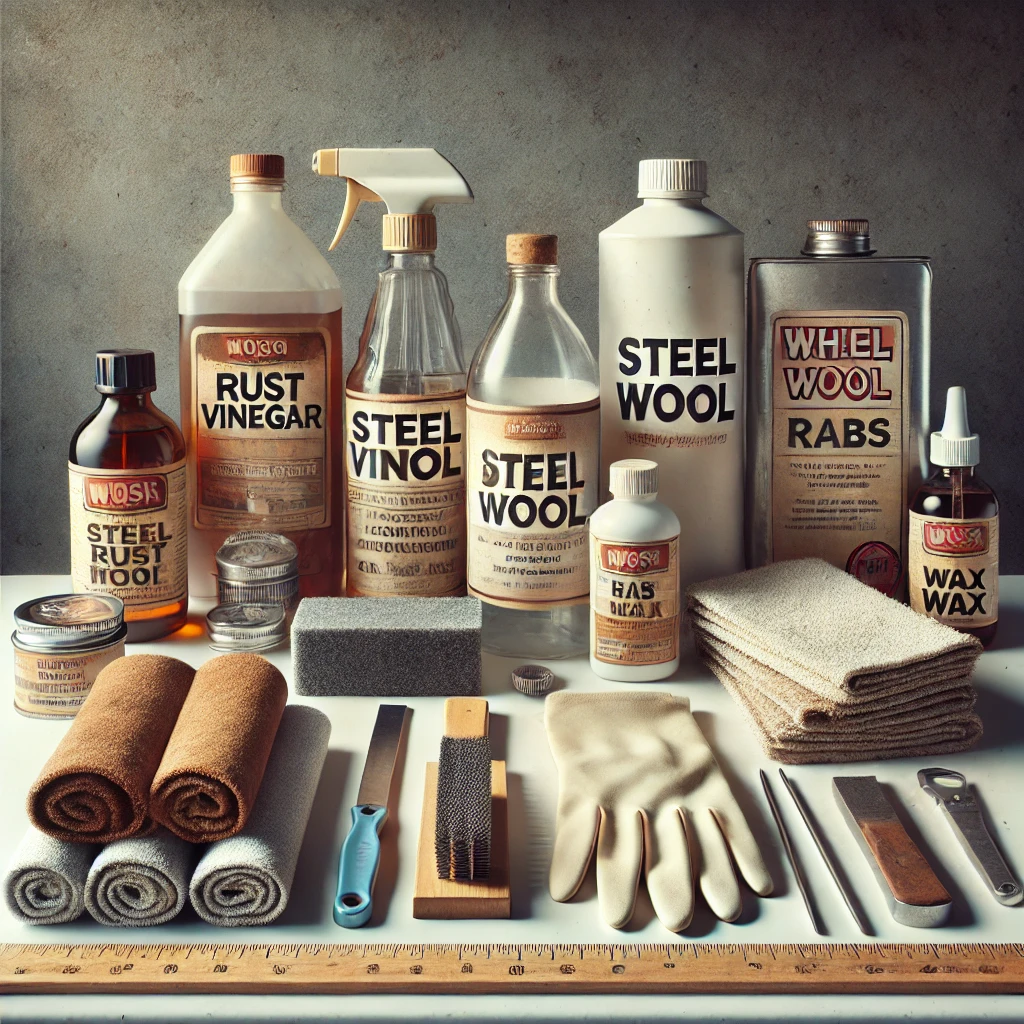
Here’s a list of things you’ll need to remove rust from your table saw:
- White vinegar or rust remover (like WD-40 or Evapo-Rust)
- Fine steel wool or a scrubbing pad (non-abrasive to avoid scratching)
- Sandpaper (220-grit or higher)
- Clean rags or paper towels
- Protective gloves
- Masking tape (to protect non-metal parts)
- Lubricant or wax (to prevent future rust)
- Baking soda (optional, for neutralizing acid)
Step-by-Step Guide to Removing Rust from a Table Saw
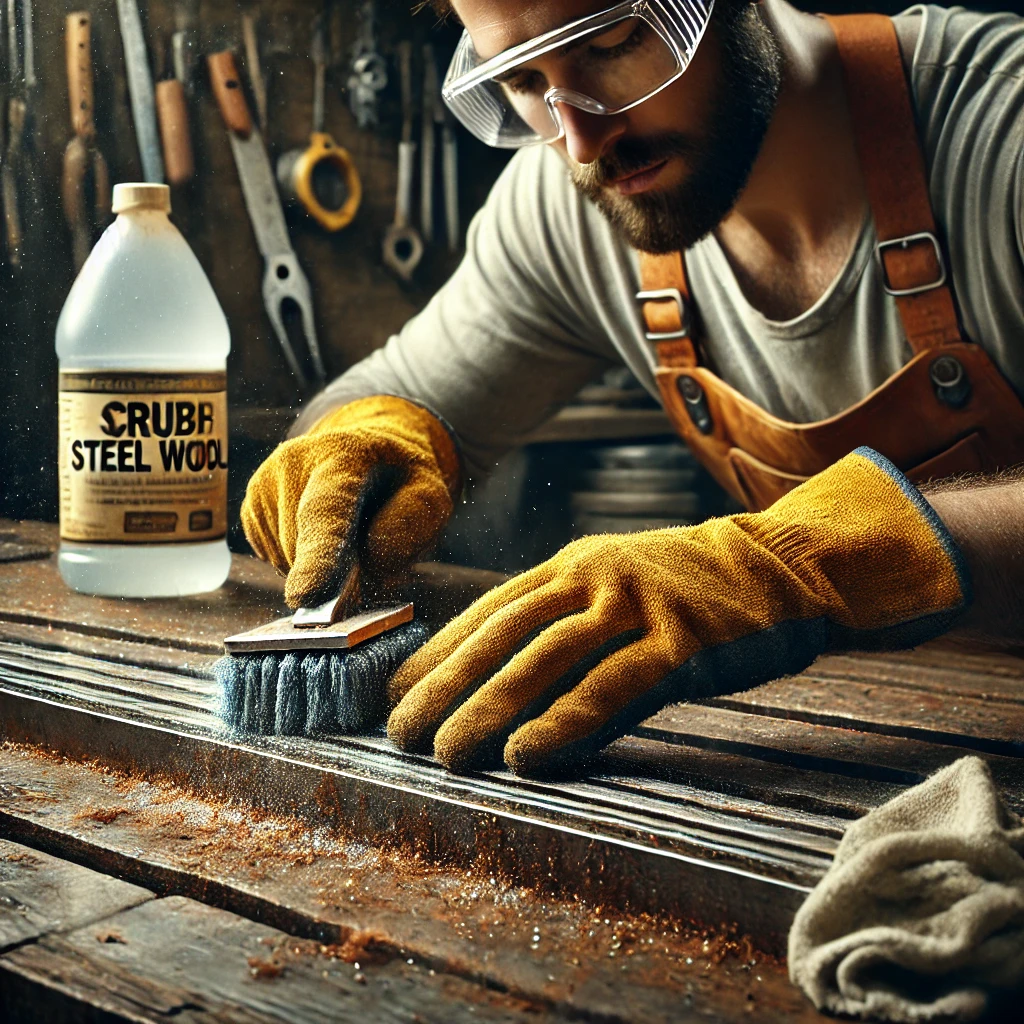
Step 1: Safety First
- Unplug the Table Saw: Always disconnect the power before working on your tools.
- Wear Gloves and Safety Glasses: Protect your hands and eyes from rust particles and cleaning solutions.
Step 2: Clean the Surface
- Remove Sawdust and Debris: Use a brush or vacuum to clean the table saw surface. This ensures the rust remover can work effectively.
- Tape Off Non-Metal Parts: Use masking tape to protect plastic or painted areas from cleaning solutions.
Step 3: Apply Rust Remover
- Option 1: White Vinegar
- Soak a rag in white vinegar and place it over the rusted area.
- Let it sit for 10-15 minutes. The vinegar will break down the rust.
- Option 2: Commercial Rust Remover
- Spray or apply the rust remover directly to the rusted area.
- Follow the instructions on the product label.
Step 4: Scrub Away the Rust
- Use fine steel wool or a scrubbing pad to gently scrub the rusted area.
- For stubborn rust, use 220-grit sandpaper. Be careful not to scratch the surface.
Step 5: Neutralize and Clean
- If you used vinegar, wipe the surface with a baking soda solution (1 tablespoon of baking soda in 1 cup of water) to neutralize the acid.
- Wipe the surface clean with a damp rag and dry it thoroughly.
Step 6: Protect the Surface
- Apply a thin layer of lubricant, paste wax, or a rust-preventative spray to the table saw surface.
- Buff it with a clean rag to create a protective barrier against future rust.
Tips to Prevent Rust in the Future
Now that your table saw is rust-free, here’s how to keep it that way:
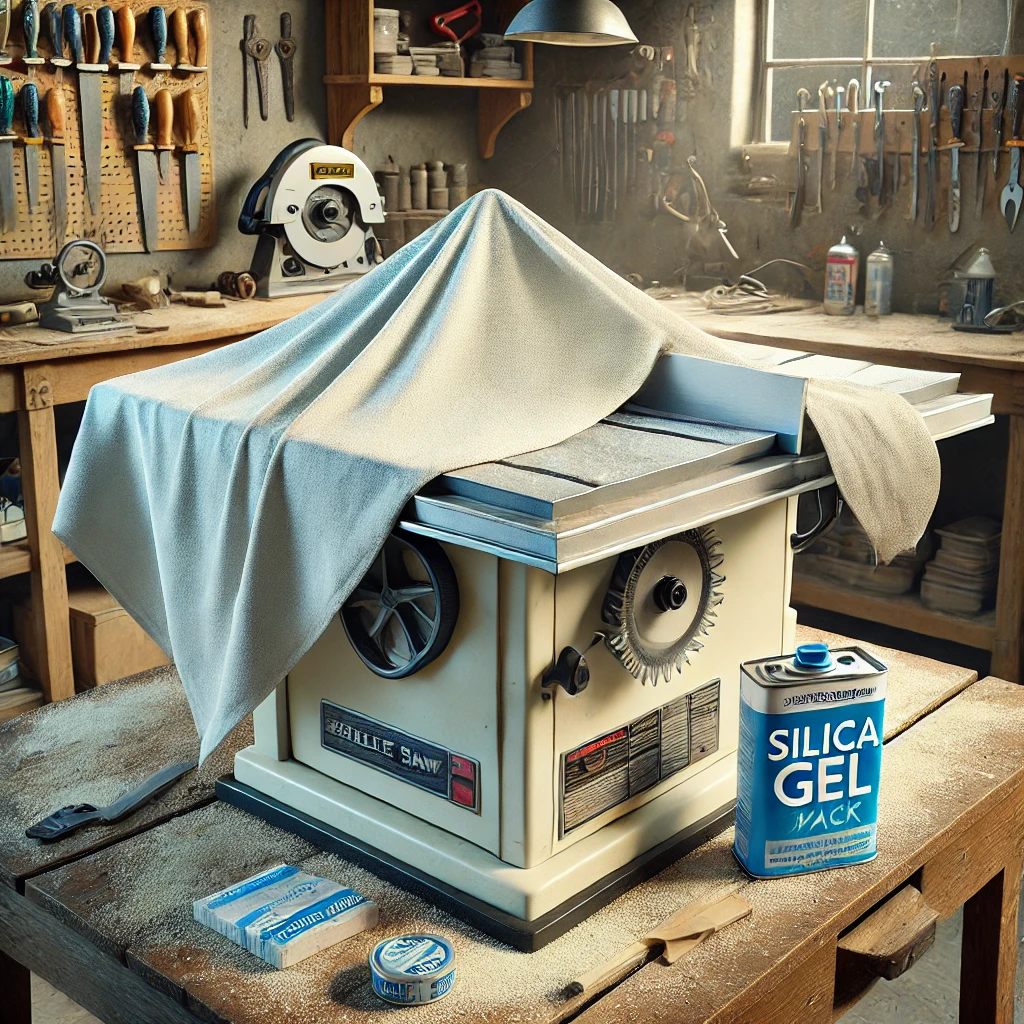
- Store in a Dry Place: Keep your table saw in a climate-controlled area with low humidity.
- Use a Cover: Protect your table saw with a cover when not in use.
- Clean After Every Use: Remove sawdust and debris to prevent moisture buildup.
- Apply Wax Regularly: Wax the surface every few months to maintain a protective layer.
- Use Silica Gel Packs: Place silica gel packs near your table saw to absorb moisture.
Common Questions About Removing Rust from a Table Saw
1. Can I Use Household Items to Remove Rust?
Yes! White vinegar, baking soda, and lemon juice are effective, natural rust removers.
2. Will Scrubbing Damage My Table Saw?
Not if you use fine steel wool or non-abrasive pads. Avoid harsh scrubbing to prevent scratches.
3. How Often Should I Wax My Table Saw?
Wax the surface every 2-3 months or after heavy use to maintain protection.
4. Can I Use My Table Saw Right After Cleaning?
Yes, once the surface is dry and protected, you can use it immediately.
When to Call a Professional
If the rust is too severe or has damaged critical parts of your table saw, it’s best to consult a professional. They can assess the damage and recommend repairs or replacements.
Conclusion: Keep Your Table Saw Rust-Free and Ready for Action
Removing rust from your table saw is easier than you think! With a few simple steps and some basic materials, you can restore your tool to its original condition. Remember, prevention is key—keep your table saw clean, dry, and well-maintained to avoid rust in the future.
By following this guide, even an 11-year-old can tackle rust removal like a pro. So, roll up your sleeves, grab your supplies, and give your table saw the care it deserves. Happy woodworking!

Finlay Connolly is a woodworking enthusiast and power tool specialist with over a decade of hands-on experience in the workshop. As the founder and lead writer at ProTableSawReviews.com, Finlay combines expert knowledge with real-world testing to help woodworkers, DIYers, and professionals choose the best tools for the job. With a sharp eye for detail and a passion for precision, Finlay is committed to providing trustworthy, practical advice backed by years of experience and research in the field. Whether you’re cutting dados or comparing fence systems, you can count on Finlay for honest, reliable reviews that make your next cut your best one.