
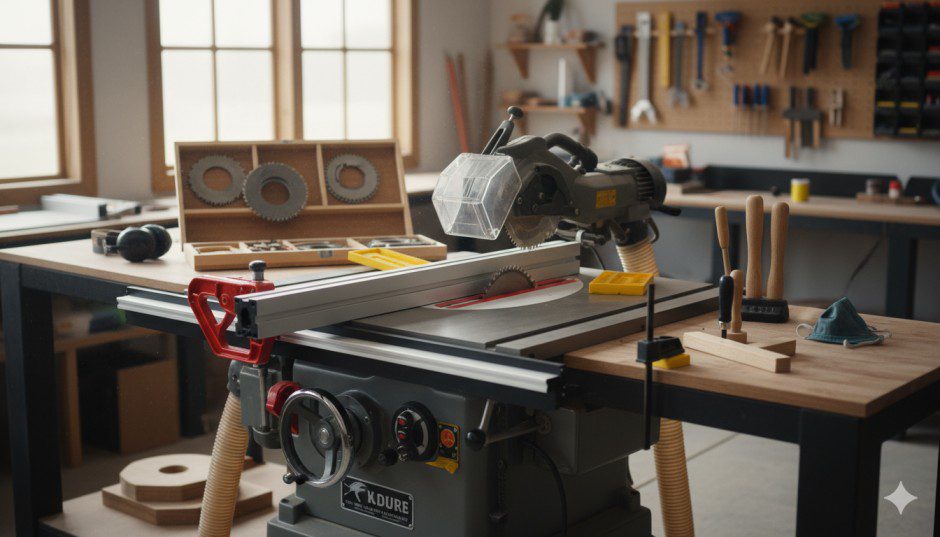
I learned this lesson the hard way about eight years ago: buying a quality table saw is just the beginning. I’d saved up for months and finally brought home a beautiful contractor saw, convinced it would transform my woodworking. The first project—a simple bookshelf—revealed the truth. My cuts wandered, tear-out ruined edges, and I nearly had a kickback incident that sent my heart racing.
The problem wasn’t the saw. It was everything I didn’t have.
A stock miter gauge that wobbled in its slot. No featherboard to keep pressure on the fence. A cheap blade that burned through oak like it had a grudge. No zero-clearance insert to prevent tear-out. I was trying to do precision work with a half-finished setup, and my projects showed it.
Over the years, I’ve invested probably $1,200 in accessories and add-ons for my table saw. Every single upgrade improved my accuracy, safety, or cut quality in measurable ways. Some accessories—like a quality miter gauge or proper featherboards—should’ve been in my shop from day one. Others, like specialized blades or digital measuring systems, came later as my skills and project demands increased.
This guide breaks down every table saw accessory worth considering, from essential safety gear to precision upgrades that take your work to the next level. I’ll explain what each accessory does, why it matters, and which ones deserve priority in your budget. Whether you’re setting up your first table saw or looking to upgrade an existing setup, you’ll know exactly what to buy and why.
What Are Table Saw Accessories?
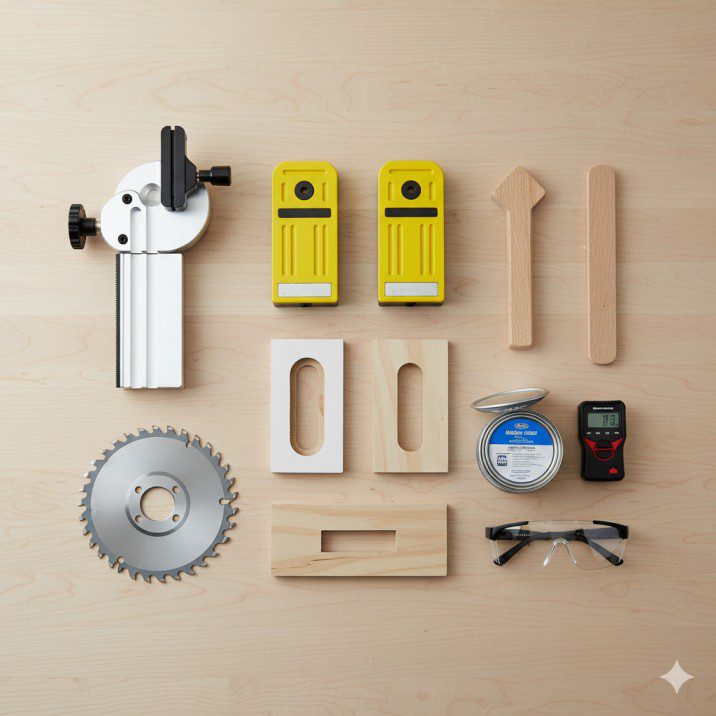
Table saw accessories are add-ons, upgrades, and supporting tools that enhance your saw’s safety, accuracy, versatility, or maintenance. They fall into several categories, each serving specific purposes in your workshop.
Safety accessories protect you from the saw’s inherent dangers. Push sticks, blade guards, featherboards, and anti-kickback devices keep your fingers away from spinning blades and prevent workpieces from being violently thrown back at you. I never make a cut without at least two safety accessories in place—usually a featherboard and push stick combination.
Precision upgrades improve your saw’s accuracy beyond stock capabilities. Aftermarket miter gauges, upgraded fences, zero-clearance inserts, and digital measuring systems turn good saws into precision machines. The difference between a $15 stock miter gauge and a $150 aftermarket model is the difference between “pretty close” and “dead-on accurate.”
Cutting support accessories help you handle materials safely and accurately. Outfeed tables, roller stands, crosscut sleds, and table extensions support workpieces during cutting, preventing dangerous tipping or binding. These accessories become essential when working with sheet goods or longer boards.
Maintenance add-ons keep your saw performing like new. Paste wax for smooth table surfaces, rust prevention products, cleaning solutions, and blade maintenance tools ensure consistent performance over years of use.
Understanding these categories helps prioritize purchases. Safety accessories come first—always. Then precision upgrades that directly impact your work quality. Convenience accessories can wait until budget allows.
Must-Have Table Saw Accessories
These are the accessories I consider non-negotiable for any serious table saw setup. I’ve listed them in priority order based on impact to safety and work quality.
1. Upgraded Miter Gauge

Kreg KMS7101 Table Saw Precision Miter Gauge
- Premium Home Improvement Tools: This table saw miter gauge helps you make accurate and repeatable angled cuts
- Versatile Woodworking Tool: Saw accessory has a brass pin that lets you make quick changes between stop angles
- Accurate Measuring Tool: Miter saw guide has five positive stops; Vernier scale aids adjustments to 1/10 of a degree
The stock miter gauge that comes with most table saws is borderline useless. I’m not exaggerating—those flimsy aluminum bars that wobble in the miter slot make accurate crosscuts nearly impossible. After fighting with my stock gauge for six months, I upgraded to an Incra V27, and it was like discovering crosscutting for the first time.
A quality miter gauge for table saw precision delivers repeatable accuracy through better fit, longer reference surfaces, and precise angle adjustments. The best models include flip stops for repetitive cuts, expandable support arms, and laser-cut angle indices that actually mean something.
Why it matters: Every crosscut, miter cut, and angled cut depends on your miter gauge. A poor gauge introduces error into every project. A quality gauge eliminates those errors.
Best use cases:
- Crosscutting boards to precise lengths
- Cutting accurate miters for frames and boxes
- Repetitive cuts using stop blocks
- Small parts that need fence support
My recommendation: Budget $100-200 for a quality aftermarket miter gauge. It’s one of the highest-impact upgrades you can make.
2. Featherboards

Kreg PRS3010 True-FLEX Featherboard – Single
- Premium Woodworking Tools: Kreg Featherboard applies perfect pressure to ensure safety and perfect cuts
- Perfectly Applies Pressure: Saw featherboard has carefully designed fingers to provide consistent, desirable pressure
- Durable Plastic Polymer Material: Hardy composite featherboard body works with a router table, table saw, miter-slot, or T-slot
New starting from: 37.49
Go to AmazonI resisted buying featherboards for table saws for way too long, thinking I could just apply hand pressure to keep boards against the fence. Then I had a close call with kickback that convinced me otherwise. Featherboards apply consistent pressure throughout the entire cut, keeping workpieces firmly against the fence and table while allowing forward movement only.
Why they matter: Featherboards eliminate the primary causes of kickback—workpieces shifting away from the fence or lifting off the table during cuts. They also free up your hands to focus on controlling feed rate and using push sticks safely.
Best use cases:
- Ripping narrow boards (under 6″ wide)
- Resawing operations
- Cutting thin stock that wants to chatter
- Any cut where you need both hands for push sticks
I keep two magnetic featherboards mounted on my saw’s sides and adjust them for each cut. The magnetic models are worth the extra cost—setup takes 10 seconds instead of fiddling with clamps.
3. Zero Clearance Inserts
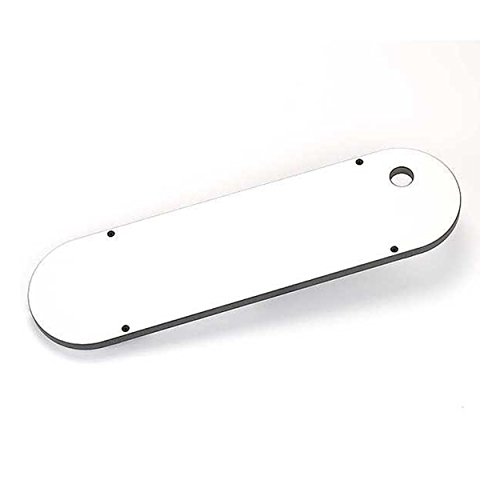
Leecraft Zero Clearance Table Saw Insert For Jet Deluxe Xacta Table Saw
- Fits: Jet DELUXE Xacta SAW (only Deluxe model), Powermatic PM1000
- Offers superior rigidity, flatness, durability, and low friction; reduces chip-out and splintering
- Eliminates dangerous gap around blade where thin off-cuts can get wedged
List Price :
Offer: 31.38
Go to AmazonStock throat plates have wide openings to accommodate blade tilt and dado stacks. Those wide gaps cause tear-out on the bottom of cuts, especially in plywood and cross-grain cuts. Zero clearance table saw inserts eliminate this problem with a throat opening that precisely matches your blade width.
I make my own zero-clearance inserts from 1/2″ Baltic birch plywood, but quality aftermarket versions work excellently. The difference in cut quality is immediately visible—bottom surfaces come out clean and crisp instead of fuzzy and splintered.
Why they matter:
- Eliminate tear-out on bottom surfaces
- Prevent small offcuts from falling into saw cabinet
- Support wood fibers right up to the blade
- Safer for small parts (no gaps to catch pieces)
Best use cases:
- Crosscutting plywood and veneered materials
- Cutting small parts
- Any project requiring clean bottom surfaces
- Reducing sanding and cleanup time
Pro tip: Make or buy multiple inserts—one for regular blades, one for dado stacks, one for each blade angle you use frequently.
4. Quality Table Saw Blade

DEWALT 12-Inch Miter Saw Blade, Crosscutting, Tungsten Carbide, 80-Tooth and 32-Tooth, 2-Pack (DW3128P5, DW3123), yellow
- ACCURATE CUTS: DEWALT DW3128P5 80-Tooth 12 Inches Crosscutting Tungsten Carbide Miter Saw Blade 2 Pack, helps you make quick, smooth, and accurate cuts
- BLADE VERSATILITY: 1 blade with 80 teeth and 1 with 32 teeth for added versatility
- Item Package Dimension: 16.3799999832924L x 13.3899999863422W x 0.7099999992758H inches
List Price :
Offer: 81.59
Go to AmazonThe blade that came with your saw is designed for one thing: lowering the saw’s retail price. I learned this after struggling through red oak with my stock blade, burning edges and requiring multiple sanding passes to clean up rough cuts. When I finally bought a proper table saw blade with 40 teeth and carbide tips, cutting became effortless.
Why it matters: Your blade determines cut quality more than any other single factor. A premium blade with sharp carbide teeth, proper hook angle, and appropriate tooth count cuts cleaner, burns less, and lasts 5-10 times longer than cheap blades.
Best use cases:
- General-purpose 40-tooth blade: handles both ripping and crosscutting adequately
- 24-tooth rip blade: aggressive cuts in thick hardwoods
- 60-80 tooth crosscut blade: glass-smooth crosscuts in hardwoods
- Specialized blades for specific materials (melamine, plastics, aluminum)
I keep three blades in rotation: a 40-tooth Freud combination blade for everyday use, a 24-tooth Diablo ripping blade for thick stock, and an 80-tooth Forrest crosscut blade for finish work.
5. Dado Set
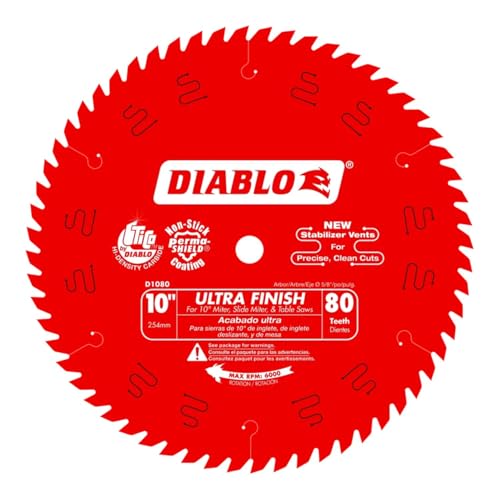
Diablo Ultra Finish Saw Blade for Wood – 10" Diameter, 80 Hi-ATB Teeth, 5/8" Arbor, .098" Kerf, 15° Hook Angle, .071" Plate, 6000 Max RPM – D1080X
- Ultra-Smooth Finish – Designed for fine, chip-free cuts in wood, ideal for crosscutting oak, pine, melamine, and delicate moldings.
- TiCo Hi-Density Carbide – High-performance carbide for precise cuts and longer blade life, tailored for professional-grade performance.
- Fast and Clean Cuts – Super thin laser-cut kerf allows for fast, durable cuts with minimal material waste.
New starting from: 53.97 $
Go to AmazonIf you build furniture with any regularity, a dado set for table saw becomes essential. Dados, rabbets, and grooves form the foundation of strong joinery—bookshelf dados, drawer bottoms, cabinet backs all rely on these cuts. You can make them with a regular blade and multiple passes, but it’s tedious and rarely produces flat-bottomed cuts.
A stacked dado set consists of two outer blades and multiple chipper blades that stack together to create precise widths from 1/4″ to 13/16″ (or wider). Setup takes about five minutes, and the results are perfectly flat, clean dadoes in a single pass.
Why it matters:
- Creates flat-bottomed grooves impossible with standard blades
- Saves enormous time on joinery-heavy projects
- Enables stronger, more professional furniture construction
- One-pass accuracy eliminates fit problems
Best use cases:
- Bookshelf and cabinet dados
- Drawer box joinery
- Raised panel doors
- Tongue and groove joints
I use my dado set on probably 60% of furniture projects. It’s that useful.
6. Paste Wax for Smooth Operation

Trewax Paste Wax with Carnauba Wax, Clear, 12.35-Ounce, Ideal on Hardwood Floors, Fine Furniture, Granite, Marble and Bronze
- Furniture Polish – Trewax Paste Wax with Carnauba wax restores original brilliance to any floor surface, furniture, granite, marble or bronze item, to several finishes while ensuring luster and long wear. Bring back the favorite parts of your home to its original shine and luster
- Contains Brazilian Carnauba Wax – Trewax Paste Wax contains Brazilian Carnauba wax which is perfect for a long-wearing finish. This paste wax offers a clean finish to the surface it is used on
- Floor Cleaner with a Non-Slip Formula – This hardwood floor polish is suitable for an array of applications, dries quickly and comes with a non-slip formula
List Price :
Offer: 13.99
Go to AmazonThis might seem minor, but paste wax for table saws dramatically improves how workpieces glide across your table surface. I apply Johnson’s Paste Wax to my table every 2-3 months, and the difference in feed resistance is immediately noticeable. Wood slides smoothly instead of dragging, reducing feed effort and improving cut control.
Why it matters:
- Reduces friction for smoother cuts
- Prevents rust on cast iron surfaces
- Makes pushing large sheets easier
- Improves accuracy by reducing chatter
Application: Clean table thoroughly, apply thin wax coat, let dry 5 minutes, buff with clean cloth. Takes 10 minutes and lasts months.
7. Splitter or Riving Knife
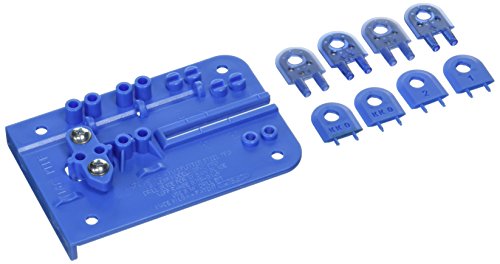
MICROJIG GRR-RIPPER SP-2 Mircojig Mj Splitter Steelpro, Blue
- REDUCE KICKBACK AND BURNING: The MJ SPLITTER Steel Pro is a reliable addition to your table saw accessories that keeps stock aligned to the table saw fence and prevents blade pinching, delivering safer cuts and essential table saw safety
- PRECISION SPLITTER SYSTEM: Includes 4 x 1/8″ steel-core Splitters with offsets of 0.000”, 0.003”, 0.006”, and 0.009” for accurate blade alignment; Designed for full kerf blades, this table saw splitter ensures the right fit with all full kerf blades
- KERF KEEPERS INCLUDED: The system comes with 4 Kerf Keepers (kerf range: 0.118” – 0.145″) that automatically eject if stock closes on the blade, preventing binding; A reliable solution for anti-kickback for table saw projects and hardwood cutting
New starting from: 39.00
Go to AmazonModern table saws include riving knives, but older models and some contractor saws don’t. A table saw splitter keeps the kerf open behind the blade, preventing workpieces from pinching the blade and causing kickback. I added an aftermarket splitter to my older Delta saw, and it’s prevented several potential kickback incidents.
Why it matters: Kickback causes the majority of serious table saw injuries. Splitters are your primary defense against this danger—they’re even more important than blade guards for preventing accidents.
Best use cases:
- All ripping operations
- Any cut where stock might bind
- Cutting reaction wood that wants to pinch
- Essential safety for any through-cut
If your saw lacks a riving knife or splitter, adding one should be your top safety priority.
Cutting & Blade Accessories
Specialized blades and blade-related accessories expand your saw’s versatility dramatically. After building up my blade collection over several years, I can handle virtually any material with optimal results.
Specialty Blade Types
Thin Kerf Blades
Thinnest kerf table saw blades remove less material per cut, reducing waste and requiring less motor power. I use thin kerf blades on my portable contractor saw when cutting expensive hardwoods—that extra 1/32″ of material saved per cut adds up fast on premium lumber.
Best for: Lower-powered saws (under 2 HP), expensive materials, resawing operations
Plastic Cutting Blades
Standard wood blades melt plastic edges, creating rough, unusable cuts. The best table saw blade for cutting plastic features triple-chip tooth geometry that produces clean cuts without melting. I added one to my collection after ruining three pieces of expensive HDPE with a regular blade.
Best for: HDPE, PVC, polycarbonate, cutting boards
Acrylic Blades
Similar to plastic blades, specialized blades for cutting acrylic prevent chipping and cracking in brittle materials. The high tooth count (80+) and zero-degree rake angle produce polished edges.
Best for: Acrylic sheets, plexiglass, polycarbonate panels
Blade Accessories
Blade Stabilizers
These heavy discs mount on either side of your blade, reducing vibration and improving cut quality. I noticed the difference immediately when I added stabilizers to my 10″ saw—cuts became noticeably smoother, and blade wobble virtually disappeared.
Best for: Thin blades, crosscutting, reducing tear-out
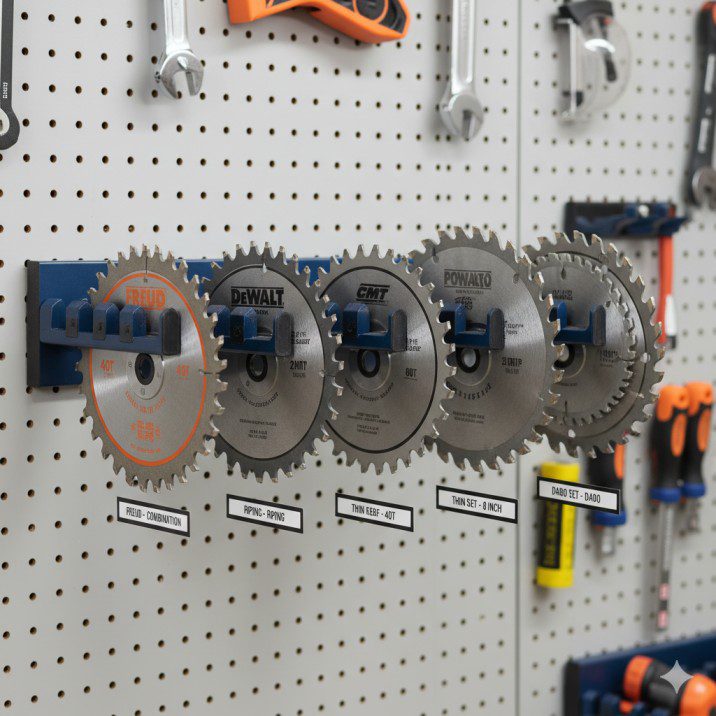
Blade Storage
Proper blade storage protects expensive carbide teeth. I hang my blades vertically on a wall-mounted rack—it saves space and prevents tooth damage from blades rubbing together in drawers.
Blade Comparison Table
| Blade Type | Tooth Count | Best For | Materials | Price Range |
|---|---|---|---|---|
| Combination | 40-50 | General purpose ripping & crosscutting | All hardwoods, softwoods, plywood | $30-$80 |
| Ripping | 24-30 | Fast ripping of thick stock | Hardwoods 4/4 and thicker | $40-$90 |
| Crosscut | 60-80 | Smooth crosscuts, miters | Hardwoods, picture frames, trim | $50-$150 |
| Thin Kerf | 40 | Lower HP saws, material savings | All woods, expensive lumber | $35-$75 |
| Dado Set | Multiple | Grooves, dadoes, rabbets | All woods, plywood | $100-$350 |
| Plastic Blade | 60-80 (TCG) | Plastics without melting | HDPE, PVC, polycarbonate | $60-$120 |
| Acrylic Blade | 80-100 | Clean acrylic cuts | Acrylic, plexiglass | $70-$140 |
Accuracy & Precision Upgrades
Once you’ve mastered basic table saw operation, precision upgrades take your work from “good enough” to “professional quality.” These accessories eliminate the small errors that accumulate into noticeable problems.
Aftermarket Miter Gauges
I already mentioned this in the must-have section, but it deserves emphasis: upgrading your miter gauge is probably the single highest-impact accuracy improvement you can make. The difference between a $15 stock gauge and a $150 Incra or Dubby is night and day.
What to look for:
- Zero play in the miter bar (should slide smoothly but without wiggle)
- Expandable support wings for longer workpieces
- Precise angle stops at common angles (0°, 22.5°, 45°)
- Flip stop for repetitive cuts
- T-track for mounting accessories
I use my Incra V27 on probably 40% of all cuts. The adjustable stop system makes repetitive crosscuts absolutely perfect—every piece comes out identical.
Fence Upgrades
Many table saws ship with adequate fences that drift slightly or require frequent adjustment. Premium aftermarket fences—Vega Pro 40, Biesemeyer-style fences, or Incra LS systems—provide rock-solid parallel alignment that stays true for months.
I upgraded my old contractor saw with a Vega Pro fence, and it transformed accuracy. The fence locked perfectly parallel every single time, with positive stops at common widths. Setup time dropped from 30 seconds per cut to about 5 seconds.
When fence upgrades make sense:
- Your current fence drifts or requires constant adjustment
- You’re doing production work requiring speed
- Your stock fence is flimsy or wobbly
- You’ve outgrown your saw’s capabilities in every area except the fence
Cost consideration: Premium fences run $300-600. That’s significant, but if your saw is otherwise solid, it’s far cheaper than replacing the entire saw.
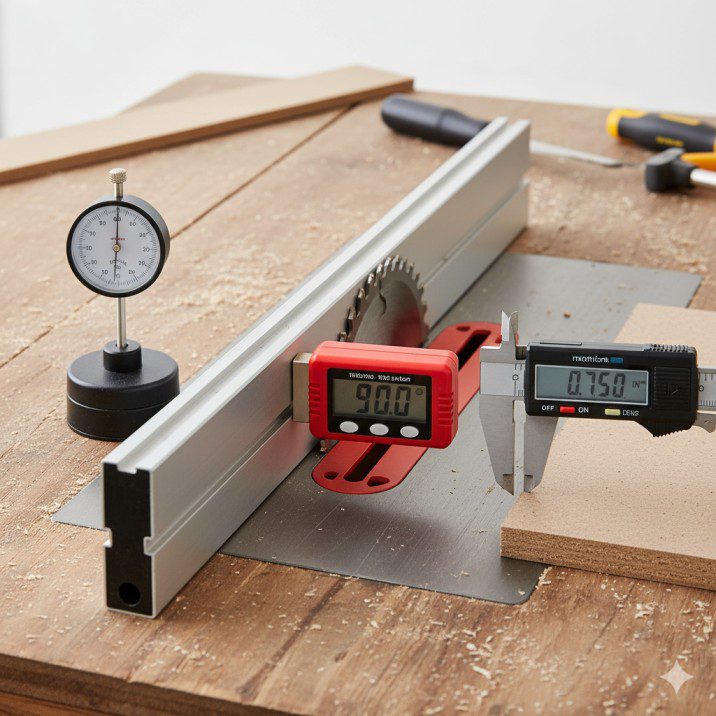
Digital Measuring Systems
I resisted digital angle gauges and measuring systems for years, relying on the scales printed on my saw. That was foolish—digital measurements improved my accuracy immediately.
Tools worth adding:
- Digital angle gauge: Measures blade tilt to 0.1° accuracy (essential for precise bevels)
- Digital depth gauge: Measures blade height precisely (critical for dado depth)
- Digital caliper: Verifies fence measurements and cut dimensions
These tools cost $20-80 each and eliminate guesswork from setups.
Table Extensions
My contractor saw came with 16″ rip capacity. After struggling to cut a full plywood sheet and nearly having a kickback incident, I added a table extension that increased capacity to 30″. Game changer.
Table extensions provide:
- Increased rip capacity for sheet goods
- Better support for large workpieces
- More stable cutting platform
- Often include integrated router mounting
Best for: Cutting full sheets, large panel work, small shops without dedicated outfeed tables
Safety Accessories Every Woodworker Needs
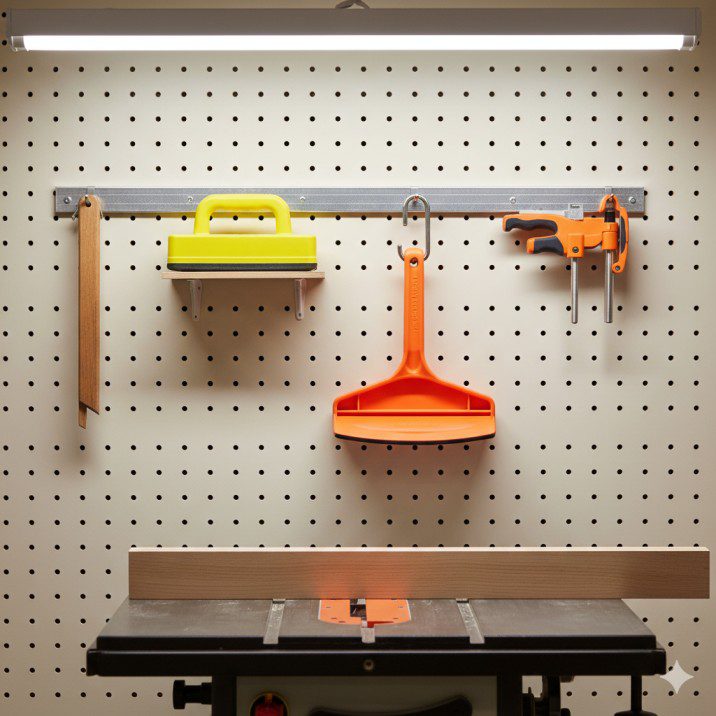
Table saws cause more serious injuries than any other workshop tool. I’ve been lucky—my worst injury was a minor nick from carelessness. But I’ve seen the aftermath of serious accidents, and I take safety seriously now. These accessories significantly reduce injury risk.
Push Sticks and Push Blocks
I keep four push sticks and two push blocks within arm’s reach of my saw. Different cuts require different push tools, and having the right one immediately available prevents the temptation to “just use my hand this once.”
Push stick types:
- Narrow push sticks: For ripping boards under 3″ wide (keeps fingers well clear)
- Wide push blocks: For face-down pressure on wider boards
- Shoe-style push blocks: For end-grain cuts and crosscutting
- Combination pushers: Dual-purpose tools for versatility
The rule I never break: Any cut that brings my hands within 6″ of the blade requires a push stick. No exceptions. Ever.
Blade Guards
Most table saw injuries happen because someone removed the blade guard for a specific cut and never reinstalled it. I’m guilty—I removed mine for a dado cut and left it off for three months. That was stupid and dangerous.
Modern blade guards integrate with riving knives and dust collection. They’re less intrusive than old designs and actually improve visibility in many cases. Unless you’re making a cut that physically prevents guard use, keep it mounted.
Anti-Kickback Pawls
These spring-loaded devices allow forward feed but dig into wood if it starts moving backward. They’re not foolproof—aggressive kickback can overwhelm them—but they provide an extra layer of protection during ripping operations.
Many modern riving knives include integrated pawls. If yours doesn’t, aftermarket pawls mount to splitters or fences.
Magnetic Featherboards (Safety Function)
I mentioned featherboards earlier for accuracy, but their safety function is equally important. By keeping workpieces firmly against the fence throughout the cut, featherboards prevent the binding and twisting that cause kickback.
Essential Safety Checklist for Beginners
✓ Always use push sticks for cuts bringing hands near blade
✓ Keep blade guard mounted unless cut absolutely prevents it
✓ Use featherboards for all ripping operations
✓ Ensure riving knife or splitter is installed before through-cuts
✓ Maintain clean, wax-coated table to prevent binding
✓ Use zero-clearance insert to prevent small pieces from dropping into blade
✓ Stand to one side of blade during startup and cutting (not directly behind)
✓ Wait for complete blade stop before reaching near cutting area
✓ Keep work area clean of offcuts and clutter
✓ Wear safety glasses for every single cut (no exceptions)
I printed this checklist and mounted it on my saw’s cabinet. Reading it before every session keeps safety top-of-mind.
Dust Collection & Maintenance Accessories
Table saw dust is incredibly fine and surprisingly voluminous. A single ripping cut through 8/4 maple produces more sawdust than you’d expect, and without proper collection, it covers everything in your shop within minutes.
Dust Collection Solutions
Some table saws include excellent dust collection systems, while others are absolutely terrible. I tested this extensively for my best table saws with dust collectors guide, measuring collection percentages with identical cuts. Results ranged from 40% (unusable) to 85% (excellent).
Improving poor dust collection:
- Upgrade dust port: Replace undersized ports with 4″ connections
- Add over-blade collection: Capture dust before it becomes airborne
- Seal cabinet gaps: Improve suction by eliminating air leaks
- Use proper shop vac or dust collector: Minimum 650 CFM for effective collection
I added a dust hood over my blade (Shark Guard-style) and improved collection from about 60% to 80%. The investment was $70 and took 30 minutes to install—well worth it for shop cleanliness and respiratory health.
Maintenance Accessories
Paste Wax link again
I apply paste wax every 2-3 months religiously. It takes 10 minutes and makes every cut smoother while preventing rust.
Rust Removal
Cast iron tables rust quickly in humid environments. I’ve dealt with this twice—once after storing a saw in an unheated garage over winter, and again after a roof leak. Proper rust removal from table saw surfaces requires specific products and techniques.
Process that worked for me:
- Apply WD-40 or rust remover to affected areas
- Scrub with fine steel wool or abrasive pad
- Wipe clean with paper towels
- Apply paste wax immediately to prevent recurrence
Table Cleaning
Regular cleaning of metal surfaces prevents pitch buildup and keeps cuts smooth. I use mineral spirits and a plastic scraper monthly to remove accumulated crud.
Blade cleaning: Soak blades in Simple Green or specialized blade cleaner to remove pitch and resin buildup. Clean blades cut better and last longer.
Maintenance Schedule I Follow
After every use:
- Brush off sawdust from table and fence
- Check blade tightness
- Verify fence alignment (takes 15 seconds)
Monthly:
- Clean table surface with mineral spirits
- Apply paste wax
- Check belt tension
- Inspect blade for damage
Every 3-6 months:
- Deep clean blade with soaking
- Lubricate trunnion and elevation mechanisms
- Check and adjust blade alignment
- Inspect electrical connections
This schedule prevents 90% of common table saw problems and keeps everything running smoothly.
Benchtop & Mobility Accessories
My shop space has changed three times over the years—from a cramped one-car garage to a two-car shop, and finally to a dedicated outbuilding. Each space required different mobility and support solutions.
Mobile Bases
Rockler All-Terrain Mobile Base – Shop Tools and Equipment Holds up to 800 lbs – Mobile Power Tool Bases Includes all Necessary Hardware – Easy to Assemble Woodworking Tools and Equipment
- Rack & Pinion Telescoping Fence System Make fence adjustments fast, smooth and accurate
- Patented material support, can be used for narrow rip cuts.
- 32-1/2″ rip capacity easily cuts a variety of larger shelving and trim materials
List Price :
Offer: 649.00
Go to AmazonThe mobile base for table saw setup transformed my small garage shop. I could position the saw optimally for each project, then roll it against the wall when I needed floor space for assembly or finishing.
Mobile base benefits:
- Reposition saw for optimal lighting and access
- Create temporary work spaces in small shops
- Store saw against wall when not in use
- Easier shop cleaning and organization
Key features to look for:
- Locking casters (at least two, preferably all four)
- Weight capacity exceeding your saw by 50%
- Low profile (shouldn’t raise saw significantly)
- Quick-release locking mechanisms
I use a HTC PM1000 mobile base under my 300-pound cabinet saw. It rolls smoothly on smooth concrete but locks absolutely solid during cutting.
Important: Mobile bases work great for cabinet saws but can increase vibration on lighter contractor saws. Test thoroughly before committing.
Outfeed Support
Outfeed support prevents board tip-down at the end of cuts—a dangerous situation that can cause kickback or binding. I’ve used several approaches:
Outfeed table: Permanent table mounted at exact saw height. Takes space but provides best support.
Roller stands: Adjustable height, portable, stores easily. I keep two available for long boards or sheet goods.
Shop-built solutions: I built a flip-down outfeed table on my saw’s back that folds up when not needed. Cost $40 in materials and solved my outfeed problem permanently.
Table Saw Stands (Portable Saws)
Portable saws require sturdy stands for safe operation. The wheeled stands that come with contractor saws work adequately, but aftermarket stands often provide better stability and height adjustment.
Stand features that matter:
- Quick-release mounting (don’t want complicated setup)
- Wheels for easy positioning
- Storage shelf underneath
- Solid, wobble-free construction
- Material support extensions
Workbench Integration
My current shop integrates the table saw into a central workbench island. The saw sits flush with the benchtop surface, providing massive support on all sides. This setup required careful planning but eliminated outfeed concerns entirely.
Considerations:
- Saw must be precisely level with bench surface
- Dust collection becomes more complex
- Requires significant dedicated space
- Incredibly stable and versatile once completed
This works well for dedicated shops but isn’t practical for shared garage spaces or small workshops.
My Recommended Complete Accessory Setups
After years of testing and using various accessories, here are three complete setups matched to different user needs and budgets.
Beginner Starter Kit ($300-450)
Priority: Safety and basic accuracy
✓ Two push sticks ($15-20)
✓ One push block ($20-25)
✓ Pair of magnetic featherboards ($50-70)
✓ Quality 40-tooth combination blade ($40-60)
✓ Basic zero-clearance insert ($15-25)
✓ Can of paste wax ($8-12)
✓ Safety glasses ($10-20)
✓ Basic miter gauge upgrade ($80-120)
Total: ~$350
This setup provides essential safety gear and the most impactful accuracy upgrade (better miter gauge). You can build quality projects with this foundation while saving for additional accessories.
What to add next: Dado set ($150-250) when you start building furniture with joinery
DIY/Hobbyist Accuracy Kit ($800-1,100)
Priority: Precision and versatility
Everything from Beginner Kit, plus:
✓ Premium miter gauge (Incra V27) ($160-200)
✓ 8″ dado set ($150-200)
✓ Zero-clearance insert set (3 inserts) ($40-60)
✓ 24-tooth rip blade ($45-65)
✓ 80-tooth crosscut blade ($70-120)
✓ Digital angle gauge ($30-50)
✓ Blade stabilizers ($40-60)
✓ Mobile base ($100-150)
Total: ~$1,000
This setup handles virtually any project with excellent accuracy. The blade collection covers all common materials, and the mobile base adds shop flexibility.
What to add next: Specialized blades for specific materials (plastic, acrylic) as projects require
Professional Precision Kit ($1,800-2,500)
Priority: Maximum accuracy, safety, and efficiency
Everything from DIY Kit, plus:
✓ Premium aftermarket fence (Vega Pro) ($350-450)
✓ Crosscut sled (shop-built or purchased) ($100-200)
✓ Thin kerf blade set ($90-140)
✓ Specialized material blades (plastic, acrylic) ($140-260)
✓ Table extension system ($200-400)
✓ Over-blade dust collection ($70-120)
✓ Premium dado set (Freud or Forrest) ($300-400)
✓ Digital measuring system ($60-100)
Total: ~$2,300
This professional setup eliminates accuracy limitations and maximizes safety and efficiency. You can handle any project with confidence and precision.
Frequently Asked Questions
What accessories do I need for a table saw?
At minimum, you need: quality push sticks, featherboards for safety, an upgraded miter gauge for accurate crosscuts, and a decent blade. These four accessories improve safety and accuracy dramatically over stock equipment. Budget $150-200 for this essential foundation.
How can I make my table saw more accurate?
The fastest path to accuracy: upgrade your miter gauge ($100-200), install zero-clearance inserts ($15-40), and apply paste wax to your table surface ($10). These three upgrades eliminate the most common accuracy problems. Next, verify your fence stays parallel and upgrade if it drifts.
What is the most important table saw safety accessory?
Push sticks and featherboards are equally critical—push sticks keep your hands away from the blade, while featherboards prevent kickback by maintaining workpiece pressure. Never make a cut that brings your hands within 6″ of the blade without using push sticks. Keep featherboards mounted for all ripping operations.
Are expensive table saw blades worth it?
Absolutely. I tested this extensively—a $70 Freud or Forrest blade cuts cleaner, burns less, stays sharp 5-10x longer, and makes woodworking more enjoyable than $20 blades. The difference in cut quality is immediately visible. Budget $40-80 for a quality combination blade as your first upgrade.
Do I really need a dado set?
If you build furniture with any regularity, yes. Dados, rabbets, and grooves form the foundation of strong furniture joinery. You can make these cuts with a standard blade and multiple passes, but it’s tedious and rarely produces flat-bottomed cuts. A dado set pays for itself in time savings within 5-10 projects.
How often should I wax my table saw?
Apply paste wax every 2-3 months with regular use, or when you notice increased feed resistance. In humid environments, wax every 4-6 weeks to prevent rust. The process takes 10 minutes—clean the table, apply thin wax coat, let dry 5 minutes, buff clean.
Final Thoughts
Your table saw is only as good as the accessories supporting it. I learned this slowly and expensively, buying tools and accessories in random order based on what seemed interesting rather than what actually mattered. This guide condenses years of trial and error into a clear priority list.
Start with safety accessories—push sticks, featherboards, and proper blade guards. Then upgrade accuracy with a better miter gauge and zero-clearance inserts. Add versatility through blade and dado sets as your projects demand. Everything else can wait until budget allows.
The total investment for a complete professional setup runs $1,500-2,500 beyond the saw itself. That might seem significant, but these accessories last decades and transform your saw from a basic cutting tool into a precision machine capable of professional-quality work.
Looking to upgrade your table saw setup? Explore my Complete Table Saw Buying Guide and Beginner Setup Guide next.
Last updated with testing through January 2025. All product recommendations based on hands-on workshop experience.