
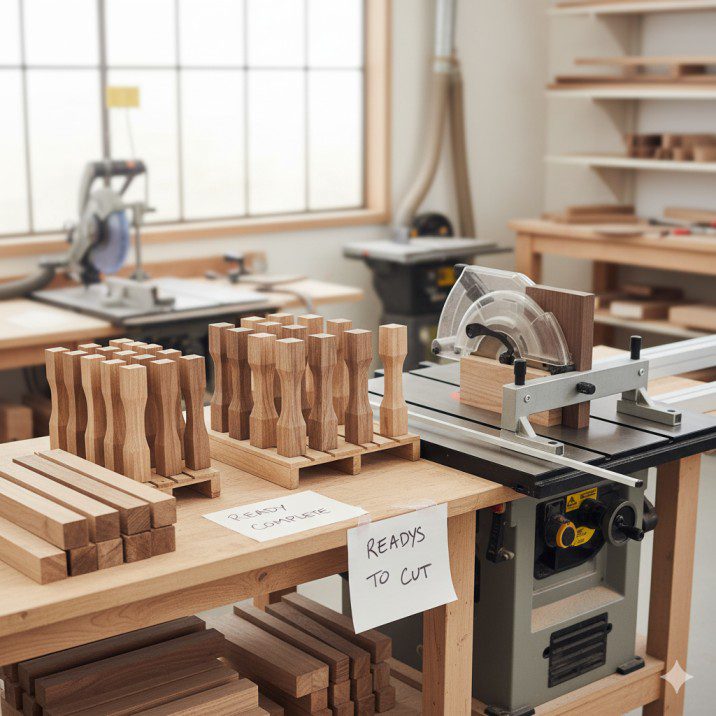
The first time I attempted to cut tenons freehand on my table saw, I ended up with wobbly joints that required so much glue and clamping pressure I was essentially building with adhesive rather than proper joinery. Then I discovered tenoning jigs—and suddenly, creating precise, repeatable tenons became almost foolproof. Whether you’re building furniture, crafting timber frames, or restoring antique pieces, a quality tenoning jig for table saw transforms one of woodworking’s most essential joints from frustrating guesswork into a reliable, production-ready process.
In 2025, tenoning jigs have evolved beyond simple shop-made fixtures. Modern commercial jigs incorporate micro-adjustments, reversible configurations, and safety features that make tenon cutting accessible even for intermediate woodworkers. The best part? You don’t need a $3,000 dedicated mortising machine when your table saw—with the right jig—can produce identical results.
Let’s explore everything from selecting the right jig style to cutting perfect tenons every single time.
What Is a Tenoning Jig and Why Do You Need One?
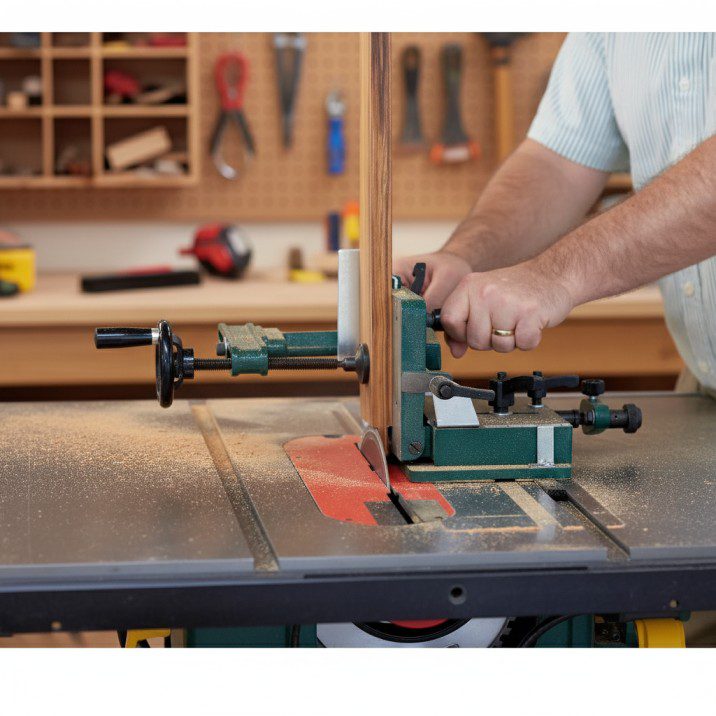
A tenoning jig is a specialized fixture that holds workpieces vertically against your table saw fence, allowing you to cut the cheeks (flat faces) of tenons with precision and safety. Unlike horizontal cuts where the board lies flat on the table, vertical tenon cuts require secure clamping and controlled positioning to prevent kickback and ensure accuracy.
The Anatomy of Tenon Joints
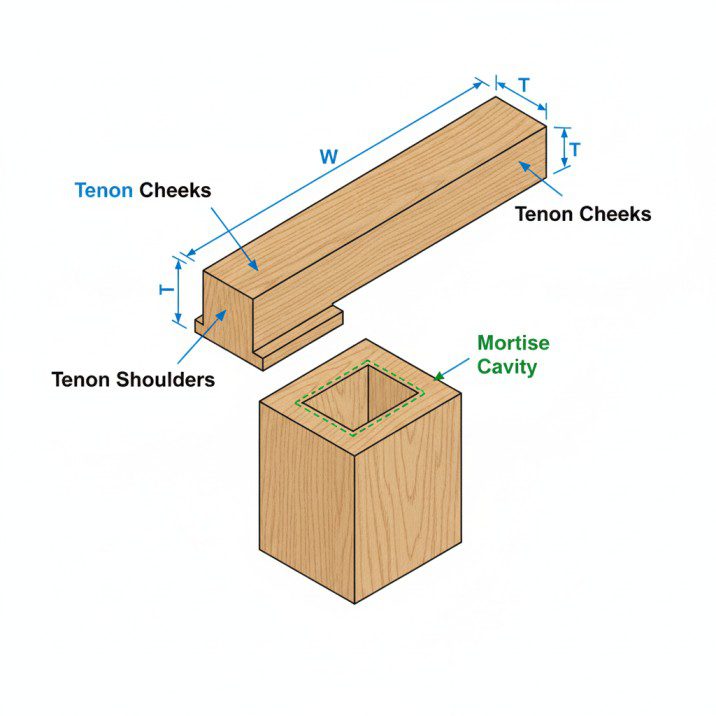
Before diving into jigs, understanding tenon geometry helps explain why proper tooling matters. A traditional tenon consists of:
Cheeks: The two flat faces that fit into the mortise (these are what your tenoning jig cuts) Shoulders: The perpendicular cuts that create the tenon’s length (typically cut with the board flat on the table) Width and thickness: Determined by your mortise dimensions, usually one-third the stock thickness
I learned early on that cheek accuracy matters most—shoulders can hide small gaps, but sloppy cheeks create loose, weak joints. A good tenoning jig ensures your cheeks are parallel, smooth, and exactly the right distance apart.
Why Your Miter Gauge Isn’t Enough
Many beginners (myself included years ago) attempt vertical cuts using only a miter gauge and careful hand pressure. This approach has serious limitations:
- Safety concerns: Hand-holding vertical stock near a spinning blade is inherently dangerous
- Inconsistent pressure: Even slight tilting creates tapered tenons
- Limited stock capacity: Tall or wide boards become nearly impossible to control
- No fine adjustment: Sneaking up on perfect fit requires multiple test cuts and setups
A dedicated tenoning jig eliminates these issues through mechanical clamping, precise angle control, and adjustable positioning.
Types of Tenoning Jigs: Finding Your Best Match
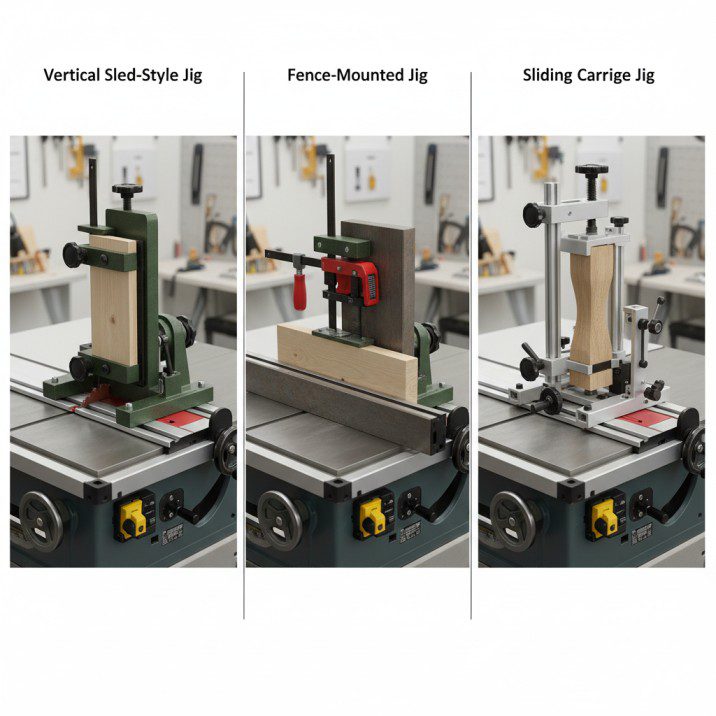
Vertical Sled-Style Jigs
These jigs ride in your miter slot, positioning the workpiece vertically in front of the blade. The most common design features a vertical clamping surface mounted to a sled base that slides through the cut.
Advantages:
- Independent of fence position, allowing blade height adjustments for tenon width
- Stable platform for long boards
- Often includes adjustable stops for repeated cuts
- Can accommodate angled tenons with tilting features
Limitations:
- Requires miter slot clearance (won’t work with dado stacks wider than your miter slot)
- Generally limited to boards under 12″ wide
- Can be bulky to store
I’ve used a Rockler Precision Tenoning Jig (sled-style) for five years, and it’s perfect for chair and table leg work where I’m cutting 2″-3″ square stock repeatedly.
Fence-Mounted Jigs
These attach directly to your rip fence, clamping the workpiece vertically against a support face that rides along the fence.
Advantages:
- Quick setup—just clamp to any fence
- Unlimited capacity for wide panels
- Compact storage when removed
- Works with dado blades for wider tenon cheeks in single passes
Limitations:
- Requires a flat, parallel fence for accuracy
- Some models can deflect with heavy boards
- Less stable for very narrow stock
For production work, fence-mounted jigs excel. When I built 40 identical drawer fronts with stub tenons, the fence-mounted approach cut setup time to under 30 seconds per piece.
Sliding Carriage Jigs
High-end commercial jigs feature a carriage that rides on precision rails, combining the stability of sled designs with the capacity of fence-mounted systems.
Advantages:
- Superior accuracy through dedicated rail systems
- Handle everything from small spindles to large panels
- Often include micro-adjustment knobs for precise positioning
- Most stable option for production environments
Limitations:
- Expensive ($300-600 range)
- Require table space for rail mounting
- More complex setup and calibration
Professional shops running repetitive joinery work justify the investment. A furniture maker I know cut his tenon-making time by 60% after upgrading to a Dubby sliding carriage jig.
Commercial Tenoning Jigs: 2025 Top Performers
| Jig Model | Type | Capacity | Key Features | Price Range | Best Application |
|---|---|---|---|---|---|
| Rockler Precision | Sled | Up to 12″ wide | Micro-adjust, angle tilting | $140-160 | Furniture legs, small parts |
| Grizzly H7583 | Fence-mount | Up to 24″ wide | Quick-clamp, dado compatible | $90-110 | Wide panels, case work |
| Dubby Deluxe | Sliding carriage | Up to 18″ wide | Dual-rail, zero-clearance | $450-500 | Production shops |
| JessEm Tool Co. | Fence-mount | Up to 20″ wide | Cam-lock clamp, flip design | $180-200 | Versatile general use |
| Milescraft 1409 | Sled | Up to 10″ wide | Budget-friendly, basic | $40-50 | Occasional use, beginners |
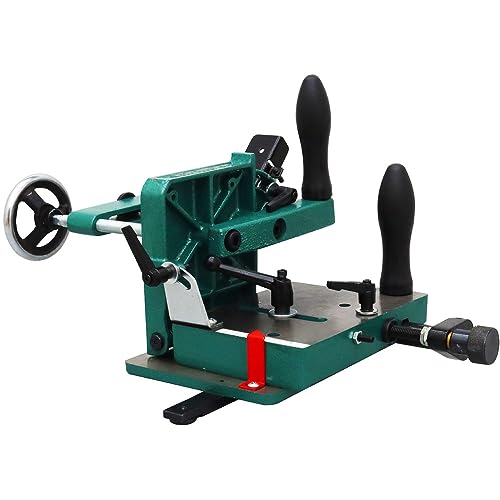
PreAsion Woodworking Tenoning Jig Heavy Duty Tenoning Jig for Table Saws Dedicated Tenon Clamping Tool, Compatible with Most Table Saws
- 【Durable Metal Construction】Crafted from high-quality metal, this tenoning jig ensures a secure and stable grip on your workpiece, enhancing safety and reducing the risk of injury during operation
- 【Technical Specifications】Chute width: 19.05 mm; Chute depth: 9.525 mm; Guide rod size: 265*19*9.5 mm; Maximum grip: 82.5 mm; Net weight of the whole machine: 8.7 KG
- 【Adjustable Clamping Angle】The angle of the rear pallet can be adjusted between 0-45°; The angle of the backing can be adjusted between 0-15°
New starting from: 199.99
Go to Amazon
Heavy-Duty Tenoning Jig (3/4" x 3/8") – Adjustable Back Stop Tenoning Jig for Table Saw – 00 to 450 Tenon Marker – Easy to Assemble, Versatile & Sturdy Woodworking Tools and Accessories
- Heavy-Duty Tenon Jig: Be it straight, angled, or mitered tenons, this table saw jig cuts it! This tenon cutter allows you to create tight-fitting joints, offer superior accuracy on a table saw and save you time between cuts. It is heavy-duty and adjustable for quick setups.
- Designed To Fit Any Table Saw: Our tenoning jig is designed to fit any table saw with a 3/4″ x 3/8″ miter groove, this heavy jig will hold your stock in a precise position. Safety, accuracy, and repeatability are the hallmarks of this heavy-duty tenoning jig.
- Easy Adjustable Back Stop: This adjustable jig backstop will support stock from 0 degrees to 45 degrees. Our table saw accessories have multi-position control levers for easy adjustment and better locking leverage.
New starting from: 209.99
Go to AmazonFeature Comparison: What Separates Good from Great
Clamping Mechanisms: Premium jigs use cam-action or threaded clamps that apply even pressure without marring wood surfaces. Budget models often rely on simple C-clamps that can leave impressions and take longer to adjust.
Adjustability: Look for jigs with micro-adjustment features (typically 0.010″ per turn). When fitting tenons to mortises, this precision makes the difference between perfect fits and frustrating gaps. I use my jig’s micro-adjuster on virtually every project.
Material Quality: Cast iron or steel construction provides the rigidity needed for accurate cuts. Aluminum jigs can deflect under clamping pressure, especially with hardwoods. The weight isn’t a downside—mass dampens vibration.
Safety Features: Quality jigs position your hands well away from the blade and include blade guards or shields. Some models have integrated hold-downs that prevent workpiece lifting during cuts.
Building Your Own DIY Tenoning Jig
Why Build Instead of Buy?
I’ve built three shop-made tenoning jigs over the years, each designed for specific needs commercial jigs didn’t address. Custom jigs make sense when:
- You need features not available commercially (extra-large capacity, specific angles)
- Your table saw has non-standard dimensions
- Budget constraints limit commercial options
- You enjoy the problem-solving aspect of jig building
A well-designed shop-made jig performs identically to commercial versions while costing $20-40 in materials.
Essential Design Principles
Rigid Base Structure: Use 3/4″ Baltic birch plywood minimum—anything thinner flexes. My current jig uses doubled 3/4″ ply laminated together for the vertical support face.
Precise Right Angles: The relationship between your sled base and vertical face must be exactly 90 degrees. I verify this with a machinist square and adjust using shims before final glue-up.
Secure Clamping: Include T-track or threaded inserts for clamps. Toggle clamps work brilliantly for speed, though they require careful positioning to avoid interference with the blade.
Runner Accuracy: If building a sled-style jig, the runners that fit your miter slots determine accuracy. I cut mine slightly oversize, then fine-tune with a shoulder plane until they slide smoothly with no side-to-side play.
Step-by-Step Build Process
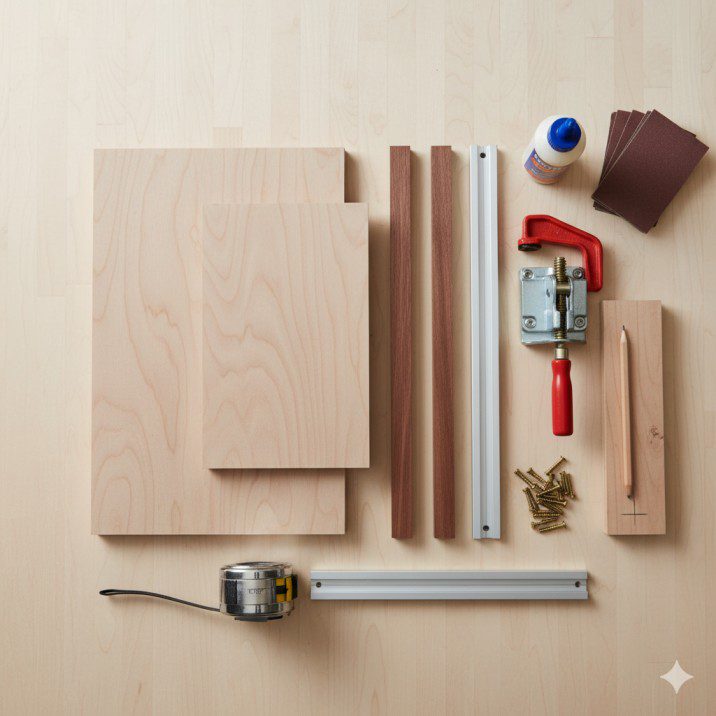
Materials Needed:
- Two pieces 3/4″ Baltic birch plywood (18″ x 24″ for base, 12″ x 18″ for vertical face)
- Hardwood miter slot runners (sized to your slots)
- Toggle clamp or C-clamp mounting hardware
- Wood glue, screws, sandpaper
- T-track (optional but recommended)
Construction Steps:
- Create the Sled Base: Cut your base plywood to size. Mill hardwood runners to fit your miter slots with approximately 0.002″ side clearance. Attach runners to the underside of the base using glue and screws from above (countersunk).
- Prepare the Vertical Face: Cut the vertical support piece and sand all surfaces smooth. This face must be flat—any bow transfers directly to your tenon cheeks.
- Assemble at Perfect 90 Degrees: Apply glue to the joining edge of the vertical face and clamp it to the base. Before the glue sets, verify the angle with a precision square from multiple sides. I use small shims to make micro-adjustments, then add screws from underneath for reinforcement.
- Add Clamping Mechanism: Install T-track on the vertical face for adjustable clamp positioning, or mount a toggle clamp at a fixed position appropriate for your typical stock sizes.
- Create Blade Clearance: Test the jig with your saw, marking where the blade will pass through the vertical face. Cut a relief slot slightly wider than your blade to allow for tilting adjustments.
- Apply Finish: I use paste wax on all sliding surfaces and a durable finish (polyurethane or shellac) on the plywood to prevent moisture absorption that could affect accuracy.
For detailed step-by-step visual guides on building jigs and fixtures, check out our table saw how-to guide.
Setting Up Your Tenoning Jig for Perfect Cuts
Initial Calibration Process

Even the best commercial jig requires proper setup. Here’s my calibration routine that ensures accuracy from the first cut:
Step 1: Verify Vertical Alignment: Use a precision square to confirm the jig’s face is exactly 90 degrees to your table surface. Most adjustable jigs have set screws for this—loosen them, position the jig with a square, then retighten.
Step 2: Check Parallel to Blade: The jig’s travel path must be perfectly parallel to the blade. I test this by making light scoring cuts on both ends of a test board, then measuring the distance between cuts. Any variation indicates misalignment.
Step 3: Set Blade Height: For standard tenon work, I set the blade height to match the desired tenon width plus 1/16″ for cleanup. Higher blades cut faster but can tear grain; lower blades require multiple passes.
Step 4: Position Fence or Stops: Adjust your fence (for fence-mounted jigs) or stops (for sled jigs) so the blade cuts exactly where needed. I use a scrap piece with marked layout lines for this—much faster than measuring repeatedly.
Creating a Setup Block System
Here’s a game-changing tip I learned from a professional furniture maker: create setup blocks for common tenon dimensions. I have blocks machined to exactly 1/4″, 3/8″, and 1/2″ thickness—the most common tenon widths in my work.
To use them: clamp your workpiece in the jig, position a setup block between the workpiece face and the blade, adjust the jig until the block just slides out, then lock everything down. Your first cut will be exactly one block-thickness away from the edge—perfect for symmetrical tenons.
This method eliminates measuring errors and speeds setup dramatically. What used to take 5-10 minutes of test cuts now takes under 60 seconds.
Cutting Techniques: From Basic to Advanced
Standard Through-Tenon Procedure

This is the bread-and-butter operation every tenoning jig performs:
1. Mill Your Stock: Ensure all workpieces are identical in dimension. Thickness consistency matters most—even 1/32″ variation means resetting the jig between pieces.
2. Mark Your Tenon: Use a marking gauge to scribe shoulder lines on all four faces. These visual references help verify your setup before committing to cuts.
3. Cut First Cheek: Secure the workpiece in the jig with one broad face against the jig’s support. Make your first cheek cut, feeding smoothly through the blade. I use a consistent feed rate—rushing causes tearout.
4. Rotate and Cut Opposite Cheek: Without adjusting the jig position, rotate the board 180 degrees and cut the opposite cheek. This ensures the tenon is centered on the stock thickness.
5. Repeat for Remaining Faces: For four-sided tenons, reposition to cut the narrow edges. Some jigs allow you to leave the workpiece clamped and simply rotate it; others require unclamping between faces.
6. Cut Shoulders: Remove the workpiece from the jig, lay it flat on the table, and crosscut the shoulders using your miter gauge or crosscut sled. The shoulders should meet your scribed layout lines exactly.
Angled and Compound Tenons
Many tenoning jigs accommodate angled cuts for chairs, timber framing, or architectural joinery. I’ve used this feature extensively when building Windsor chairs with splayed legs.
Setting Angles: Most adjustable jigs have degree markings, but I never trust them completely. Instead, I use an angle gauge to verify the actual angle after loosening the adjustment mechanism.
Compound Angles: For tenons that tilt in two planes (like chair legs), you’ll make one angle adjustment on the jig and a second by tilting your blade. Test cuts in scrap are non-negotiable here—these joints are difficult to visualize and easy to cut backwards.
Critical Safety Note: Angled cuts reduce effective blade guard clearance. Work slowly, keep hands well clear, and consider using a push stick even though the workpiece is clamped.
Haunched and Stub Tenons
Haunched Tenons (used at panel doors’ top rails) have one narrow edge removed to accommodate a groove. I cut these by making the standard tenon first, then removing the haunch with a handsaw or bandsaw—trying to do it on the table saw invites complications.
Stub Tenons (short tenons for drawer construction) require careful blade height setting. I’ve found that a 1/2″ to 5/8″ stub tenon provides plenty of glue surface for drawers without excessive mortise depth. Set your blade height precisely—going too deep wastes material and mortising effort.
For more specialized cutting techniques and advanced joinery, explore our table saw accessories that complement your tenoning work.
Achieving Perfect Fit: The Mortise-Tenon Relationship
The Goldilocks Fit
Woodworkers debate ideal tenon-to-mortise fit, but here’s what works consistently in my experience:
Hand Pressure Fit: The tenon should slide into the mortise with firm hand pressure—not requiring mallet blows, but not falling in loosely. When you pull it out, you should hear a slight suction sound.
Test Assembly: Always test-fit before glue-up. The joint should pull together completely but shouldn’t require excessive clamping force. If you’re bending rails to close gaps, something’s wrong.
Seasonal Consideration: Wood movement affects tenon fit. A perfect fit in January’s dry workshop air may be too tight in August’s humidity. For furniture that experiences seasonal changes, I aim slightly to the looser side of ideal.
Adjusting Tenon Thickness
When your initial test tenon is too thick (the common scenario), you have two adjustment options:
Method 1: Reposition the Jig: Move the jig slightly away from the blade. Most commercial jigs have micro-adjustment screws for this—typically one full rotation equals 0.025″ change in tenon thickness. I make small adjustments (1/4 turn), test cut, and measure before processing all workpieces.
Method 2: Raise the Blade: For fence-mounted jigs, you can achieve the same result by raising the blade slightly. This removes more material from the cheek. However, this changes the shoulder location, so it only works if your shoulders aren’t cut yet.
Too Loose?: If your tenon rattles in the mortise, you have fewer options. Small gaps (under 1/32″) can be filled with veneer shims. Larger gaps require starting over—there’s no reliable fix for severely undersized tenons.
Dealing with Problem Joints
Tapered Tenons: If your tenon is tighter at one end, the jig isn’t perpendicular to the table or you’re applying uneven pressure during the cut. Recalibrate the jig’s angle and ensure smooth, consistent feed pressure.
Twisted Tenons: This indicates your stock wasn’t flat before cutting. I learned to joint and plane everything before tenoning—trying to fix twisted stock in the jig creates dangerous situations and poor results.
Rough Cheeks: Tearout on tenon cheeks usually means dull blades or incorrect tooth count. I use a 50-tooth combination blade for tenons—aggressive rip blades leave rough surfaces, while fine crosscut blades can burn.
Safety Considerations: Keeping All Your Fingers
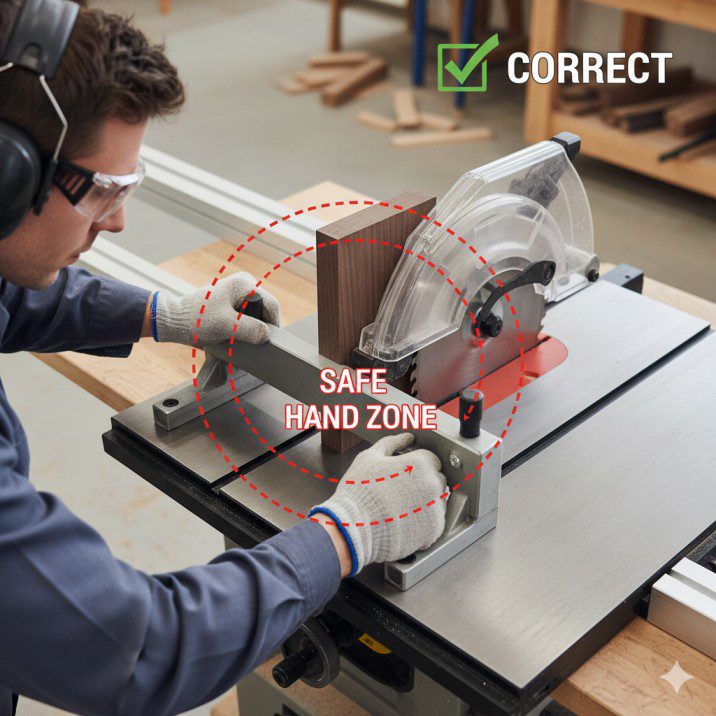
Tenoning operations position your hands near a vertical blade exposure—inherently more dangerous than standard ripping. After 15 years of incident-free tenon cutting, here are my non-negotiable safety practices:
Critical Safety Rules
Never Reach Over the Blade: Position yourself to the side of the jig during cuts. If the workpiece kicks back, it should miss you entirely.
Secure Clamping Always: Hand-holding vertical stock while cutting is an invitation to disaster. Even for quick test cuts, use the clamp. The 10 seconds spent clamping could save your fingers.
Blade Guards When Possible: Many tenoning operations make standard blade guards impractical, but use them whenever the configuration allows. Some commercial jigs include integrated guards—these are worth the extra cost.
Listen to the Cut: A properly set-up tenoning operation should sound smooth and consistent. Changes in pitch indicate binding, which can lead to kickback. Stop immediately if anything sounds wrong.
Inspect Clamps Before Each Cut: I’ve had toggle clamps loosen over time, almost releasing a workpiece mid-cut. Check that all clamp components are tight before starting each board.
Emergency Preparedness
Keep your blade guard key accessible—if something goes wrong, you want immediate blade-lowering capability. I also position a push stick within arm’s reach even though I’m not typically using it during tenoning. In an emergency, having options matters.
One close call taught me to always check that the jig is fully engaged with the miter slot or fence before starting the saw. A partially seated jig can shift during the cut—a terrifying experience I won’t repeat.
For comprehensive safety guidelines when working with table saws and accessories, visit our table saw buying guide section on safety features.
Troubleshooting Common Tenoning Problems
Problem: Tenons Don’t Match Each Other
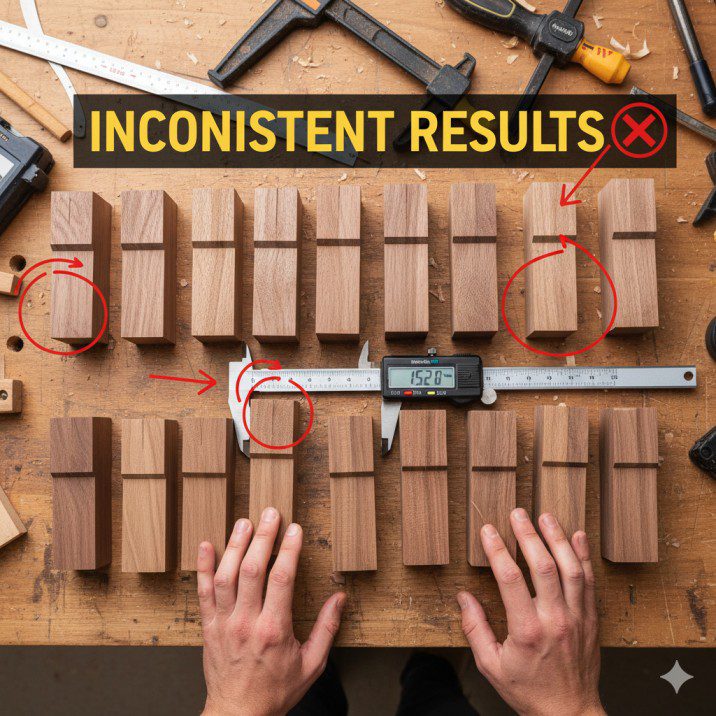
Symptoms: When cutting multiple identical pieces, the tenons vary in thickness by more than 0.010″.
Causes and Solutions:
- Inconsistent stock thickness: Mill all pieces at once to identical dimensions before tenoning
- Workpiece not seated fully: Ensure each board sits flat against the jig’s reference surface—sawdust buildup prevents this
- Clamp pressure variation: Apply consistent clamping force for each piece—I count toggle clamp handle rotations for uniformity
I keep a dedicated brush at the saw to clean the jig’s reference surface between every 3-4 cuts. This simple habit eliminated 90% of my consistency problems.
Problem: Shoulders Don’t Align with Layout Lines
Symptoms: After cutting tenon cheeks, the remaining material extends beyond or falls short of your marked shoulder lines.
Causes and Solutions:
- Blade height incorrect: Remeasure and adjust—I use a combination square set to the exact tenon length, then adjust blade height to match
- Layout lines inaccurate: Verify your marking gauge is set correctly and marks are visible on all four faces
- Stock not square: If your board’s edges aren’t 90 degrees to faces, the vertical cuts won’t align properly with flat-cut shoulders
Problem: Burning or Rough Cheeks
Symptoms: Tenon surfaces show burn marks or excessive tearout requiring heavy sanding.
Causes and Solutions:
- Dull blade: Replace or sharpen—tenoning requires sharp teeth more than most operations
- Feed rate too slow: Increase your feed speed slightly to prevent burning
- Wrong blade type: Use 40-50 tooth combination blades, not aggressive rip blades or ultra-fine crosscut blades
- Blade height excessive: Lower the blade so only 1/2″ extends above the work—less exposed blade means less friction
I reserve one carbide blade specifically for joinery work, never using it for cutting plywood or other abrasive materials. This blade stays sharp significantly longer.
Problem: Workpiece Shifts During Cut
Symptoms: You hear or feel the workpiece move within the clamp mid-cut, or see misaligned saw marks.
Causes and Solutions:
- Insufficient clamp pressure: Tighten more aggressively—better slight clamp marks than dangerous workpiece movement
- Smooth stock surface: Highly planed surfaces can slip—I lightly scuff the clamping area with 100-grit sandpaper
- Workpiece too small: Very narrow stock lacks sufficient clamping surface—build auxiliary clamping blocks
- Vibration loosening: Some saw vibration can gradually loosen clamps—pause halfway through long cuts to verify tightness
Advanced Applications and Specialized Techniques
Production Tenoning: Speed Without Sacrificing Accuracy
When building sets of chairs or multiple cabinet frames, efficiency matters. Here’s my production workflow that maintains quality while dramatically increasing output:
1. Mill All Stock to Identical Dimensions: Use stop blocks on your planer and thickness setup blocks. Every piece should be within 0.005″ of target thickness.
2. Set Up Once, Cut Everything: After achieving perfect setup with test pieces, cut all tenons without adjusting the jig. I’ve processed 60+ identical tenons in under 90 minutes this way.
3. Use Dedicated Mortise and Tenon Story Sticks: Create a reference board with exact mortise and tenon locations marked. Use this to set up both operations, ensuring perfect part-to-part consistency.
4. Batch by Operation: Cut all cheeks on all pieces, then switch to shoulder cutting. Fewer setup changes mean fewer opportunities for error.
Wide Panel Tenons
Cutting tenons on boards wider than 8″ presents unique challenges. The workpiece becomes difficult to support and align accurately:
Support Solutions: Build an auxiliary support that clamps to your table, providing a stable surface behind the jig. This prevents the far end of wide boards from sagging and creating angled cuts.
Multiple Pass Strategy: For panels over 12″ wide, I make the cheek cut in two passes—one from each edge, meeting in the middle. This reduces strain on the jig and provides better control.
Alternative Method: Consider using a router table with a large straight bit for very wide panel tenons. While this article focuses on table saw jigs, knowing when to use alternative tools demonstrates experience.
Curved and Tapered Workpieces
I’ve built hundreds of Windsor chairs with tapered, turned legs that still require tenons. Here’s how to handle non-uniform stock:
Reference Surface Creation: Attach a flat board to the curved workpiece using double-sided tape or hot glue. This flat surface rides against the jig, while the actual workpiece gets cut accurately despite its irregular shape.
Center Finding: For turned spindles, use a center finder tool to mark exact center points at both ends. These guide your positioning in the jig to ensure the tenon is concentric with the spindle.
Safety Considerations: Irregular shapes can catch unexpectedly during cuts. Work slowly, ensure extremely tight clamping, and make sure your hands are well clear of the cutting path.
Maintenance and Long-Term Care
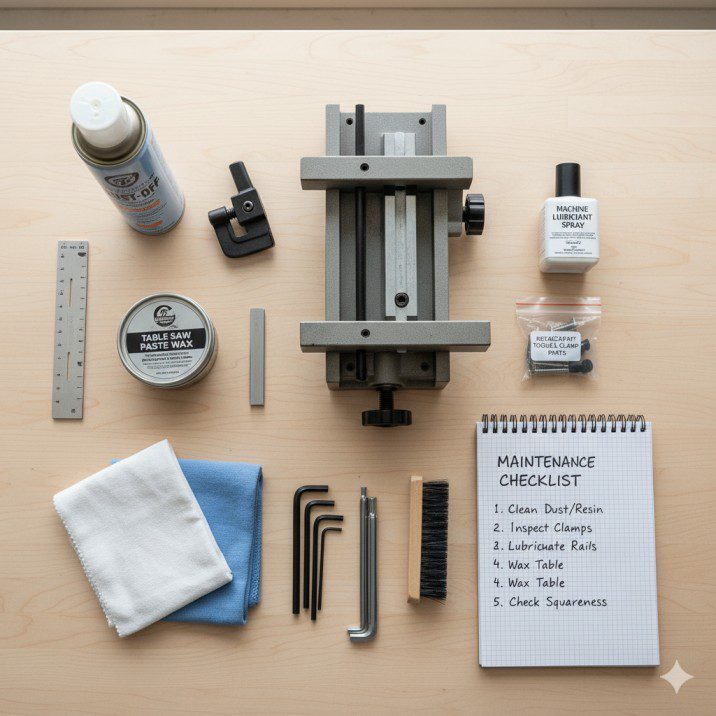
Keeping Your Jig Accurate
Even quality jigs lose accuracy over time without maintenance. Here’s my quarterly maintenance routine:
Inspect All Fasteners: Vibration gradually loosens screws and bolts. I check and retighten every fastener on my jig every three months. Lock washers help but aren’t perfect.
Verify Critical Angles: Use a precision square to recheck the jig’s vertical orientation. Over time, wooden components can shift slightly with humidity changes.
Clean Sliding Surfaces: Sawdust accumulation in miter slots or along fence-contact surfaces affects accuracy. I use compressed air and follow with paste wax application.
Check Clamp Operation: Toggle clamps and threaded clamps can develop play. Replace any worn components immediately—clamp failure during cutting is dangerous.
Inspect Reference Surfaces: The face that contacts your workpiece should remain flat and smooth. I check with a straightedge and resurface if necessary using a hand plane or careful sanding.
When to Replace vs. Repair
Replace If: The base structure has developed cracks, warps, or permanent deformation. These fundamental structural issues can’t be reliably fixed and compromise safety.
Repair If: Clamps wear out, adjustment mechanisms loosen, or minor surface damage occurs. These component-level issues are easily addressed with replacement parts or simple repairs.
I’ve repaired my primary tenoning jig four times over eight years—replacing toggle clamps twice, resurfacing the vertical face once, and rebuilding worn miter slot runners once. The jig itself remains accurate and reliable.
Storage Considerations
Tenoning jigs are bulky and often have protruding clamps that catch on other tools. I store mine:
- Hanging on a French cleat system where it’s immediately accessible
- With blade guards or covers over any sharp edges
- Away from moisture sources that could warp wooden components
- With adjustment knobs backed off to relieve spring tension in clamps
Comparing Tenoning Methods: Jig vs. Alternatives
Table Saw with Tenoning Jig vs. Router Table
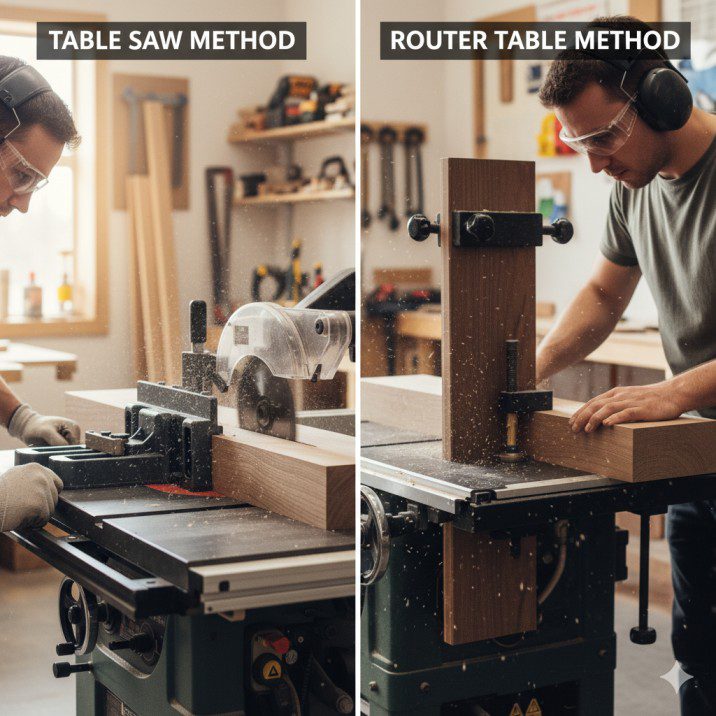
Tenoning Jig Advantages:
- Handles larger stock more easily (router bits limited to 1.5″ cutting depth typically)
- Faster for production work once set up
- Creates smoother cheeks with proper blades
- Better for hardwoods—less tear-out than routers
Router Table Advantages:
- More versatile for decorative tenon details
- Easier to cut haunches and irregular features
- Can handle curved edges better
- Quieter operation
My Take: For straightforward furniture tenons in quantity, the table saw with a good jig wins. For one-off decorative pieces or small parts, I reach for the router table.
Tenoning Jig vs. Bandsaw
Many woodworkers cut tenons on the bandsaw, using the fence to guide vertical cuts:
Bandsaw Advantages:
- Safer—blade is enclosed and less exposed
- Handles irregular shapes easily
- Can cut very wide boards without special setups
- Less noise and dust
Tenoning Jig Advantages:
- Superior surface finish—no saw marks to clean up
- Better accuracy and repeatability
- Faster cutting with larger blades
- No blade drift compensation needed
My Take: For rough carpentry or rustic work where tenons will be trimmed or adjusted anyway, the bandsaw is excellent. For finished furniture with visible joints, the table saw jig produces better results.
For a comprehensive comparison of different saw types and their capabilities, check our best table saw reviews.
Cost Analysis: Investment vs. Value
Commercial Jig Investment Breakdown
| Cost Factor | Budget Jig | Mid-Range Jig | Premium Jig |
|---|---|---|---|
| Initial Purchase | $40-60 | $140-180 | $450-500 |
| Replacement Parts (5 years) | $20-30 | $30-50 | $50-80 |
| Setup Time per Project | 15-20 min | 8-12 min | 5-8 min |
| Accuracy Capability | ±1/32″ | ±1/64″ | ±0.005″ |
| Lifespan (with maintenance) | 5-8 years | 10-15 years | 20+ years |
DIY Build Economics
Building your own tenoning jig costs $20-40 in materials and requires 3-6 hours of shop time. If you value your time at $25/hour, the total “cost” is $95-190—competitive with mid-range commercial jigs.
When DIY Makes Sense:
- You have specific needs commercial jigs don’t address
- You enjoy the building process and learning experience
- You’re on a tight budget and have time available
- You want to customize features for your workflow
When Buying Makes Sense:
- You need reliable performance immediately
- You lack the skills or tools for precision jig building
- Your time is better spent on paying projects
- You want proven designs with warranty support
Time Savings Calculation
Before using a tenoning jig, cutting eight tenons for a single project took me 45-60 minutes including setup, test cuts, and careful hand-tool work. With a well-adjusted jig, the same task takes 15-20 minutes.
For someone building furniture weekly, this saves approximately 30 hours annually—a significant return on even a premium jig investment.
Real-World Project Applications
Case Study: Arts and Crafts Dining Table
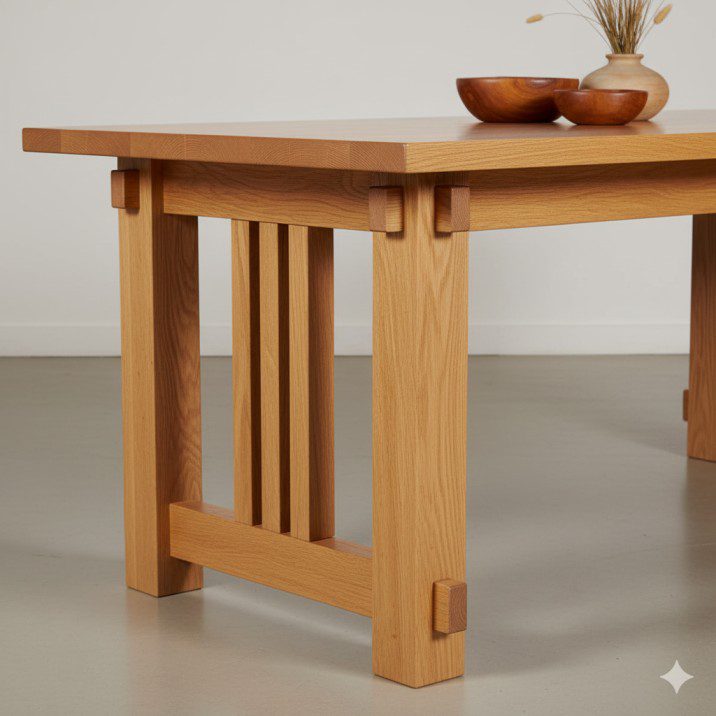
Last year I built a quarter-sawn white oak dining table using traditional mortise and tenon joinery throughout. The project included:
- Four legs with double tenons at each end (16 tenons total)
- Four rails with corresponding tenons (8 tenons)
- Breadboard ends requiring long tenons (6 tenons)
Total: 30 precision tenons, all cut using my fence-mounted tenoning jig. The entire tenon-cutting process took under three hours spread across two shop sessions.
Key Takeaway: Using setup blocks for the three different tenon dimensions (leg-to-apron, apron-to-leg, and breadboard) meant each size required only one calibration. All similar tenons were identical.
Fit Quality: Every joint assembled with hand pressure and required zero adjustment. The table has remained rock-solid through two years of daily use—testament to accurate joinery.
Production Work: Gallery Frame Sets
A local gallery commissioned 24 frames in three sizes, all requiring mortise and tenon corner joints. Here’s how the tenoning jig proved invaluable:
Volume: 96 total tenons (4 per frame × 24 frames) Time Investment: 4.5 hours total including setup Consistency Result: All frames were square within 1/32″, requiring no adjustment during assembly Cost Efficiency: At production rates, the jig effectively “paid” for itself on this single project through time savings alone
Restoration Work: Antique Chair Repair
Tenoning jigs excel in repair work where you’re matching existing joint dimensions. I recently restored an antique Windsor chair with a broken leg requiring a new tenon:
Challenge: The original tenon was hand-cut and slightly irregular Solution: Used the existing mortise to determine exact tenon dimensions, then set up the jig to match Result: The new tenon fit the 150-year-old mortise perfectly, maintaining the chair’s integrity and value
Frequently Asked Questions
What size tenons can a standard tenoning jig cut?
Most commercial jigs accommodate stock from 1/2″ to 12″ wide and can cut tenons up to 3″ long (limited by blade diameter). Fence-mounted jigs often handle wider stock—up to 24″ in some cases. The tenon thickness is limited by your blade height, typically maxing out around 2-3″ for standard 10″ saw blades. For specialized work requiring larger dimensions, custom shop-made jigs provide unlimited flexibility.
Can I use a tenoning jig with a dado blade?
Yes, and this is highly effective for cutting tenon cheeks in a single pass. Most fence-mounted jigs work perfectly with dado stacks, while sled-style jigs require your miter slot to be wider than the dado stack. When using dados, I typically stack to 1/2″ or 5/8″ width—this removes cheek material quickly while still allowing controlled cuts. Always verify your jig design supports dado use before attempting this.
How do I prevent tearout on the back edge of tenon cuts?
Tearout occurs where the blade exits the workpiece. Four solutions work reliably: First, use a sharp blade with at least 40 teeth—dull blades tear rather than cut cleanly. Second, apply painter’s tape over the exit area to support grain fibers. Third, attach a zero-clearance backing board to your jig’s back face. Fourth, make a shallow scoring cut first, then complete the full-depth cut. I typically combine a sharp blade with tape for perfect results.
Is a tenoning jig safe for beginners?
When used properly with secure clamping and appropriate safety awareness, tenoning jigs are significantly safer than attempting vertical cuts freehand. However, beginners should practice on scrap wood extensively before cutting actual project pieces. Always keep hands well clear of the blade path, use proper eye and hearing protection, and never rush the cutting process. Start with a basic, well-reviewed commercial jig rather than building your own—proven designs include safety features learned through years of development. For comprehensive safety guidance, review our table saw how-to guide before your first tenoning session.
Taking Action: Your Next Steps
If you’re currently struggling with inconsistent tenons or avoiding mortise-and-tenon joinery due to perceived difficulty, a quality tenoning jig for table saw work removes those barriers. Here’s my recommended progression:
Step 1: Assess Your Current Situation
- How many projects annually involve tenon cutting?
- What accuracy level do your projects demand?
- What’s your realistic budget including time and money?
- Does your current table saw support aftermarket jigs?
Step 2: Research and Select Based on your assessment, choose between building a shop-made jig (if you have time and skills), purchasing a budget option (for occasional use), or investing in a quality commercial jig (for regular woodworking).
Step 3: Practice Before Projects Dedicate 2-3 hours to practice cuts on scrap wood. Experiment with different setups, learn your jig’s adjustments, and develop confidence before working on project pieces.
Step 4: Start Simple Choose a straightforward first project—perhaps a simple picture frame or small table with four identical tenons. Success builds confidence for more complex work.
Step 5: Document and Refine Record your setups, note what works, and continuously refine your process. Every project teaches something applicable to the next.
The difference between acceptable joinery and professional-grade work often comes down to tooling quality and setup precision. A proper tenoning jig for table saw provides both—transforming one of woodworking’s most essential joints from an intimidating challenge into a reliable, repeatable process that elevates every project you build.
Ready to upgrade your joinery capabilities? Explore our table saw accessories guide for complementary tools that work alongside your tenoning jig, and check our best table saw reviews to ensure your saw provides the stable platform these precision jigs require.
Final Thoughts: The mortise and tenon joint has endured for centuries because it simply works—when cut accurately. A quality tenoning jig isn’t just another accessory; it’s the bridge between appreciating fine joinery and actually producing it consistently in your own shop. Whether you build your own or purchase a commercial model, the investment returns value on every project for years to come.

Finlay Connolly is a woodworking enthusiast and power tool specialist with over a decade of hands-on experience in the workshop. As the founder and lead writer at ProTableSawReviews.com, Finlay combines expert knowledge with real-world testing to help woodworkers, DIYers, and professionals choose the best tools for the job. With a sharp eye for detail and a passion for precision, Finlay is committed to providing trustworthy, practical advice backed by years of experience and research in the field. Whether you’re cutting dados or comparing fence systems, you can count on Finlay for honest, reliable reviews that make your next cut your best one.