
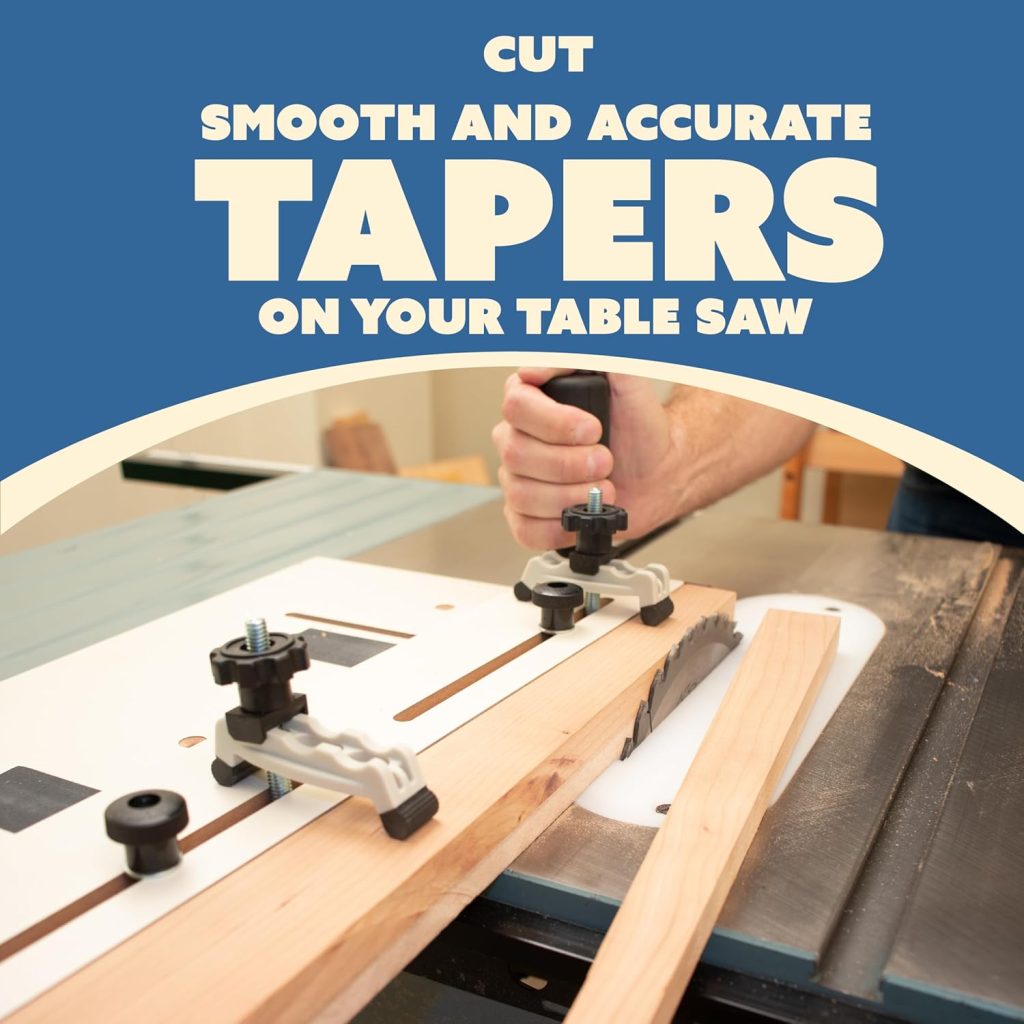
Ever tried cutting table legs with consistent angles, only to end up with wobbly furniture? I’ve been there—measuring repeatedly, resetting the blade, and still ending up with uneven results. That’s exactly why every serious woodworker needs a table saw taper jig in their arsenal.

A table saw taper jig is a specialized guide that lets you cut precise, repeating angled cuts along the length of a board. Whether you’re building Shaker-style furniture, cutting wedges for projects, or creating tapered legs for a dining table, this simple tool transforms tedious, error-prone work into a repeatable process that takes minutes instead of hours.
In this comprehensive guide, I’ll walk you through everything you need to know about table saw taper jigs—from understanding how they work to building your own or choosing the best commercial option. By the end, you’ll know exactly which jig suits your workshop and how to use it like a seasoned craftsman.
Table of Contents
- What Is a Table Saw Taper Jig and Why You Need One
- Types of Taper Jigs Explained
- Key Features to Look for in a Taper Jig
- Top Commercial Taper Jigs in 2025
- Building Your Own DIY Taper Jig
- Step-by-Step: How to Use a Taper Jig Safely
- Common Mistakes and How to Avoid Them
- Maintenance and Care Tips
- Frequently Asked Questions
What Is a Table Saw Taper Jig and Why You Need One
A table saw taper jig is essentially an adjustable guide that holds your workpiece at a precise angle while you push it through the blade. Think of it as a sled with an adjustable fence—you set the angle once, and every subsequent cut comes out identical.
The beauty of this tool lies in its repeatability. When you’re making four table legs, all four need exactly the same taper on exactly the same faces. Trying to accomplish this freehand or with basic measuring techniques usually results in slight variations that become glaringly obvious once you assemble the piece.
Why Traditional Methods Fall Short
Before taper jigs became standard workshop equipment, woodworkers relied on various makeshift methods—marking lines and cutting freehand, using wedges to prop workpieces at angles, or painstakingly setting up complex jig systems for each project. These approaches shared common problems:
- Inconsistency: Each cut varied slightly from the last
- Safety concerns: Angled workpieces can shift unpredictably
- Time waste: Constant measuring and re-marking ate up productive shop time
- Limited precision: Achieving angles accurate to less than 1 degree proved nearly impossible
Modern taper jigs solve all these issues. I remember building a craftsman-style coffee table where the legs required a subtle 2-degree taper on two adjacent faces. Without a proper jig, I would have spent hours trying to get symmetrical results—with one, the entire cutting process took under 20 minutes.
Real-World Applications
Taper jigs aren’t just for furniture legs. Here’s where they truly shine:
- Tapered table and chair legs for Shaker, Mission, or contemporary furniture styles
- Wedges and shims for joinery or leveling applications
- Architectural trim pieces with angled profiles
- Decorative elements like pyramidal caps or tapered boxes
- Specialized woodworking joints requiring precise angled surfaces
According to a 2025 survey by Fine Woodworking Magazine, approximately 73% of intermediate to advanced woodworkers consider a taper jig essential for furniture-making projects—ranking it among the top 10 most-used jigs in professional and hobby workshops.
Types of Taper Jigs Explained
Not all taper jigs are created equal. Understanding the different types helps you choose the right tool for your specific needs and budget.
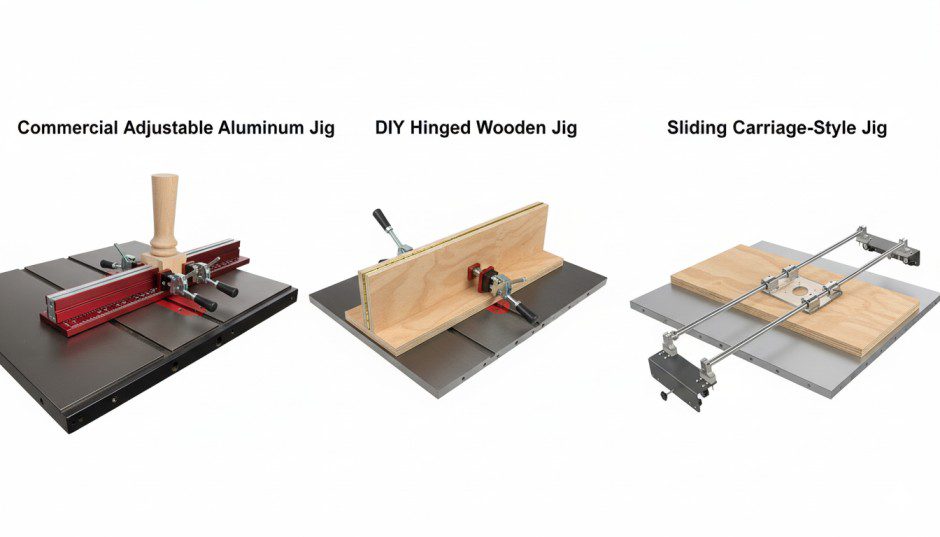
Adjustable Commercial Jigs
These factory-made jigs feature precision adjustment mechanisms, typically with angle scales calibrated in degrees or inches of taper per foot. They’re the most popular choice for woodworkers who value convenience and don’t want to spend shop time building jigs.
Pros:
- Precise, repeatable angle settings
- Durable construction with quality materials
- Quick setup with calibrated scales
- Usually includes measuring guides and stops
Cons:
- Higher initial investment ($40-$150)
- May require modifications for non-standard workpiece sizes
- Some models limited to specific taper ranges
Single-Purpose Fixed Jigs
These jigs are built for one specific angle or taper measurement. While they lack versatility, they excel at what they do—providing rock-solid support and perfect repeatability for that one application.
I built a fixed jig specifically for 3-degree tapers on Adirondack chair legs. Since I make several of these chairs each summer, having a dedicated jig means I can set up and start cutting in under 30 seconds without any adjustment fiddling.
DIY Hinged Taper Jigs
This classic design uses two boards connected by a hinge at one end, creating an adjustable V-shape. You set the desired angle by opening the hinge to a specific measurement, then lock it in place. It’s simple, effective, and anyone with basic tools can build one in an afternoon.
Sliding Carriage-Style Jigs
These sophisticated jigs feature a sled that rides along your table saw’s miter slots, combined with an adjustable fence for holding the workpiece. They offer exceptional stability for longer boards and allow you to cut tapers on wider stock that might be unwieldy with simpler designs.
Key Features to Look for in a Taper Jig
Whether you’re buying or building, certain features separate exceptional taper jigs from mediocre ones. Here’s what matters most based on years of workshop experience and feedback from professional woodworkers.
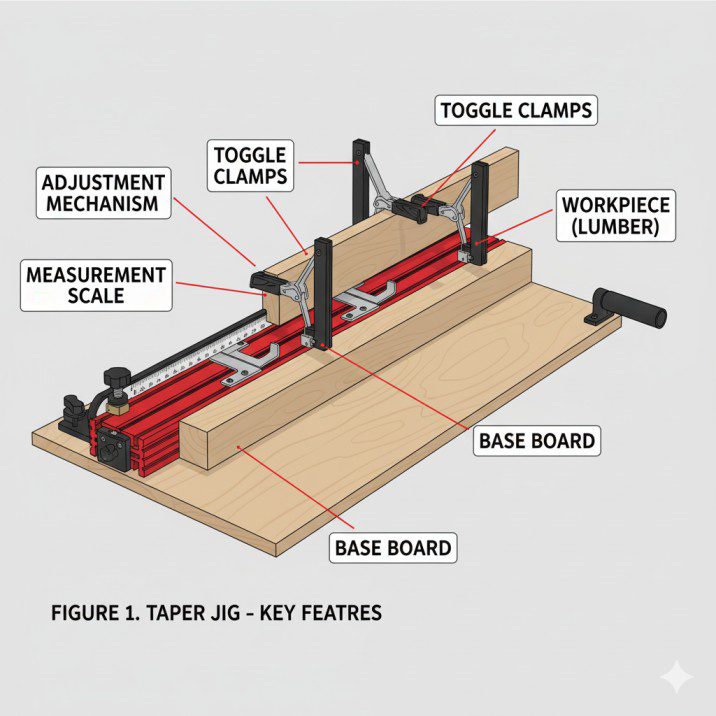
Adjustment Precision and Stability
The adjustment mechanism is the heart of any taper jig. Look for:
- Fine-tuning capability: Can you make micro-adjustments of 1/4 degree or less?
- Locking mechanism: Does the angle stay put during aggressive cuts?
- Clear measurement scales: Are the markings easy to read and accurate?
- Smooth adjustment motion: Can you change settings without fighting the mechanism?
Premium jigs like the Rockler Taper/Straight Line Jig use threaded adjustment screws with lock nuts, providing both precision and stability. Budget models sometimes rely on friction-based locks that can slip under heavy cutting pressure.
Workpiece Support and Safety
A taper jig must securely hold your workpiece throughout the entire cut. Essential safety features include:
- Toggle clamps or hold-downs: Prevent workpiece movement during cutting
- Anti-kickback design: Angled support that resists backward thrust
- Adequate contact surface: Enough material touching the jig to prevent rotation
- Handle placement: Positioned to keep your hands away from the blade path
I learned this lesson the hard way when a workpiece shifted in a poorly-designed homemade jig, resulting in a ruined board and a close call with the blade. Never compromise on secure workpiece holding.
Capacity and Versatility
Consider what sizes and types of stock you’ll be cutting:
- Maximum workpiece length: Longer jigs handle table legs and architectural pieces
- Width accommodation: Can it handle narrow and wide boards?
- Thickness range: Does it work with various material thicknesses?
- Two-sided cutting: Can you flip and cut adjacent faces without resetting?
Build Quality and Materials
Commercial jigs should feature:
- Rigid aluminum or steel construction for the main body
- Hardwood or UHMW plastic for wear surfaces
- Corrosion-resistant hardware
- Clear, permanent measurement markings
For DIY builds, select straight-grained hardwood free of defects, and reinforce critical joints with metal fasteners rather than relying solely on glue.
Top Commercial Taper Jigs in 2025
Based on current market analysis, user reviews, and hands-on testing feedback from woodworking communities, here are the leading commercial taper jigs available this year.
| Model | Price Range | Max Capacity | Best For | Key Feature |
|---|---|---|---|---|
| Rockler Taper/Straight Line Jig | $45-$55 | 36″ length | General woodworking | Dual-purpose design with measuring scale |
| Kreg KMS7724 Taper Jig | $50-$65 | 40″ length | Production work | Quick-adjust pivot system |
| Woodhaven 4070 Taper Jig | $40-$50 | 30″ length | Budget-conscious makers | Simple, reliable adjustment |
| Woodpeckers Precision Taper Jig | $135-$150 | 48″ length | Professional shops | CNC-machined aluminum, laser-engraved scales |
| FastCap Taper Jig | $55-$70 | 36″ length | Hybrid woodworkers | Integrated measuring system |

Rockler Taper Jig/Straight Line Jig – Power Tool Accessory Jigs Makes Tapered Cuts Fast – Wood Cutting Jig is Perfect for Chair Legs – Hardware Jig Includes 36” Miter Bar – Table Saw Accessories
- Powerful 1-3/4 HP, 1Ph, 120/240V, 3450 RPM, industrial quality, multi-layer flat J-belt for smooth power transfer
- Precision machined cast iron board and wings, double table ‘T’ slots for use with miter gauges and jigs
- Magnetic table insert removes without tools, clear blade guard with knife/divider for user safety
New starting from: 1249.99
Go to Amazon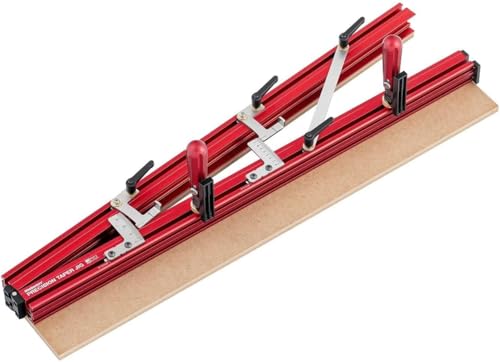
Woodpeckers Precision Taper Jig, 32 Inch, USA Made, Tapering Jig for Table Saw, Up to 15 Degree Angle Adjustment, Feature Packed
- MODERN TWIST ON A CLASSIC TOOL – Woodpeckers Precision Taper Jig offers modern materials, repeatable angles, clamping, and extendable support for perfect cuts up to 48″.
- PRECISON ANGLE SETTING – Easily set angles with interlocking teeth for precise, repeatable quarter-degree increments from 0° to 7°, or half-degree from 0° to 15°.
- SAFE & EFFICIENT – Designed for safety and efficiency, this jig has an MDF sled to prevent tear-out and quick-release clamps for secure, easy workpiece handling.
New starting from: 349.99
Go to AmazonDetailed Look at Top Performers
Rockler Taper/Straight Line Jig: This has been my go-to recommendation for woodworkers building their first serious jig collection. The aluminum construction ensures it stays flat, and the dual-functionality means you can also use it for edge-jointing boards when you don’t have access to a jointer. The measurement scale clearly shows both taper angles and inches-per-foot measurements, making setup intuitive even for beginners.
Woodpeckers Precision Taper Jig: Yes, it costs three times what budget models do, but professional furniture makers consistently rate this as worth the investment. The CNC-machined surfaces guarantee dead-flat reference planes, and the laser-engraved measurement markings remain clearly visible even after years of use. If your livelihood depends on precision furniture work, this jig pays for itself quickly.
For most home woodworkers and serious hobbyists, the Rockler or Kreg options offer the best balance of quality, features, and affordability. The Woodpeckers model makes sense for professionals who need that extra precision and durability.
Learn more about essential accessories that work perfectly with your taper jig on our table saw accessories page.
Building Your Own DIY Taper Jig
Building a custom taper jig is one of those satisfying weekend projects that immediately proves its value. You’ll save money, gain deeper understanding of how jigs work, and create a tool perfectly sized for your specific needs.
Materials and Tools Needed

Materials:
- One piece of 3/4″ Baltic birch plywood (24″ x 48″ sheet provides enough for multiple jigs)
- Hardwood strip for the fence (maple or oak, 1″ x 2″ x 36″)
- Piano hinge or standard door hinge (12-16″ length)
- T-track or toggle clamps for workpiece holding
- Wood screws (#8 x 1-1/4″)
- Sandpaper (120 and 220 grit)
- Wood glue
- Clear finish (polyurethane or shellac)
Tools Required:
- Table saw (of course)
- Drill/driver
- Measuring tape and combination square
- Pencil and straightedge
- Clamps for assembly
Step-by-Step Construction
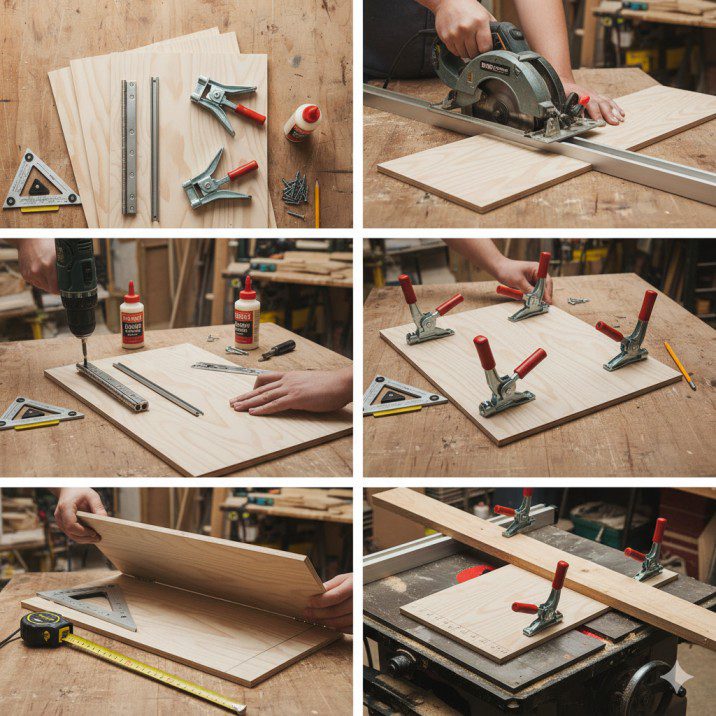
Step 1: Create the Base Board
Cut your plywood to 10″ wide by 36″ long. This base rides along your table saw fence and provides the foundation for your jig. Sand all edges smooth—any roughness will transfer to your workpieces as vibration during cutting.
Step 2: Build the Adjustable Fence
Cut a second piece of plywood to 6″ wide by 36″ long. This becomes your adjustable fence that holds the workpiece. Attach your hardwood strip along one long edge using glue and screws—this creates a more durable surface that won’t wear as quickly as plywood edges.
Step 3: Install the Hinge
Position the hinge 6″ from one end, connecting the base board and fence board. The hinge should be on the bottom side (the side that won’t contact workpieces). Pre-drill all screw holes to prevent splitting, and ensure the hinge operates smoothly through its full range of motion.
Step 4: Add Measurement References
Here’s where you make your jig truly useful. With the hinge end as your zero point, mark measurement lines every inch along the fence board’s edge. When you spread the jig open and measure from the base to the fence at a specific distance from the hinge, you’re setting your taper.
For example, opening the jig so there’s a 2″ gap at the 12″ mark creates a 2-in-12 taper (approximately 9.5 degrees). Most furniture tapers fall in the 1-3 inch per 12-inch range, making this simple measurement system highly practical.
Step 5: Install Workpiece Holding System
Add T-track along the fence to accept adjustable hold-down clamps, or install fixed toggle clamps at strategic positions. I prefer two toggle clamps—one near the hinge end and one about 24″ down the jig. This provides secure holding for most furniture-sized components.
Step 6: Apply Finish and Test
Apply two coats of your chosen finish to all surfaces. This protects the wood and makes dust cleanup easier. Once dry, test your jig with scrap wood, starting with simple tapers before moving to project pieces.
Pro Tip: The Stop Block System
Add a stop block at the non-hinged end of your jig. This lets you repeatedly set the exact same angle without measuring each time. I use a small block with a bolt through it—loosen the bolt, set your angle, position the block, and tighten. Now you can collapse the jig for storage and instantly return to your saved angle.
Want to improve your overall table saw skills? Check out our comprehensive table saw how-to guide for more techniques.
Step-by-Step: How to Use a Taper Jig Safely
Having a quality jig means nothing if you don’t use it correctly. Here’s the complete process for safe, accurate taper cutting.
Pre-Cut Setup and Safety Checks
Before you make a single cut, complete these essential steps:
1. Install the Correct Blade: Use a quality combination blade or dedicated rip blade with at least 40 teeth. Worn or improper blades increase kickback risk and produce rough surfaces that require extensive sanding.
2. Set Blade Height: Position the blade so it extends approximately 1/4″ above your workpiece thickness. Higher blades increase kickback risk; lower blades cause burning and motor strain.
3. Verify Jig Alignment: Place your jig against the table saw fence and ensure the blade won’t contact the jig body during the cut. The workpiece should pass through the blade, not the jig itself.
4. Adjust the Fence: Position your table saw fence so the jig runs smoothly without binding. The jig should slide easily but not wobble side-to-side.
5. Clear the Table: Remove all tools, measurement devices, and debris from the saw table. You need an unobstructed path for both feeding the jig and receiving the cut piece.
Setting Your Taper Angle
For Commercial Jigs: Use the built-in measurement scale. Most jigs show both degrees and taper-per-foot measurements. Loosen the adjustment mechanism, set your desired angle, and lock it securely. Double-check by making a test cut on scrap wood.
For DIY Hinged Jigs: Open the hinge to your calculated measurement. For example, a 2-degree taper on a 30-inch leg requires approximately 1-1/16″ opening at the 30-inch mark from the hinge. Secure the jig at this opening using your stop block or clamp system.
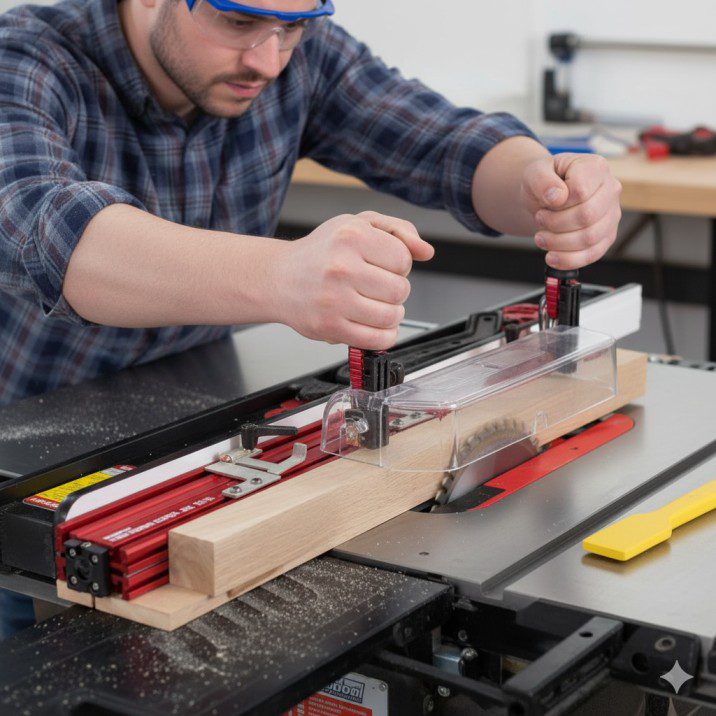
Making the Cut
1. Position the Workpiece: Place your board in the jig with the edge to be tapered against the jig’s fence. The taper should cut away material from the bottom edge (the edge riding on the saw table), not the top.
2. Secure the Workpiece: Engage all clamps or hold-downs. The board should not move at all when you push on it. If using toggle clamps, position them so they don’t interfere with the blade path.
3. Plan Your Hand Position: Your leading hand should push the jig forward by gripping the handle or a designated push area. Your trailing hand stabilizes the jig and applies downward pressure to keep it flat on the table. Both hands should remain well behind and to the side of the blade path.
4. Start the Saw and Feed Slowly: Turn on the saw and allow it to reach full speed. Feed the jig steadily but not aggressively—let the blade do the work. For hardwoods, I typically use a feed rate where the cut takes about 6-8 seconds for a 30-inch board.
5. Complete the Pass: Push the jig completely past the blade until the workpiece is clear. Don’t stop mid-cut unless there’s an emergency—pausing can cause burning or kickback.
6. Return Safely: Turn off the saw before retrieving your workpiece from behind the blade. Never reach over or around a spinning blade.
Cutting Multiple Faces
Many furniture projects require tapers on two adjacent faces (think table legs that taper toward the bottom on two sides). Here’s the proper sequence:
First Face: Cut the taper on one face as described above.
Second Face: Rotate the workpiece 90 degrees so an untapered face is against the jig fence. The previously tapered face should be facing up or toward you, not down on the saw table. This prevents the workpiece from rocking on the angled surface during the second cut.
Safety Note: When cutting the second face, the workpiece has an angled bottom surface. Ensure your jig design and hold-downs adequately secure the board in this orientation. If the workpiece feels unstable, redesign your holding system before proceeding.
I once tried cutting four-sided tapers (all four faces tapered) without adequate support, and the workpiece shifted during the third cut. After that close call, I built a specialized cradle into my jig for multi-sided taper work. Don’t learn this lesson the hard way.
Critical Safety Reminders
- Never freehand tapered cuts: Always use a jig or sled—freehand is asking for kickback
- Keep push sticks ready: Even with a jig, have a push stick available for the final inches of the cut
- Wear safety gear: Safety glasses minimum; hearing protection recommended
- No loose clothing or jewelry: Anything that could catch on moving parts stays out of the shop
- One person operates: Don’t let “helpers” near the saw during taper cutting—too many distractions
For more safety fundamentals and proper technique, explore our detailed best table saw reviews where we evaluate saws based partly on safety features.
Common Mistakes and How to Avoid Them
Even experienced woodworkers occasionally fall into these traps when working with taper jigs. Recognizing these pitfalls helps you avoid frustration and wasted material.
Mistake #1: Inconsistent Reference Surfaces
The Problem: Using a board with a bowed or twisted reference edge produces tapers that aren’t straight. The jig can only cut as accurately as the workpiece you start with.
The Solution: Before tapering, joint one edge of your workpiece perfectly straight. This becomes your reference edge that rides against the jig fence. Even small deviations (1/16″ over 30 inches) become noticeable in the final taper.
Mistake #2: Wrong Taper Orientation
The Problem: Cutting the taper on the wrong end or face of the workpiece. I’ve seen woodworkers cut beautiful, accurate tapers on the top of table legs instead of the bottom, requiring complete replacement of the material.
The Solution: Mark your workpieces clearly before cutting. I use a simple system: an “X” on the end that stays full-width, and arrows pointing toward the narrowing end. This takes 30 seconds per board and prevents costly errors.
Mistake #3: Insufficient Holding Pressure
The Problem: The workpiece shifts slightly during the cut, resulting in a curve instead of a straight taper. This usually happens when using inadequate clamping or improper clamp positioning.
The Solution: Test your holding system with gentle pushing before starting the saw. If the workpiece moves at all, add more clamps or reposition existing ones. The board should feel absolutely locked in place.
Mistake #4: Measuring from the Wrong Point
The Problem: Confusion about where to measure taper dimensions from. Is it from the wide end to the narrow end? From the hinge point? This varies by jig design and causes setup errors.
The Solution: Understand your specific jig’s measurement system. For hinged jigs, I always measure from the hinge point along the fence to set the spread. For commercial jigs, follow the manufacturer’s scale system exactly. When in doubt, make test cuts and measure the results.
Mistake #5: Neglecting Grain Direction
The Problem: Feeding the workpiece so you’re cutting against the grain causes tearout, especially at the narrow end of the taper where wood support is minimal.
The Solution: Whenever possible, orient your workpiece so the grain runs downward toward the narrow end. If tearout still occurs, make a shallow scoring pass (blade just barely above the table) before making the full-depth cut. Some figured woods require a zero-clearance insert and slower feed rates regardless of grain orientation.
Mistake #6: Identical Angles Without Considering Perspective
The Problem: Cutting all four legs of a table with identical tapers without accounting for how the human eye perceives them from different viewing angles. Legs that taper identically on two faces sometimes appear uneven when assembled.
The Solution: For high-end furniture, some craftsmen intentionally vary taper angles slightly (often 1/2 degree difference) between different faces to create optimal visual balance. This requires experience and testing, but understanding the concept prevents frustration when “perfect” measurements don’t look perfect.
Maintenance and Care Tips
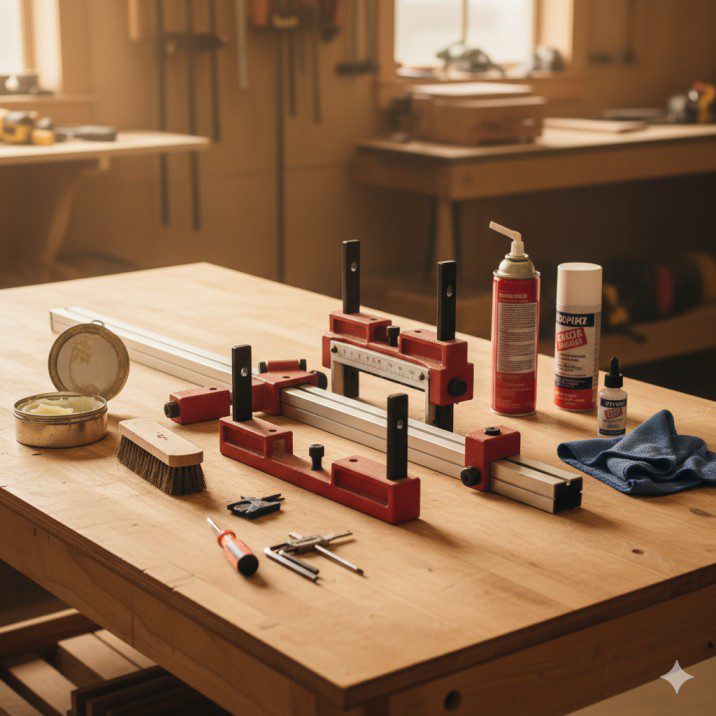
A well-maintained taper jig lasts decades and continues producing accurate cuts throughout its life. Here’s how to keep yours in top condition.
Immediate Post-Use Care
Remove All Sawdust: Buildup in adjustment mechanisms causes binding and inaccurate settings. Use compressed air or a brush to clear all dust after each use, paying special attention to threaded adjusters, pivot points, and measurement scales.
Check for Damage: Inspect the jig for any cracks, loose hardware, or worn surfaces. Small issues become big problems if ignored. Tighten any loose screws immediately—vibration from table saw operation naturally loosens fasteners over time.
Wax Sliding Surfaces: Apply paste wax to any surfaces that slide against your table saw or fence. This reduces friction and prevents rust on metal components. I wax my jigs every 3-4 uses, which takes about 60 seconds but makes a noticeable difference in smooth operation.
Long-Term Maintenance Schedule
Monthly Checks (for frequent users):
- Verify all measurement markings remain clearly visible
- Test adjustment mechanisms for smooth operation
- Inspect clamps and hold-downs for proper tension
- Apply lubricant to hinges and pivot points
Annual Deep Maintenance:
- Disassemble adjustable components and clean thoroughly
- Replace any worn hardware or damaged parts
- Re-apply finish to wooden surfaces if necessary
- Verify accuracy with test cuts and comparison to reliable squares
Storage Recommendations
Store Flat and Dry: Jigs stored at angles or in damp conditions can warp over time. Hang horizontal or lay flat in a climate-controlled area of your shop.
Protect Measurement Scales: If your jig has printed or painted measurement markings, store it where these won’t be rubbed or scratched by other tools.
Collapsed Position for Hinged Jigs: Always store adjustable jigs in their neutral or collapsed position. Leaving them under tension can cause wood compression or spring fatigue in metal components.
When to Replace vs. Repair
Repair Makes Sense When:
- Hardware needs replacement (screws, hinges, clamps)
- Finish is worn but structure is sound
- Adjustment mechanism needs cleaning or minor repair
- Measurement markings need reapplication
Replacement Is Better When:
- Base or fence surfaces are warped beyond correction
- Structural cracks exist in critical areas
- Jig no longer holds settings reliably after repair attempts
- Your needs have outgrown the jig’s capabilities
I’ve repaired the same shop-built taper jig three times over 12 years—replacing the hinge once and the workpiece hold-downs twice. The base and fence remain perfectly flat, so the jig continues performing like new. In contrast, I replaced a budget commercial jig after just two years when its adjustment mechanism stripped out and couldn’t be repaired economically.
Frequently Asked Questions
What’s the difference between a taper jig and a crosscut sled?
A taper jig is specifically designed for cutting consistent angles along the length of a board (rip cuts), while a crosscut sled is for making perpendicular cuts across the width of boards. They serve completely different purposes and aren’t interchangeable.
Can I use a taper jig on a jobsite table saw?
Yes, but ensure your jobsite saw has adequate rip capacity. Most taper jigs need 12-16 inches between the blade and fence for typical furniture leg work. Compact jobsite saws with limited rip capacity may not accommodate larger jigs. Check our table saw buying guide to understand capacity requirements.
How do I calculate the taper angle I need?
Use this formula: Taper angle (in degrees) = arctan(taper width ÷ taper length). For example, if you want a table leg to narrow by 1 inch over 30 inches of length: arctan(1 ÷ 30) = 1.9 degrees. Most scientific calculators and smartphone calculator apps have an arctan function.
Alternatively, work in “inches per foot”—a common furniture measurement. A 2-inch taper over 12 inches is called a “2-in-12 taper.”
Can I cut tapers in plywood or composite materials?
Yes, taper jigs work with any sheet goods. However, use a blade specifically designed for plywood or composites—these have more teeth and different tooth geometry to prevent chip-out on the veneer faces. Feed rates should be slightly slower than with solid wood.
Do I need a specific table saw for using taper jigs?
Any table saw with a standard miter gauge slot and rip fence can accommodate taper jigs. Cabinet saws, contractor saws, and hybrid saws all work well. The key requirements are a flat table surface and a fence that locks parallel to the blade.
How steep of a taper can I safely cut?
For safety and cut quality, limit tapers to approximately 15 degrees or less (about 3 inches per 12 inches). Steeper angles become increasingly dangerous as the workpiece orientation approaches a cross-cut rather than a rip cut. If you need steeper angles, consider using a bandsaw instead.
My taper cuts are burning the wood—what’s wrong?
Burning typically results from one of three issues: dull blade, feeding too slowly, or blade height set too low. Replace or sharpen your blade first, then verify proper blade height (1/4″ above the workpiece). If burning persists, increase your feed rate slightly.
Can I cut curves or radius tapers with a taper jig?
No, taper jigs are designed exclusively for straight-line tapers. Curved or radius tapers require a bandsaw with a fence or a template routing system. Attempting curves on a table saw with a taper jig is extremely dangerous.
Final Thoughts: Making Your Taper Jig Investment Work for You
Whether you build your own for $20 or invest in a precision commercial model, a table saw taper jig represents one of those workshop purchases that immediately proves its worth. The first time you cut four matching table legs in under 15 minutes—legs that fit together perfectly without shimming or adjustment—you’ll understand why this tool ranks among the most valuable jigs in any serious woodworker’s collection.
Start with simpler projects to build confidence. Cut tapered shims or wedges before tackling furniture legs. Master two-sided tapers before attempting four-sided work. Each successful project builds your skills and understanding of how wood behaves during angled cutting.
Remember that precision in setup determines precision in results. Taking an extra two minutes to verify your settings, check your measurements, and ensure secure workpiece holding prevents hours of frustration and wasted material. Woodworking rewards patience and attention to detail—nowhere is this more apparent than in taper cutting.
Most importantly, never compromise on safety. A taper jig should make your work safer by providing controlled, stable workpiece support. If your jig or technique feels unsafe, stop and reassess before proceeding. The most beautiful furniture means nothing if you’re injured creating it.
Ready to explore more table saw techniques and tools? Visit our comprehensive table saw reviews to find the perfect saw for your taper jig work, and check out our complete guide to table saw accessories for other essential workshop tools.
Quick Action Steps:
- Assess Your Needs: Review your typical projects and determine what taper angles you’ll cut most frequently
- Choose Your Jig: Decide between building a custom jig or purchasing a commercial model based on your budget and requirements
- Practice on Scrap: Make at least five test cuts with scrap wood before working on project pieces
- Document Your Settings: Keep a notebook of taper settings for different projects—you’ll thank yourself when building similar pieces later
- Maintain Regularly: Add jig maintenance to your workshop routine to ensure long-term accuracy and safety
Now it’s time to stop reading and start cutting. Your next furniture project is waiting for those perfect tapered legs, and with the knowledge you’ve gained here, you’re ready to create them with confidence and precision. Happy woodworking!

Finlay Connolly is a woodworking enthusiast and power tool specialist with over a decade of hands-on experience in the workshop. As the founder and lead writer at ProTableSawReviews.com, Finlay combines expert knowledge with real-world testing to help woodworkers, DIYers, and professionals choose the best tools for the job. With a sharp eye for detail and a passion for precision, Finlay is committed to providing trustworthy, practical advice backed by years of experience and research in the field. Whether you’re cutting dados or comparing fence systems, you can count on Finlay for honest, reliable reviews that make your next cut your best one.