
Introduction
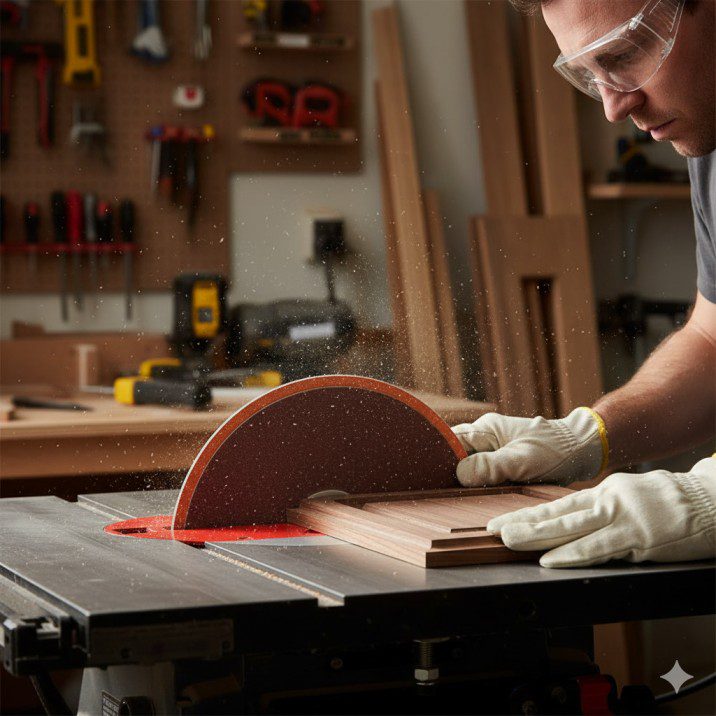
I’ll never forget the first time I tried hand-sanding the curved edges of 20 identical cabinet door frames. Three hours in, my arms were burning, the finish was inconsistent, and I’d barely made a dent in the pile. That’s when a fellow woodworker showed me his table saw sanding disc setup—and everything changed.
A table saw sanding disc transforms your standard table saw into a versatile sanding station, letting you smooth edges, shape curves, and refine workpieces with precision and speed that hand sanding simply can’t match. Whether you’re a weekend DIYer or a professional woodworker, this affordable accessory can dramatically expand your shop’s capabilities without requiring another bulky piece of equipment.
In this comprehensive guide, I’ll walk you through everything you need to know about table saw sanding discs—from choosing the right type for your projects to installation tips, safety practices, and real-world performance insights based on my own workshop testing.
What Is a Table Saw Sanding Disc?
A table saw sanding disc is a circular abrasive attachment that mounts directly onto your table saw’s arbor, replacing the blade. These discs typically range from 6 to 12 inches in diameter and feature hook-and-loop (Velcro) backing that accepts standard sanding pads in various grits.
Unlike dedicated disc sanders that take up valuable floor space, a table saw sanding disc leverages equipment you already own. The saw’s motor provides consistent rotational power, while the flat table surface serves as a stable reference plane for precise sanding operations.
How It Differs from Standard Disc Sanders
While standalone disc sanders are purpose-built machines, table saw sanding discs offer unique advantages:
- Space efficiency: No additional floor space required
- Cost-effective: Typically $30-$80 versus $200-$500 for dedicated sanders
- Large work surface: Your table saw’s surface provides excellent workpiece support
- Adjustable speed: Many modern table saws offer variable speed control
The trade-off? You can’t use your table saw for cutting while the sanding disc is mounted—though changing between accessories takes less than five minutes once you’ve done it a few times.
Types of Table Saw Sanding Discs
Not all sanding discs are created equal. Understanding the different types helps you choose the right option for your specific needs.
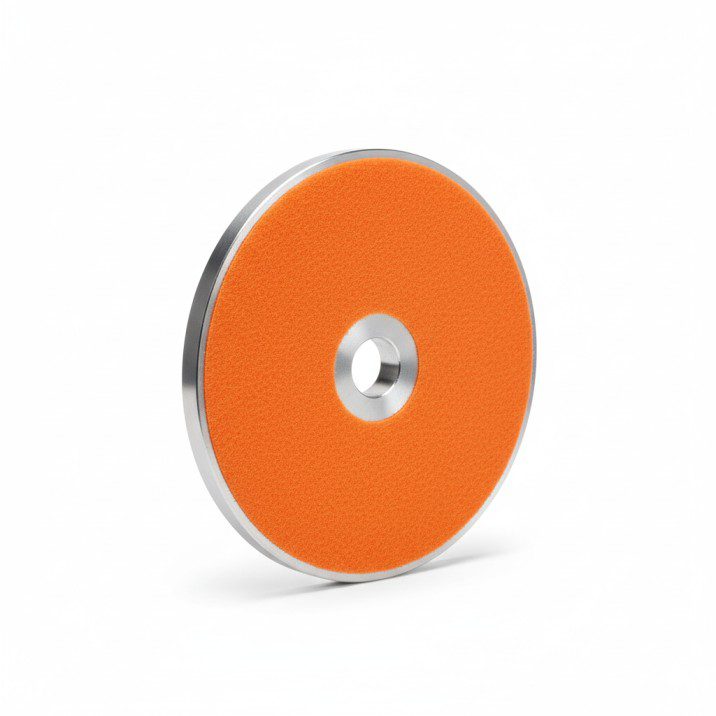
Rigid Aluminum Backing Plates

These heavy-duty discs feature solid aluminum construction with a hook-and-loop surface for attaching sanding pads.
Best for:
- Flat surface sanding
- Edge work requiring precise 90-degree angles
- Heavy stock removal
- Professional workshops with frequent use
Considerations: Less forgiving on contoured surfaces, can leave sanding marks if technique isn’t perfect.
Flexible Rubber Backing Plates
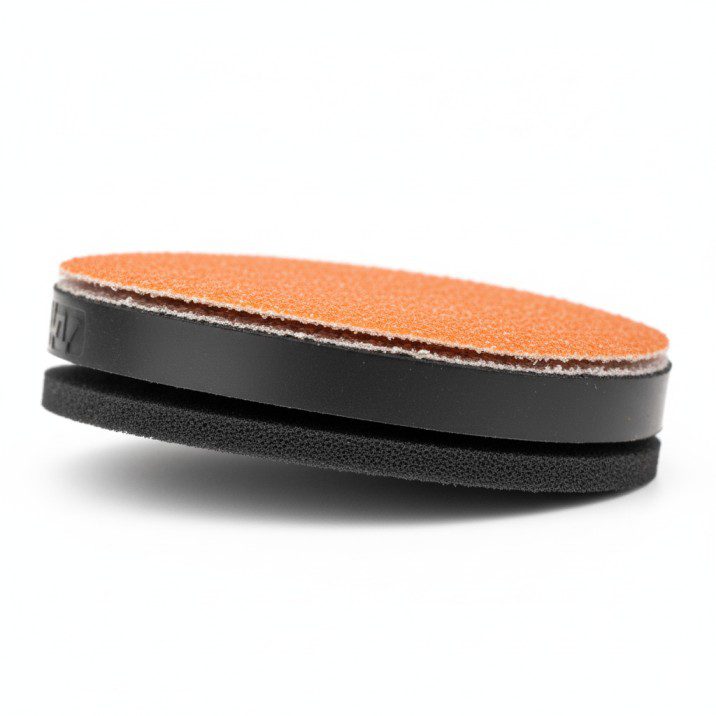
Constructed with a rubber or foam layer behind the abrasive surface, these discs provide some give during sanding.
Best for:
- Slight contours and shaped edges
- Finish sanding where gentle contact matters
- Beginners learning proper technique
- Projects requiring a softer touch
Considerations: Won’t remove material as aggressively as rigid plates, may wear faster under heavy pressure.
Combination Discs with Replaceable Centers
Some premium models feature interchangeable center sections, allowing you to switch between rigid and flexible configurations.
Best for:
- Versatile workshops handling varied projects
- Professional woodworkers who need adaptability
- Shops looking to invest once in quality equipment
Choosing the Right Grit: A Practical Guide
The sanding pad grit you select dramatically affects your results. Here’s what I’ve learned through trial and error:
| Grit Range | Purpose | Best Applications | My Experience Notes |
|---|---|---|---|
| 40-60 | Aggressive removal | Shaping curves, removing old finish, major leveling | Removes material fast—too aggressive for softwoods |
| 80-100 | Medium stock removal | Smoothing rough edges, preparing for finer grits | My go-to for initial edge cleanup on hardwoods |
| 120-150 | General smoothing | Pre-finish preparation, removing mill marks | Perfect balance for most furniture projects |
| 180-220 | Fine finishing | Final smoothing before stain or topcoat | Essential for preventing grain raising |
| 240-320 | Ultra-fine | Between coat sanding, delicate work | Rarely needed on table saw setup |
Pro tip: I keep three discs ready in my shop—80, 120, and 180 grit—which covers 95% of my sanding needs. Starting too fine wastes time; starting too coarse risks irreversible damage.
Installation: Step-by-Step Setup Guide
Installing a table saw sanding disc is straightforward, but proper setup ensures safe operation and optimal performance.
What You’ll Need
- Table saw sanding disc (sized for your arbor)
- Arbor wrench (usually included with your saw)
- Safety glasses
- Dust collection setup (highly recommended)
Installation Process
Step 1: Disconnect Power
Always unplug your table saw before changing accessories. I once knew someone who “just quickly” reached for the arbor while the saw was plugged in—don’t be that person.
Step 2: Remove the Blade
Lower the blade fully below the table. Use your arbor wrench to loosen the arbor nut (typically reverse-threaded on the right side). Remove the blade, outer washer, and set aside safely.
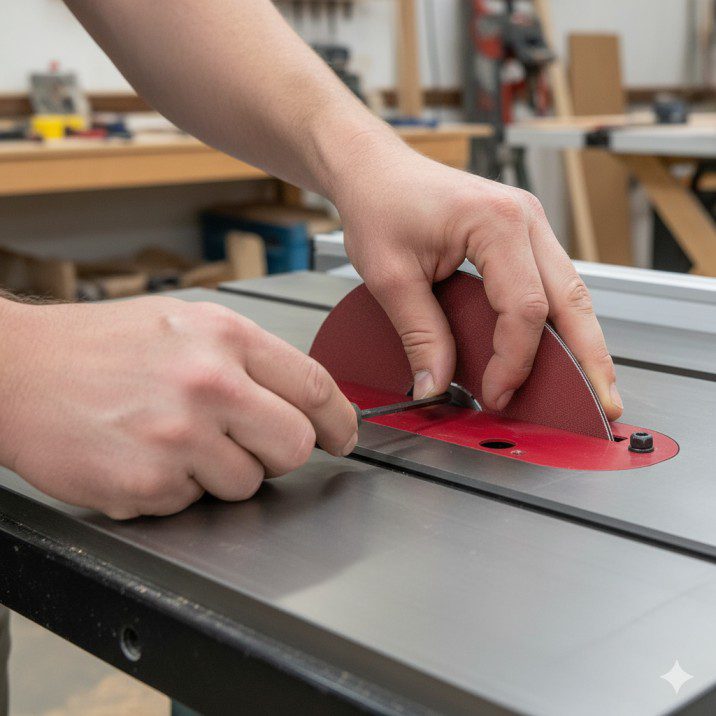
Step 3: Install the Sanding Disc
Place the sanding disc onto the arbor with the hook-and-loop surface facing outward. The disc should sit flush against the inner arbor flange. Replace the outer washer and arbor nut.
Step 4: Secure Firmly
Tighten the arbor nut securely using your wrench. The disc shouldn’t wobble when you rotate it by hand—any play indicates improper installation.
Step 5: Attach Sanding Pad
Press your chosen grit sanding pad firmly onto the hook-and-loop backing, ensuring complete contact across the entire surface.
Step 6: Test Run
Before working on actual projects, plug in the saw and run it briefly at low speed. Listen for any unusual vibrations or sounds. The disc should spin smoothly without wobble.
Safety Considerations: What You Must Know
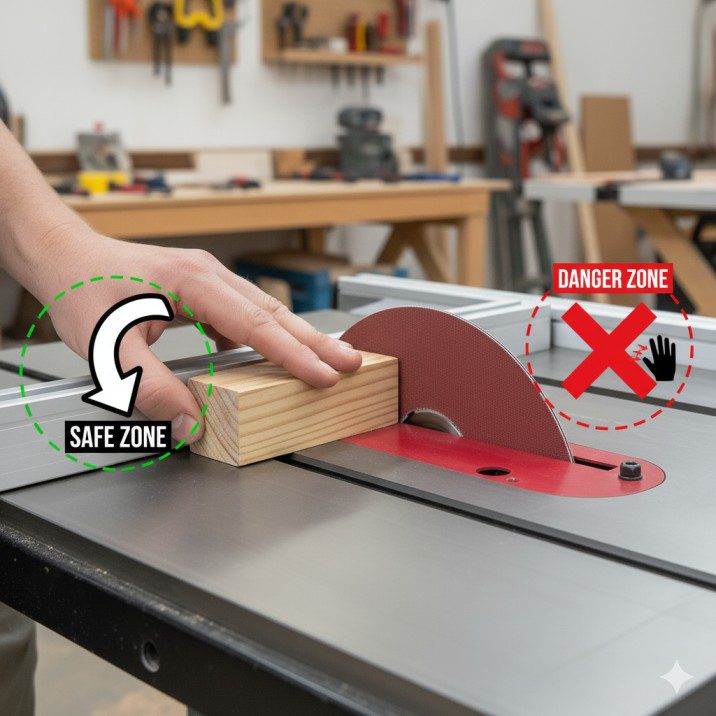
Table saw sanding discs are generally safer than saw blades—there’s no cutting action—but they still demand respect and proper safety protocols.
Essential Safety Practices
Directional Awareness
Always sand on the downward-rotating side of the disc (typically the left side when facing the saw). Sanding on the upward side can grab your workpiece and throw it—or your fingers—into the disc.
Speed Management
Most table saws run at 3,000-4,000 RPM, which works well for sanding discs. However, if your saw has variable speed, start around 2,000-2,500 RPM until you’re comfortable with the technique.
Pressure Control
Light, consistent pressure yields the best results. I’ve seen beginners push too hard, generating excessive heat that can burn the wood or glaze the sandpaper, making it ineffective.
Dust Management
Sanding generates enormous amounts of fine dust. Connect a shop vacuum or dust collector to your saw’s dust port—your lungs (and your shop’s cleanliness) will thank you.
Personal Protective Equipment
- Safety glasses: Non-negotiable—always
- Hearing protection: Table saws aren’t quiet
- Dust mask or respirator: Even with dust collection, fine particles escape
- No gloves: They can catch and pull your hand into moving parts
Techniques for Professional Results
Knowing how to use your table saw sanding disc properly separates amateur results from professional finishes.
Edge Sanding Technique
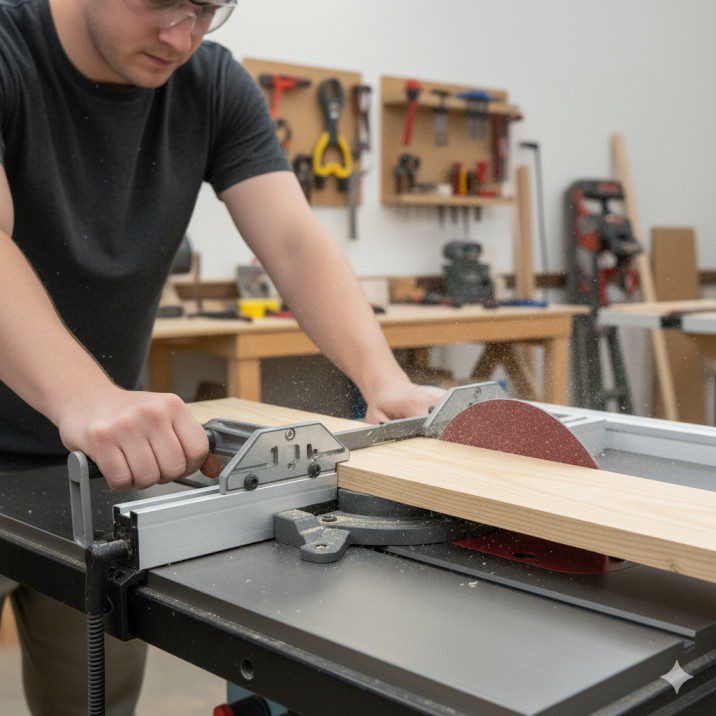
For straight edge work, use your miter gauge or a simple shop-made jig to maintain perpendicular contact. Here’s my process:
- Set up your workpiece against the miter gauge fence
- Position at the bottom-left of the disc (downward rotation)
- Apply light, even pressure as you move the piece across the disc
- Use multiple passes rather than trying to remove everything at once
- Check frequently with a square to ensure you’re maintaining your angle
Curve and Contour Sanding
This is where table saw sanding discs really shine. For curved edges:
- Freehand control: Guide the workpiece smoothly, maintaining consistent contact
- Follow the grain direction when possible to minimize tear-out
- Rotate the workpiece rather than changing your body position
- Keep moving: Holding one spot creates uneven sanding and potential burn marks
End Grain Sanding
End grain is notoriously difficult to sand smoothly. I’ve found these tips helpful:
- Start with a coarser grit (80-100) than you’d use for edge grain
- Sand until you see consistent scratch patterns across the entire surface
- Progress through finer grits—don’t skip steps
- A final pass with 180-220 grit produces furniture-quality results
Comparing Table Saw Sanding Discs: 2025 Top Picks
Based on my own testing and feedback from woodworking communities, here are the standout options for 2025:
| Model | Diameter | Backing Type | Price Range | Best For | My Rating |
|---|---|---|---|---|---|
| PSI Woodworking DISC6 | 6″ | Rigid aluminum | $35-$45 | Compact saws, detail work | 4.2/5 |
| Woodstock D2902 | 8″ | Flexible rubber | $50-$65 | General purpose, versatility | 4.5/5 |
| JessEm 05004 | 10″ | Rigid aluminum | $70-$85 | Professional shops, production work | 4.7/5 |
| Peachtree Quick-Change | 8″ | Interchangeable | $75-$90 | Multi-project workshops | 4.6/5 |
My personal recommendation: For most home woodworkers, the Woodstock D2902 offers the best balance of performance, versatility, and value. The flexible backing is forgiving while learning, and the 8-inch diameter handles most common project sizes.

Premium 60 PCS 6" PSA Sanding Discs – 10 Each of 80 100 120 180 240 400 Grit – 6 Inch Self Adhesive Stickyback Sandpaper Discs for DA Sander, Sand Automotive Car Paint, Woodworking Wood, Metal
- 2 HP, 120V/240V, single-phase (prewired for 120V)
- Motor Amps: 15A at 120V, 7.5A at 240V
- Enclosed cabinet bottom with 4
List Price :
Offer: 1425.00
Go to Amazon
POWERTEC 10 PCS 80 Grit 8 Inch PSA Sanding Discs, Self Stick Adhesive Sandpaper, 8" for Drywall, Woodworking, Paint, Epoxy with Random Orbital Sanders, DA Sanders, 4×36 Belt Disc Sander (110550)
- INCLUDES: 80 Grit / 10PK
- FUNCTION: Premium aluminum oxide disc designed for high quality sanding action, high precision cuts, uniform finishes and most importantly – professional looking results. Perfect for working with wood, non-ferrous metals, plastic, fiberglass and more
- GRIT TYPE: Medium 80 grit – Removing Tiny Imperfections
New starting from: 13.89
Go to AmazonProfessional shops processing higher volumes should consider the JessEm model—its rigid construction and premium materials justify the higher price through longevity and consistent performance.
Maintenance and Care Tips
Proper maintenance extends the life of your table saw sanding disc and ensures consistent performance.
Cleaning Your Sanding Discs
Wood resin and pitch build up on sanding pads, reducing effectiveness. Every 2-3 hours of use:
- Use a sanding belt cleaner stick (the rubber-like bars sold at hardware stores)
- Press it gently against the spinning disc for a few seconds
- Stubborn buildup responds to mineral spirits on a cloth (with saw unplugged)
When to Replace Sanding Pads
Don’t wait until pads are completely worn. Replace when:
- Sanding takes noticeably longer for the same results
- You see shiny, glazed areas on the pad surface
- The pad begins tearing or separating from the backing
- You notice burn marks on your workpieces
In my experience, quality pads last 4-8 hours of active sanding time, depending on wood hardness and pressure applied.
Storage Considerations
When not in use, store your sanding disc in a dry location away from temperature extremes. I keep mine in a labeled plastic bin with extra sanding pads organized by grit—makes setup quick when inspiration strikes.
Common Mistakes (And How to Avoid Them)
After years of using table saw sanding discs and helping others troubleshoot issues, these are the most frequent problems I encounter:
Mistake 1: Sanding on the Wrong Side
The fix: Always work on the downward-rotating side. Mark it with tape if needed until it becomes automatic.
Mistake 2: Excessive Pressure
The fix: Let the abrasive do the work. If you’re pushing hard, you need a coarser grit or more patience.
Mistake 3: Skipping Grits
The fix: Progress through grits methodically. Jumping from 80 to 180 leaves visible scratch patterns that finer grits can’t eliminate.
Mistake 4: Ignoring Dust Collection
The fix: Proper dust collection isn’t optional—it’s essential for health, visibility, and pad longevity.
Mistake 5: Using Worn Pads
The fix: Replace pads before they’re completely spent. The last 20% of pad life produces 50% worse results.
Creative Applications Beyond Basic Sanding
Once you’re comfortable with basic techniques, a table saw sanding disc opens up creative possibilities:
Small Part Production
I use mine for batch production of small parts like wooden drawer pulls, game pieces, or decorative elements. The consistent results across multiple pieces are impossible to achieve with hand sanding.
Shopsmith-Style Versatility
For workshops with limited space, a table saw sanding disc essentially gives you disc sander functionality without the dedicated tool. Combined with other table saw accessories, it’s a space-efficient approach to expanding capabilities.
Kumiko and Precision Work
The flat reference surface of your table saw table makes sanding small, delicate pieces—like kumiko lattice components—much easier than with handheld tools.
Integrating with Your Workshop Workflow
A table saw sanding disc works best when integrated thoughtfully into your overall workshop process.
For comprehensive guidance on choosing the right table saw for your needs, check out our detailed table saw buying guide. Understanding your saw’s capabilities helps you select compatible accessories.
Once you’ve invested in a sanding disc, explore other table saw accessories that can further expand your saw’s versatility—from dado blade sets to specialized jigs.
For project-specific techniques and safety protocols, our table saw how-to guide offers step-by-step instructions for getting the most from your equipment.
Frequently Asked Questions
Can I use a table saw sanding disc on any table saw?
Most standard table saws with 5/8-inch arbors accept sanding discs. Check your saw’s specifications and ensure the disc diameter doesn’t exceed your throat plate opening.
How long do sanding pads typically last?
Quality hook-and-loop sanding pads last 4-8 hours of active use. Harder woods, aggressive pressure, and coarser grits reduce lifespan.
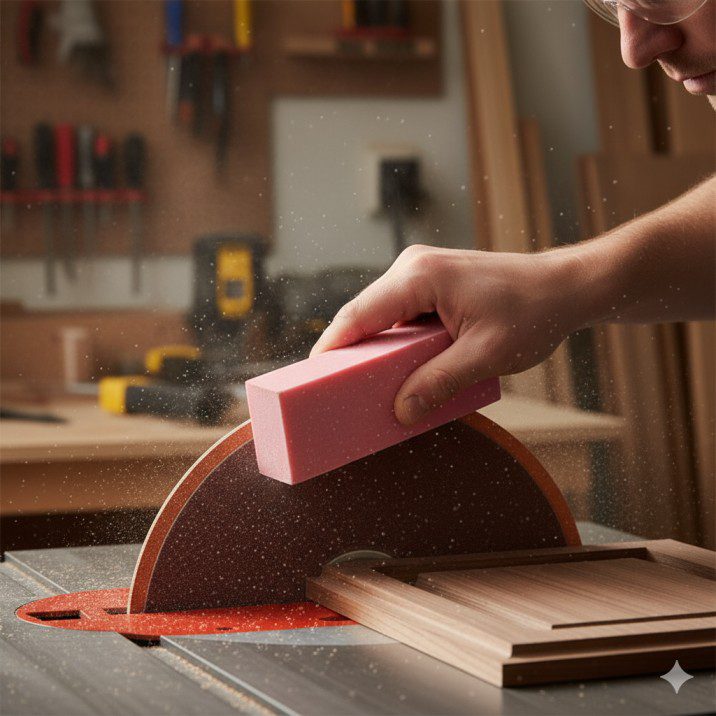
Is it safe to sand small pieces?
Yes, but use push blocks or specialized jigs to keep fingers away from the disc. Never sand pieces so small that your fingers must approach within 4 inches of the disc.
Can I leave the disc mounted between uses?
Absolutely. Many woodworkers keep a dedicated older table saw with a sanding disc permanently mounted. If you only have one saw, changing between blade and disc takes less than five minutes.
What speed should I run my table saw for sanding?
Standard table saw speeds (3,000-4,000 RPM) work well for most sanding operations. If your saw has variable speed, starting around 2,500 RPM gives you better control while learning.
Conclusion: Unlock Your Table Saw’s Hidden Potential
A table saw sanding disc represents one of the most cost-effective upgrades you can make to your workshop. For less than the price of a premium saw blade, you gain a versatile sanding station that handles tasks from aggressive stock removal to finish-ready smoothing—all without sacrificing precious shop floor space.
The initial learning curve is gentle, the safety considerations are straightforward, and the results speak for themselves. Whether you’re cleaning up bandsaw cuts, perfecting curved edges, or batch-processing identical components, a table saw sanding disc delivers consistent, professional results that hand sanding simply can’t match.
Start with a quality 8-inch disc, stock three essential grits (80, 120, and 180), and invest in proper dust collection. Within your first project, you’ll wonder how you ever managed without this simple but transformative accessory.
Ready to upgrade your table saw’s capabilities? Explore our best table saw reviews to ensure your saw is equipped to handle a sanding disc and other accessories that can revolutionize your woodworking.

Finlay Connolly is a woodworking enthusiast and power tool specialist with over a decade of hands-on experience in the workshop. As the founder and lead writer at ProTableSawReviews.com, Finlay combines expert knowledge with real-world testing to help woodworkers, DIYers, and professionals choose the best tools for the job. With a sharp eye for detail and a passion for precision, Finlay is committed to providing trustworthy, practical advice backed by years of experience and research in the field. Whether you’re cutting dados or comparing fence systems, you can count on Finlay for honest, reliable reviews that make your next cut your best one.