If you’ve ever battled with a wobbly, inaccurate table saw fence that drifts mid-cut, you know the frustration. I’ve been there—measuring twice, cutting once, and still ending up with boards that are off by 1/16″. The game-changer? Installing a universal table saw fence that transformed my budget saw into a precision cutting machine. Whether you’re dealing with a hand-me-down contractor saw or looking to resurrect an older model, a quality aftermarket fence can be the difference between acceptable results and professional-grade accuracy.
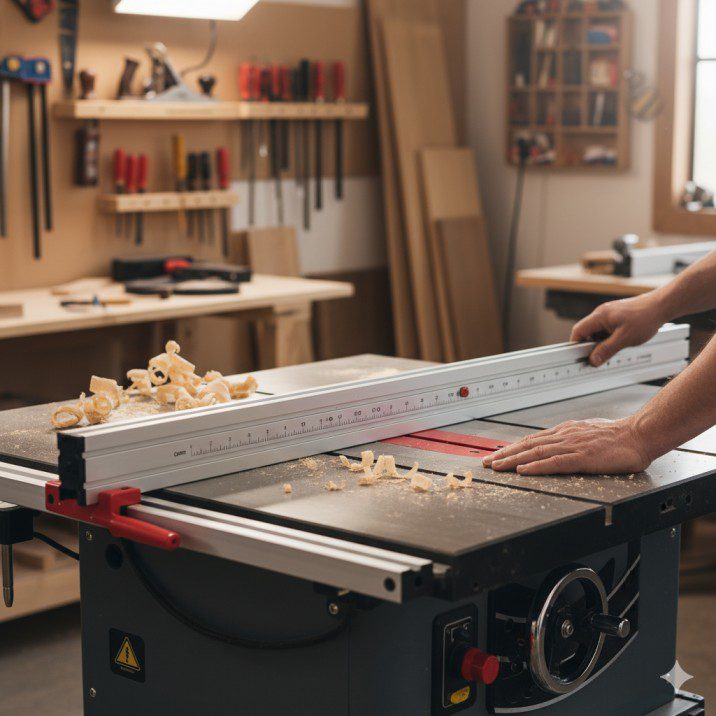
A universal table saw fence is designed to fit multiple brands and models, offering upgrade potential without requiring a brand-specific replacement. In 2025, these fence systems have evolved significantly, with manufacturers incorporating features like micro-adjustments, digital readouts, and tool-free installation that were once reserved for premium saws.
Let’s dive into everything you need to know about choosing, installing, and getting the most from a universal fence system.
What Makes a Table Saw Fence “Universal”?
The term “universal” refers to compatibility across different saw brands and models rather than a one-size-fits-all solution. These fence systems include adjustable mounting brackets, variable rail lengths, and adaptable components that accommodate different table depths and rail configurations.
Key Characteristics of Universal Fence Systems
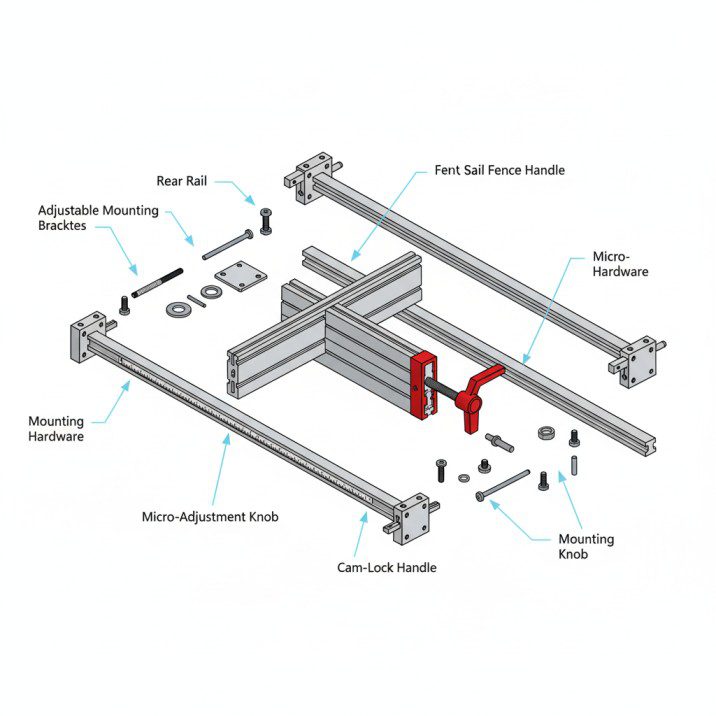
Adjustable Mounting Hardware: Most universal fences come with multiple bracket options or sliding mounting plates that adjust to fit table thicknesses ranging from 3/4″ to 2″ and rail spacing from 27″ to 52″. This flexibility allows a single fence design to work with Craftsman, Delta, Ridgid, and many other brands.
Modular Rail Systems: Rather than fixed-length rails, quality universal fences feature sectional rails that can be extended or shortened. I’ve installed these on tables ranging from 20″ to 30″ deep without any issues—you simply trim the front rail or add extension sections.
Standardized Locking Mechanisms: Universal fences typically use cam-action locks or lever-based clamping systems that work independently of the saw’s original mounting points. This means you’re not relying on proprietary attachment methods.
Why Upgrade to an Aftermarket Fence System?
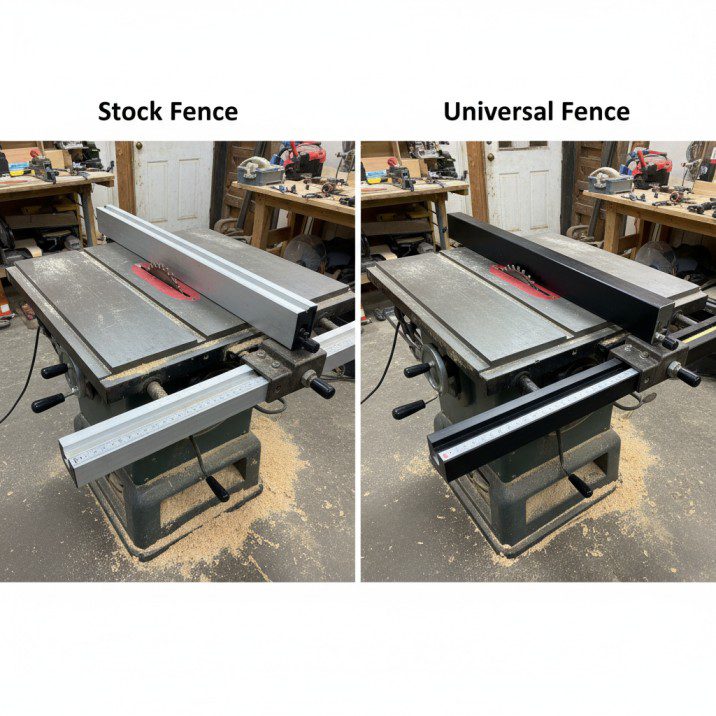
Common Problems with Factory Fences
Through years of working with different table saws, I’ve encountered the same issues repeatedly with stock fences, particularly on entry-level and mid-range models:
- Deflection under pressure: Thin aluminum extrusions that flex when you apply side pressure during cuts
- Rack and pinion wear: Plastic gears that develop slop over time, causing the fence to shift
- Inconsistent lockdown: Single-point locking that allows the fence to pivot slightly when tightened
- Limited capacity: Short rails that restrict rip capacity to 24″ or less
One contractor I know was losing $200+ monthly on wasted material from inaccurate cuts before upgrading his fence—the investment paid for itself in under three months.
Performance Benefits You’ll Actually Notice
When I upgraded to a universal fence system on my contractor saw, three improvements stood out immediately:
- Repeatability: Setting the fence to 12″ and getting exactly 12″ on every cut, even after unlocking and repositioning
- Stability: No more fence drift during long rip cuts through hardwoods
- Expanded capacity: Going from 24″ to 36″ or 50″ rip capacity opened up possibilities for sheet goods
Top Universal Table Saw Fence Systems in 2025
Here’s a comparison of leading aftermarket fence options currently available:
| Fence System | Rip Capacity | Accuracy Claim | Installation Time | Price Range | Best For |
|---|---|---|---|---|---|
| Vega PRO 50 | 50″ right | ±1/64″ over 50″ | 2-3 hours | $450-550 | Professional shops |
| Shop Fox Classic | 25″-52″ options | ±1/32″ | 1-2 hours | $300-400 | Home woodworkers |
| Delta T3 | 30″-52″ options | ±1/32″ | 1.5-2 hours | $350-450 | General use |
| Accusquare XL | 40″-50″ options | ±1/64″ | 2-4 hours | $500-600 | High-precision work |
| PSI T-Square | 36″-50″ options | ±1/16″ | 1 hour | $150-200 | Budget upgrades |
Vega U50 Table Saw Fence System: 36-Inch Fence Bar, 50-Inch to Right
- Table saw fence system fits a variety of saws; 2-1/2-inches fence height
- 36-inch fence bar (50 inches to right, 8 inches to left of blade); micro adjustment and auxiliary table support
- Steel construction; assembly required
New starting from: 414.99
Go to AmazonShop Fox W2005 Classic Fence with Standard Rails, Silver, White
- Wide right angle design for maximum accuracy and support
- Single locking cam action lever HDPE plastic fence surface for extremely low sliding resistance
- Standard rails provide 25-Inch maximum rip to the right of the blade
List Price :
Offer: 425.00
Go to AmazonFeature Breakdown: What Actually Matters
Micro-Adjustment Dials: Systems with fine-adjustment knobs (typically 0.001″ per click) make precise fence positioning significantly easier. I use this feature constantly when sneaking up on final dimensions for joinery work.
Digital Readouts (DRO): The 2025 models with LCD displays eliminate measurement errors entirely. While not essential, they speed up setup considerably—especially for decimal measurements like 14.375″.
Dual-Point Locking: Fences that lock at both front and rear rails eliminate any possibility of the fence angling during cuts. This became non-negotiable for me after repeatedly dealing with single-lock systems that would pivot slightly.
Installation Guide: What to Expect
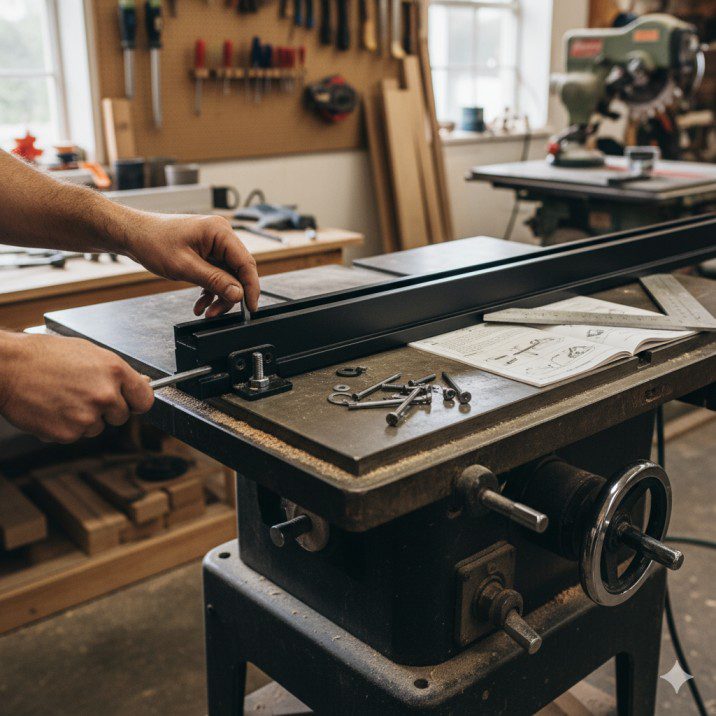
Tools and Time Requirements
Most universal fence installations require basic tools you likely already have:
- Allen wrenches (usually included)
- Standard wrenches (10mm, 13mm common sizes)
- Carpenter’s square
- Measuring tape
- Level
- 30-60 minutes for simple systems, 2-4 hours for complex installations
Step-by-Step Installation Process
1. Remove Your Old Fence System: This typically involves loosening bolts under the table that secure the front and rear rails. On some saws, you’ll need to access these from inside the cabinet—bring a flashlight.
2. Prepare the Table Surface: Clean the table edges thoroughly. Any sawdust or rust under the mounting brackets will affect alignment. I use mineral spirits and 220-grit sandpaper for this.
3. Install Front Rail: Position the universal fence’s front rail according to the manufacturer’s template. Most systems provide alignment jigs or measurements from the blade. This is the critical step—take your time ensuring it’s parallel to the miter slots.
4. Mount Rear Rail: The rear rail typically has more adjustment range. Use a straightedge across both rails to confirm they’re parallel before final tightening.
5. Calibration: Measure fence-to-blade distance at front and rear. Adjust until both measurements match within 1/64″. Some fences have built-in indicators for this; others require manual measurement.
Common Installation Challenges
Non-Standard Table Thickness: If your saw table is thicker or thinner than typical, you may need to add shims or source longer mounting bolts. I keep an assortment of 1/4-20 bolts in various lengths for this reason.
Existing Hole Patterns: Old mounting holes may not line up perfectly. Rather than trying to use them, most installers simply drill new holes—this provides a clean starting point.
Rail Extensions Interfering with Stands: On mobile saw stands, extended rails sometimes hit the support legs. Measure carefully before ordering extended capacity versions.
Maximizing Accuracy: Calibration and Maintenance

Initial Calibration Procedure
Even the best universal fence requires proper setup to achieve advertised accuracy. Here’s my calibration routine:
Blade Parallelism Check: Before touching the fence, ensure your blade is parallel to the miter slots within 0.002″. An out-of-alignment blade will sabotage fence accuracy regardless of quality.
Fence Face Verification: Use a precision straightedge (36″ minimum) against the fence face. Any bow or twist needs correction through the fence’s adjustment mechanisms.
Cursor/Scale Alignment: Most fences have an adjustable cursor or indicator. Set the fence to a known distance using precision measuring tools, then adjust the cursor to match.
Ongoing Maintenance Tasks
Monthly Checks:
- Verify front and rear rail bolts haven’t loosened from vibration
- Clean sawdust from fence tube channels using compressed air
- Check cursor alignment with a precision rule
Seasonal Adjustments: Temperature and humidity changes affect cast iron tables. I re-check fence parallelism at season changes and typically find 0.001″-0.003″ drift that requires minor adjustment.
Lubrication Points:
- Apply dry lubricant (PTFE spray) to fence tube channels twice yearly
- Lubricate rack and pinion gears (if equipped) with white lithium grease annually
- Keep locking mechanisms clean and free of pitch buildup
Compatibility Considerations: Will It Fit Your Saw?
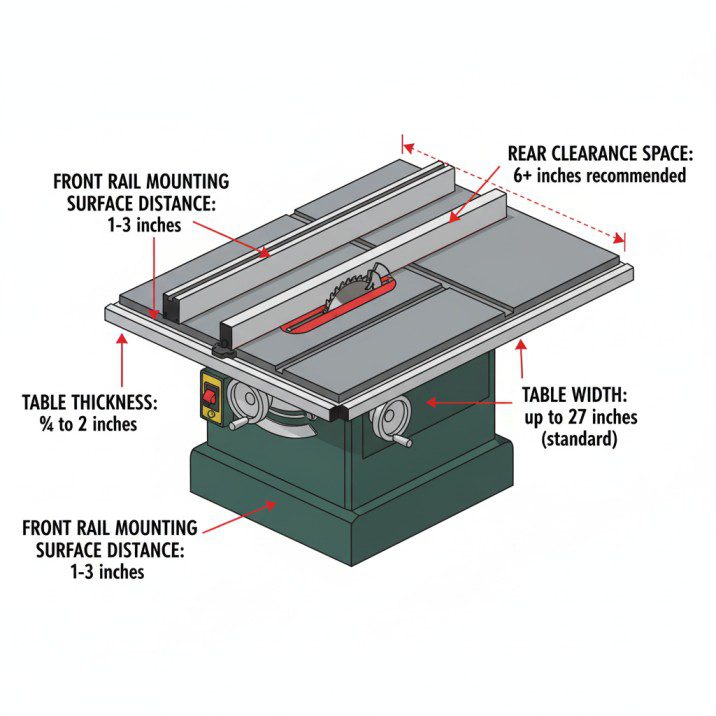
Measuring Your Saw for Compatibility
Before purchasing any universal fence, measure these critical dimensions:
- Front Rail Mounting Surface: Distance from table edge to where the rail will mount (typically 1″-3″)
- Table Thickness: Measure at the front edge where mounting brackets will attach
- Desired Rip Capacity: Measure from blade to right edge of table, then decide if you want flush or extended capacity
- Rear Rail Clearance: Check for obstructions behind the table (motor housing, dust collection, cabinet back)
Saws with Known Compatibility Issues
Cabinet Saws with Rear-Mounted Trunnions: Some older Powermatic and Delta models have limited rear rail mounting options. Check manufacturer compatibility charts carefully.
Ultra-Compact Benchtop Saws: Tables under 20″ deep often require shortened rails or specialized brackets. The PSI T-Square system works well for these applications in my experience.
European-Style Sliding Table Saws: These typically have unique rail configurations that aren’t compatible with standard universal fences. Stick with manufacturer-specific options.
Adapter Brackets and Workarounds
Several companies manufacture adapter plates for specific saw models. These bolt to your table using the original fence mounting holes, then provide standardized mounting points for universal fences. I’ve used these successfully on older Craftsman saws where direct mounting was challenging.
Universal Fence vs. Manufacturer Replacement Parts
When to Choose Universal Over OEM
Your saw model is discontinued: Aftermarket universal fences often outlast the saws they’re designed to fit, making them ideal for vintage equipment.
OEM replacement cost is prohibitive: Some manufacturer-specific fences cost $600+, while comparable universal options start at $300.
You want features your original fence lacked: Digital readouts, micro-adjustments, or extended capacity may not be available as OEM parts.
When OEM Makes More Sense
Current-model premium saws: If you own a recent SawStop, Powermatic, or similar high-end saw, the manufacturer’s fence is typically optimized for that specific machine geometry.
Warranty concerns: Installing aftermarket components may void warranties on new saws. Always check your warranty terms first.
Specialized integrated features: Some modern saws have fence systems that interact with blade guards, riving knives, or electronic features. Replacing these with universal fences may sacrifice safety features.
Cost-Benefit Analysis: Is the Investment Worth It?
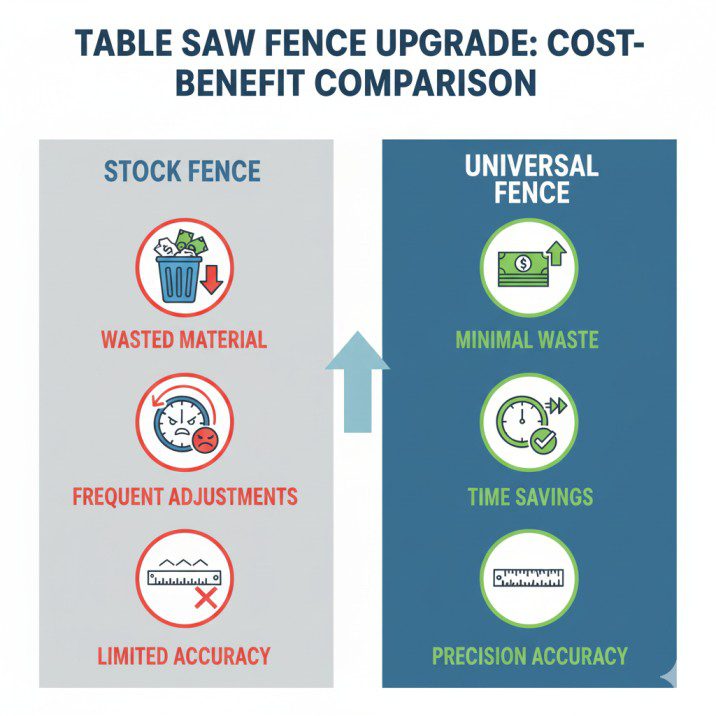
True Cost of Ownership
Beyond the initial purchase price, consider:
| Cost Factor | Universal Fence | Stock Fence |
|---|---|---|
| Initial Investment | $150-600 | Included with saw |
| Installation Labor | DIY or $100-200 | N/A |
| Accuracy-Related Waste | Minimal (±1/64″) | Variable (±1/16″ common) |
| Resale Value Impact | +$100-200 to saw value | Baseline |
| Lifespan | 15-20+ years | 5-10 years typical |
Material Savings Calculation
Here’s a real scenario from my shop: Before upgrading, I averaged 3-4 sheets of plywood per month that had cuts too inaccurate for finish work—that’s $150-200 in wasted material. After installing a Vega PRO 50, material waste dropped to under $20 monthly. The fence paid for itself in under four months.
For professional shops processing multiple sheets daily, the ROI is even faster. One cabinetmaker I know calculated his universal fence upgrade saved 2.5 hours weekly in remakes and adjustment time—at $75/hour shop rate, that’s $9,750 annually.
Real-World Performance: User Experiences
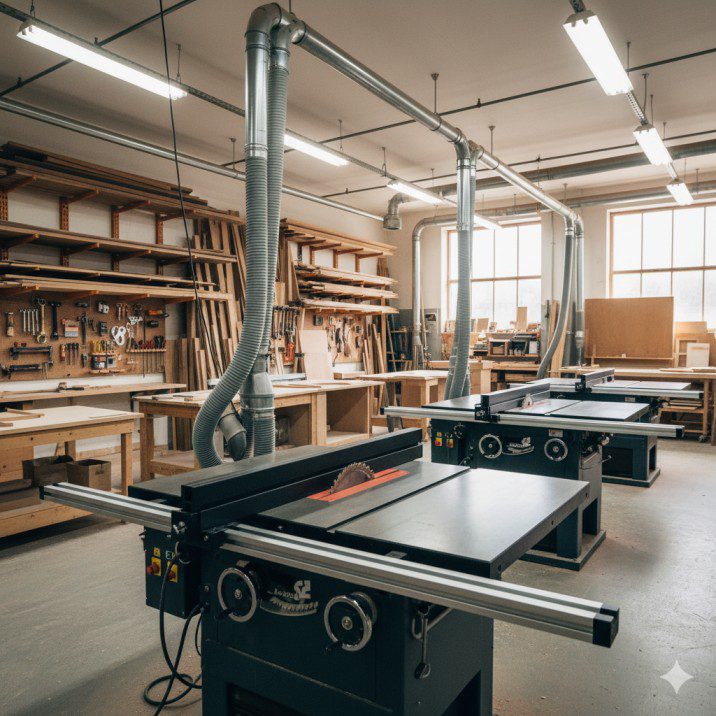
Case Study: Contractor Saw Transformation
A reader recently shared his experience upgrading a 15-year-old Ridgid R4512 with a Shop Fox Classic fence. His original fence had developed 1/8″ of deflection at the far end, making crosscuts unpredictable. After installation:
- Crosscut repeatability improved to ±1/32″
- Rip capacity increased from 30″ to 40″
- Setup time for joinery cuts reduced by 60%
- Total investment: $325 plus 2 hours installation time
Professional Shop Perspective
Cabinet shops running production work need absolute reliability. I spoke with a furniture maker who operates three table saws—two equipped with Accusquare XL universal fences. His feedback: “The initial cost stung, but we haven’t had a single measurement-related issue in 18 months. Before, we were adjusting fences multiple times daily.”
Frequently Asked Questions
Can I install a universal fence on a benchtop saw?
Yes, but with limitations. Benchtop saws typically support fences up to 36″ rip capacity due to table size constraints. Ensure your model has sufficient table edge for mounting brackets—some ultra-compact saws lack adequate mounting surfaces. Check out our table saw buying guide for compatibility considerations.
How accurate can I expect a universal fence to be?
Quality systems achieve ±1/32″ over 50″ consistently, with premium models reaching ±1/64″. This depends heavily on proper installation and calibration. Your saw’s blade alignment is equally important—a perfect fence won’t compensate for blade runout or misalignment.
Will installation damage my table saw?
Most installations require drilling 2-4 new mounting holes, which is reversible. If you plan to restore the saw to original condition later, save all original parts. The process is similar to other table saw accessories installations—straightforward with proper tools.
Do universal fences work with dado blade setups?
Most do, but verify the fence face design. Some fences have removable sacrificial faces specifically for dado work, preventing damage to the main aluminum extrusion. Check manufacturer specifications regarding maximum dado width clearance.
Can I add a digital readout later?
Many universal fence systems offer retrofit DRO kits. Vega, Shop Fox, and Delta all sell add-on digital displays for $100-200 that mount to existing cursors. Installation is typically tool-free and takes 15-30 minutes.
How long does installation typically take?
Expect 1-3 hours for your first universal fence installation. Experienced installers complete basic systems in under an hour. Complex installations with extended rails, digital readouts, and custom mounting can reach 4-5 hours. Our table saw how-to guide covers detailed installation procedures.
Making the Right Choice for Your Shop
Choosing a universal table saw fence comes down to matching your accuracy requirements, budget, and saw compatibility. If you’re struggling with an inaccurate stock fence, even a mid-range universal upgrade will transform your woodworking experience.
For hobbyists working primarily with construction lumber and simple projects, a $200-300 fence system provides excellent value. Professional woodworkers and serious hobbyists who demand tight tolerances for furniture work should consider $400-600 premium systems with micro-adjustments and proven accuracy claims.
Before purchasing, measure your saw carefully, verify compatibility with manufacturer charts, and read recent user reviews focusing on your specific saw model. The right universal fence will serve you reliably for decades—it’s one of the few tool upgrades that genuinely improves both productivity and work quality.
Ready to upgrade? Visit our best table saw reviews to see which saws pair best with aftermarket fence systems, and explore our comprehensive guides for maximizing your table saw’s potential.
Final Recommendation: Start with measuring your saw and identifying 2-3 compatible universal table saw fence options within your budget. Read installation manuals before purchasing to ensure you have necessary tools. Most importantly, don’t rush the calibration process—a properly installed fence will deliver years of precision cutting that makes every project more enjoyable.

Finlay Connolly is a woodworking enthusiast and power tool specialist with over a decade of hands-on experience in the workshop. As the founder and lead writer at ProTableSawReviews.com, Finlay combines expert knowledge with real-world testing to help woodworkers, DIYers, and professionals choose the best tools for the job. With a sharp eye for detail and a passion for precision, Finlay is committed to providing trustworthy, practical advice backed by years of experience and research in the field. Whether you’re cutting dados or comparing fence systems, you can count on Finlay for honest, reliable reviews that make your next cut your best one.


