
When it comes to woodworking, ripping—cutting wood along the grain to create narrower boards—is a fundamental task. Whether you’re crafting furniture, building cabinets, or preparing lumber for a DIY project, choosing the right tool for ripping can make or break your results. Two of the most popular tools for this job are the band saw and the table saw. But which is better for ripping? In this comprehensive guide, we’ll dive deep into the band saw vs. table saw for ripping debate, comparing their features, strengths, weaknesses, and ideal use cases. By the end, you’ll know exactly which tool suits your woodworking needs and how to maximize its potential.

Ripping requires precision, power, and safety, and both band saws and table saws have unique advantages. Whether you’re a professional woodworker or a hobbyist, understanding the differences between these tools will help you achieve cleaner cuts, save time, and work more safely. Let’s explore the key factors to consider, from cutting capacity to cost, and provide actionable tips to elevate your ripping game.
What is Ripping in Woodworking?
Before we compare the tools, let’s clarify what ripping entails. Ripping is the process of cutting wood parallel to its grain, typically to reduce the width of a board or create long, straight strips. For example, you might rip a 6-inch-wide oak plank into two 3-inch-wide pieces for a table leg. This differs from crosscutting, which cuts across the grain to shorten the board’s length.
Ripping demands:
- Precision: Straight, consistent cuts to maintain board uniformity.
- Power: Enough force to slice through hardwoods like maple or softwoods like pine.
- Safety: Features to prevent kickback, blade binding, or injury.
Both band saws and table saws can rip wood, but their approaches, capabilities, and results vary significantly. Let’s break down each tool’s role in ripping and how they stack up.
Understanding Band Saws for Ripping
A band saw is a versatile woodworking tool with a continuous, flexible blade that loops around two or three wheels, driven by a motor. It’s known for its ability to make curved cuts, but it’s also highly effective for ripping, especially for specific materials and applications.
How Band Saws Rip Wood

- The blade moves in a continuous downward motion, cutting through the wood as you push the material along the table.
- Band saws excel at resawing (a type of ripping where thick boards are cut into thinner slabs) and ripping irregular or thick stock.
- Blades come in various widths and tooth configurations (e.g., 3–6 TPI for ripping), allowing customization for different woods.
Key Features for Ripping
- Throat Capacity: Determines the maximum width of the board you can rip (e.g., 14–36 inches on larger models).
- Cutting Height: Sets the thickness of the material (e.g., 6–12 inches for most benchtop band saws).
- Blade Tension and Tracking: Ensures straight cuts by keeping the blade stable.
- Fence: A rip fence guides the wood for consistent cuts, similar to a table saw.
- Motor Power: Typically 1–3 HP, sufficient for hardwoods if paired with a sharp blade.
Advantages of Band Saws for Ripping
- Versatility: Ideal for ripping thick, irregular, or green (wet) wood that table saws struggle with. Great for resawing lumber into veneers or thin boards.
- Narrow Kerf: Band saw blades (e.g., 1/8–1/2 inch wide) remove less material, preserving more wood compared to table saw blades (1/8 inch or wider).
- Safety: Lower risk of kickback due to the downward blade motion, making it safer for beginners or uneven stock.
- Curved and Specialty Cuts: Can transition from ripping to curved cuts without changing tools, perfect for complex projects.
- Quiet Operation: Band saws are generally quieter than table saws, improving workshop comfort.
Limitations of Band Saws for Ripping
- Slower Cutting Speed: Ripping on a band saw is slower than on a table saw, especially for long, straight cuts.
- Blade Drift: Blades may wander slightly, requiring adjustments or a high-quality fence to maintain straightness.
- Precision Challenges: Less accurate for perfectly straight, production-level ripping compared to a table saw’s rigid setup.
- Setup Time: Changing blades or adjusting tension for ripping can be time-consuming.
- Footprint: Larger band saws require significant workshop space, though benchtop models are more compact.
Best Use Cases
- Ripping thick hardwoods (e.g., 8/4 oak) or softwoods for furniture making.
- Resawing lumber into thin slabs for box-making or veneer.
- Cutting irregular or reclaimed wood with knots or uneven grain.
- Projects requiring both ripping and curved cuts, like chair backs or decorative panels.
Understanding Table Saws for Ripping

A table saw is a woodworking staple, featuring a circular blade mounted on an arbor, protruding through a flat table. It’s the go-to tool for ripping due to its precision, speed, and power, making it a favorite among cabinetmakers and carpenters.
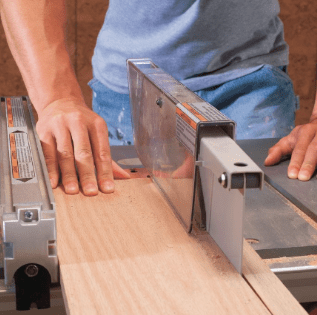
How Table Saws Rip Wood
- The spinning blade cuts as you push the wood across the table, guided by a rip fence for straightness.
- Table saws are optimized for long, straight cuts, producing clean edges ideal for joinery or panel glue-ups.
- Blades (e.g., 24–40 TPI ripping blades) are designed for specific materials, ensuring smooth, tear-out-free cuts.
Key Features for Ripping
- Rip Capacity: Determines the maximum board width (e.g., 24–52 inches, depending on the fence and table size).
- Blade Size: Typically 10–12 inches, with ripping blades optimized for low TPI (teeth per inch).
- Fence System: High-quality fences (e.g., Biesemeyer, Vega) ensure parallel cuts with minimal drift.
- Motor Power: 1.5–5 HP, providing ample force for hardwoods and production work.
- Safety Features: Riving knives, blade guards, and anti-kickback pawls reduce risks during ripping.
Advantages of Table Saws for Ripping
- Speed and Efficiency: Table saws rip faster than band saws, ideal for high-volume projects or production shops.
- Precision: Rigid fences and flat tables produce perfectly straight, repeatable cuts, crucial for joinery or cabinetry.
- Power: Strong motors handle dense hardwoods like walnut or maple with ease, even for long rips.
- Versatility: With the right blade (e.g., “table saw ripping blade” from your keyword list), table saws can rip plywood, MDF, or solid wood.
- Accessories: Features like “table saw extension tables” or “table saw jigs” (from your keyword list) enhance ripping accuracy and capacity.
Limitations of Table Saws for Ripping
- Wider Kerf: Table saw blades remove more material (1/8 inch or more), wasting wood compared to band saws.
- Kickback Risk: Improper technique or warped wood can cause kickback, posing safety hazards.
- Material Limitations: Struggles with very thick (e.g., >2 inches) or irregular stock, where band saws excel.
- Portability: Most table saws (except portable models) are heavy and stationary, less ideal for job sites.
- Noise: Table saws are louder, which may be disruptive in small workshops.
Best Use Cases
- Ripping plywood or MDF sheets for cabinetry or shelving.
- Creating long, straight boards for table tops or door frames.
- High-volume ripping in production woodworking shops.
- Projects requiring precise, glue-ready edges for panel construction.
Band Saw vs. Table Saw for Ripping: A Detailed Comparison
To help you decide, let’s compare band saws and table saws across key factors for ripping, tailored to woodworkers’ needs.
| Factor | Band Saw | Table Saw |
|---|---|---|
| Cutting Speed | Slower, better for controlled, detailed cuts. | Faster, ideal for high-volume ripping. |
| Precision | Good for irregular stock; prone to blade drift. | Excellent for straight, repeatable cuts. |
| Kerf Width | Narrow (1/8–1/2 inch), less material waste. | Wider (1/8 inch+), more wood loss. |
| Material Versatility | Excels at thick, irregular, or green wood. | Best for flat boards, plywood, or MDF. |
| Safety | Lower kickback risk; safer for beginners. | Higher kickback risk; requires careful setup. |
| Power | 1–3 HP, sufficient for most woods. | 1.5–5 HP, handles dense hardwoods easily. |
| Setup Time | Blade changes and tensioning take longer. | Quick blade swaps and fence adjustments. |
| Cost | $200–$2,000 (benchtop to industrial models). | $300–$3,000 (portable to cabinet saws). |
| Space Requirement | Compact benchtop or large floor models. | Portable or large stationary setups. |
| Best For | Resawing, irregular stock, curved cuts. | Production ripping, straight edges, joinery. |
Which Tool Wins for Ripping?
- Choose a Band Saw if you:
- Need to rip thick or irregular lumber (e.g., live-edge slabs or reclaimed wood).
- Want to resaw boards into thin veneers or slices.
- Prioritize safety and a narrow kerf to save material.
- Work on projects combining ripping with curved or intricate cuts.
- Choose a Table Saw if you:
- Need fast, precise, and straight rips for cabinetry or furniture.
- Work with plywood, MDF, or standard boards for production projects.
- Have a well-equipped shop with space for a table saw and accessories.
- Value speed and efficiency over material conservation.
For many woodworkers, the choice depends on the project. If you’re ripping plywood for cabinets, a table saw’s speed and precision are unmatched. For resawing walnut for a jewelry box, a band saw’s versatility shines.
Safety Considerations for Ripping
Ripping involves powerful tools and spinning blades, so safety is paramount. Here’s how band saws and table saws compare in terms of safety for ripping, with tips to stay safe.
Band Saw Safety
- Advantages: The downward blade motion reduces kickback, and the narrow blade is less likely to bind. Band saws are generally safer for beginners or when cutting uneven stock.
- Risks: Blade drift can cause the wood to bind if not guided properly. Fingers can get too close to the blade during narrow cuts.
- Safety Tips:
- Use a push stick or featherboard to guide the wood, keeping hands away from the blade.
- Ensure proper blade tension and tracking to prevent drift.
- Wear safety glasses to protect against wood chips or dust.
- Use a sharp blade (e.g., 3–6 TPI for ripping) to avoid binding.
Table Saw Safety
- Advantages: Modern table saws include safety features like riving knives, blade guards, and anti-kickback pawls, reducing risks when used correctly.
- Risks: Kickback is a significant hazard, especially with warped or improperly fed wood. The exposed blade poses a higher injury risk.
- Safety Tips:
- Always use a riving knife to prevent the wood from pinching the blade.
- Install a high-quality rip fence (e.g., from your keyword “replacement table saw fence”) to ensure straight cuts.
- Use push sticks or a “table saw jig” (from your keyword list) to keep hands clear of the blade.
- Never remove the blade guard unless absolutely necessary, and wear safety glasses and hearing protection.
Pro Tip
For both tools, invest in a zero clearance insert (related to your keyword “zero clearance table saw insert”) to reduce tear-out and improve safety by minimizing gaps around the blade. Regular maintenance, like cleaning the saw (as in your March 28, 2025, request for “how to clean table saw metal surface”), also ensures safe operation.
Practical Tips for Ripping with Band Saws and Table Saws
To get the best results, follow these expert tips tailored for ripping on each tool.
Band Saw Ripping Tips
- Choose the Right Blade: Use a wide blade (1/2–3/4 inch) with 3–6 TPI for ripping. For resawing, opt for a carbide-tipped blade for durability.
- Adjust the Fence: Set the rip fence slightly off-parallel to compensate for blade drift. Test on scrap wood to dial in the angle.
- Use a Resaw Guide: For thick cuts, a tall fence or resaw guide keeps the wood vertical, improving accuracy.
- Go Slow: Feed the wood steadily to avoid overloading the motor or causing blade wander.
- Maintain Blade Tension: Check tension before each session to ensure straight cuts, especially for hardwoods.
Table Saw Ripping Tips
- Select a Ripping Blade: Use a low-TPI blade (24–30 teeth), like a “table saw ripping blade” from your keyword list, for smooth, fast cuts.
- Check Fence Alignment: Ensure the fence is parallel to the blade to prevent binding or kickback. Upgrade to a “table saw fence for dewalt” (from your list) if needed.
- Use Featherboards: These keep the wood pressed against the fence, improving consistency and safety.
- Extend the Table: For long boards, add a “table saw extension wing” (from your list) to support the material.
- Joint One Edge First: Before ripping, joint one edge of the board flat to ensure it sits flush against the fence.
Cross-Tool Tip
For both saws, invest in a high-quality digital angle gauge to verify blade alignment (90 degrees for ripping). This ensures clean, square cuts, especially for joinery projects like dovetails (as in your April 15, 2025, request for intricate joinery visuals).
Cost and Accessibility
Cost is a key factor when choosing between a band saw and a table saw for ripping. Here’s a breakdown:
- Band Saws:
- Entry-Level (Benchtop): $200–$500 (e.g., WEN 3962, Rikon 10-305).
- Mid-Range: $500–$1,200 (e.g., Laguna 14|BX, Grizzly G0555).
- Industrial: $1,200–$2,000+ (e.g., Powermatic PWBS-14CS).
- Accessories: Blades ($10–$50), resaw fences ($50–$150), mobile bases ($100).

WEN 9-Inch Band Saw, 2.8-Amp Benchtop (BA3959)
- 2.8-amp motor rotates the blade up to 2500 feet per minute
- Create cuts up to 3-1/2 inches deep and 9 inches wide
- Uses 59-1/2-inch blades anywhere from 1/8 to 3/8 inches in size
New starting from: 149.00
Go to Amazon- Table Saws:
- Portable: $300–$700 (e.g., DeWalt DWE7485, “10 inch table saw ryobi” from your list).
- Contractor: $700–$1,500 (e.g., Delta 36-725T2, “table saw powermatic” from your list).
- Cabinet: $1,500–$3,000+ (e.g., SawStop PCS, “industrial table saw” from your list).
- Accessories: Ripping blades ($30–$100), “table saw extension tables” ($50–$200), “table saw dust collector” ($100–$300).
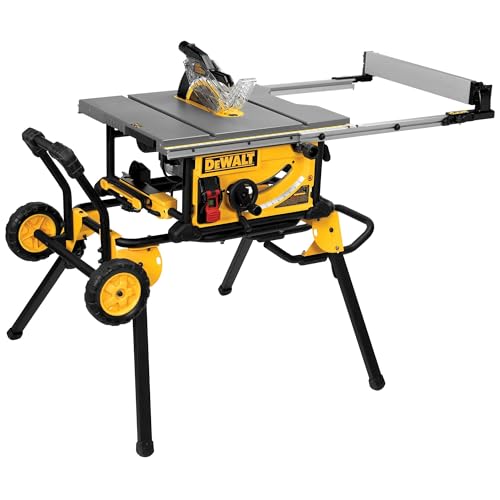
DEWALT 10-Inch Table Saw with Rolling Stand, 32-1/2-Inch Rip Capacity (DWE7491RS)
- Rack & Pinion Telescoping Fence System Make fence adjustments fast, smooth and accurate
- Patented material support, can be used for narrow rip cuts.
- 32-1/2″ rip capacity easily cuts a variety of larger shelving and trim materials
List Price :
Offer: 599.00 $
Go to AmazonBudget Considerations
- Band Saw: More affordable for hobbyists, with benchtop models offering good ripping capabilities for small shops.
- Table Saw: Higher upfront cost, but portable models (e.g., “table saw small” from your list) are budget-friendly and versatile for job sites.
If you already own one tool, consider whether its ripping capabilities meet your needs before investing in another. For example, a table saw with a “table saw router extension” (from your list) can handle multiple tasks, reducing the need for a band saw.
Real-World Applications: When to Use Each Tool
To illustrate the band saw vs. table saw for ripping debate, here are practical scenarios based on woodworking projects:
- Building a Dining Table:
- Table Saw: Rip 4/4 maple boards into precise 3-inch strips for the tabletop. The table saw’s speed and straight cuts ensure glue-ready edges for panel glue-ups.
- Band Saw: Resaw a 6-inch-thick walnut slab into 1/4-inch veneers for decorative inlays, leveraging the band saw’s narrow kerf and resawing capacity.
- Crafting a Jewelry Box:
- Band Saw: Rip and resaw cherry lumber into thin strips for box sides, then cut curved lid details with the same tool.
- Table Saw: Rip plywood for the box bottom, ensuring perfectly square edges for assembly.
- Reclaimed Wood Projects:
- Band Saw: Rip barnwood with nails or knots, as the band saw handles irregular stock safely and efficiently.
- Table Saw: Avoid unless the wood is cleaned and flattened, as nails or uneven grain can cause kickback.
- Cabinetry:
- Table Saw: Rip plywood sheets into cabinet panels with a “table saw ripping blade” for fast, accurate cuts.
- Band Saw: Use for resawing hardwood for custom door panels or decorative accents.
These examples show that both tools have their place, and many woodworkers benefit from owning both for complementary tasks.
Conclusion: Band Saw or Table Saw for Ripping?
The band saw vs. table saw for ripping debate boils down to your specific needs, budget, and workshop setup. If you prioritize speed, precision, and production-level ripping for straight cuts, a table saw is the clear winner. Its power and rigid fence system make it ideal for cabinetry, furniture, and plywood projects. However, if you need versatility, safety, and the ability to rip thick or irregular wood, a band saw shines, especially for resawing or specialty cuts.
For most woodworkers, the best approach is to assess your projects:
- Choose a table saw for high-volume, straight ripping tasks, enhanced by accessories like “table saw extension wings” or “table saw miter gauges” (from your keyword list).
- Choose a band saw for resawing, irregular stock, or projects requiring both ripping and curved cuts.
- Consider both if your budget and space allow, as they complement each other for a well-rounded workshop.
Ready to upgrade your ripping game? Explore our guides on “table saw accessories” or “best table saw ripping blades” to optimize your setup, or check out our reviews of top band saws and table saws for 2025. Have questions about choosing the right tool? Leave a comment below or contact us for expert advice!
Disclaimer: Always follow manufacturer safety guidelines when using power tools. Prices and availability are subject to change.

Finlay Connolly is a woodworking enthusiast and power tool specialist with over a decade of hands-on experience in the workshop. As the founder and lead writer at ProTableSawReviews.com, Finlay combines expert knowledge with real-world testing to help woodworkers, DIYers, and professionals choose the best tools for the job. With a sharp eye for detail and a passion for precision, Finlay is committed to providing trustworthy, practical advice backed by years of experience and research in the field. Whether you’re cutting dados or comparing fence systems, you can count on Finlay for honest, reliable reviews that make your next cut your best one.