
Ever watched a beautiful sheet of plywood tip off the back of your table saw mid-cut, ruining hours of layout work? Or worse, felt that heart-stopping moment when a long board starts to fall and you instinctively grab for it—right near the spinning blade?
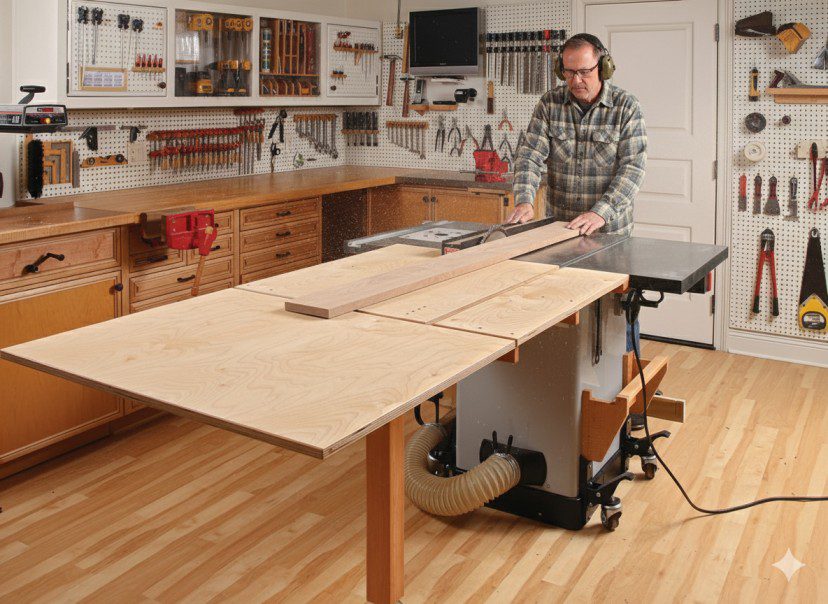
I learned about outfeed tables the hard way. Three years into woodworking, I was ripping an 8-foot oak board when the unsupported end dropped as it cleared the blade. The board pivoted, kicked back, and left a nasty bruise on my hip. That weekend, I built my first outfeed table.
A table saw outfeed table is simply an extension that supports workpieces as they exit the saw, keeping them level and preventing dangerous tipping. Whether you’re a weekend hobbyist or professional cabinetmaker, proper outfeed support transforms your table saw from a useful tool into a precision cutting station that’s safer and more accurate.
Why Every Table Saw Needs Outfeed Support
The physics are simple but unforgiving: as a workpiece moves through your blade, weight shifts from the infeed side to the outfeed side. Without proper support, gravity takes over, creating three major problems.
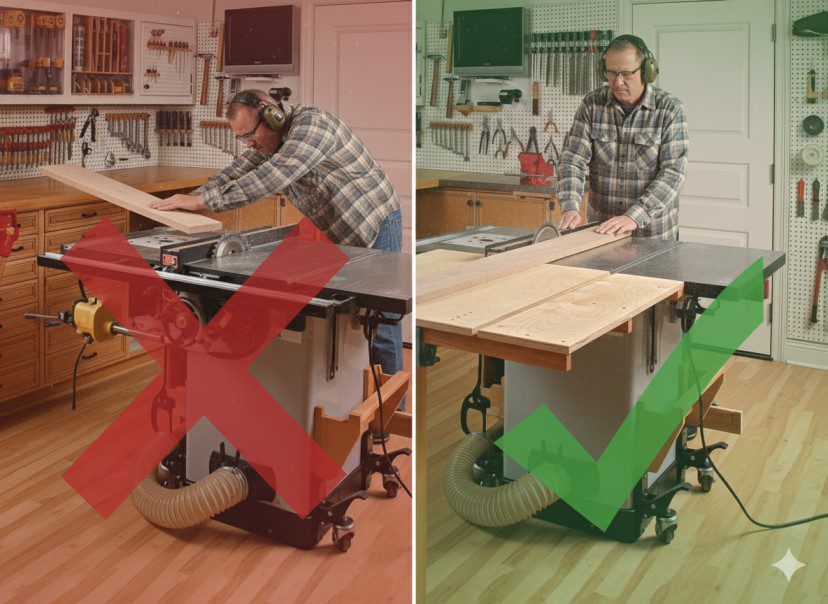
The Safety Factor
Falling workpieces create immediate danger. When a board tips downward off your saw table, your natural instinct is to catch it—often reaching toward or over the blade. According to the U.S. Consumer Product Safety Commission’s 2024 data, approximately 67,000 table saw injuries occur annually, with a significant percentage involving kickback or loss of workpiece control during cutting.
Beyond the grab-and-reach danger, tipping workpieces can bind against the blade, causing violent kickback. Proper outfeed support eliminates these scenarios entirely. The workpiece stays level throughout the cut, maintaining consistent contact with the blade and fence.
Accuracy and Cut Quality
Even if you manage to prevent disaster, your cut quality suffers without support. As a board tips, it pivots slightly around the blade contact point, changing the angle between workpiece and blade—sometimes by just a fraction of a degree, but enough to ruin precision work.
I noticed this building cabinet face frames without adequate support. Rails that should have been perfectly square measured 89.7 degrees on one end and 90.3 degrees on the other. Once I added proper outfeed support, my square cuts actually measured square.
Real-World Applications
Outfeed tables prove essential for:
- Sheet goods breaking down: Supporting 4×8 plywood or MDF sheets during ripping
- Long board ripping: Processing dimensional lumber longer than 4 feet
- Production cutting: Making multiple identical cuts without resetting supports
- Wide panel work: Supporting glued-up panels during trimming
- Assembly station: Serving as additional workspace when not cutting
According to Fine Woodworking Magazine’s 2025 survey, 78% of intermediate to advanced woodworkers consider outfeed support essential for safe, accurate table saw operation.
Types of Outfeed Tables Explained
Understanding different types helps you choose the right solution for your space and budget.
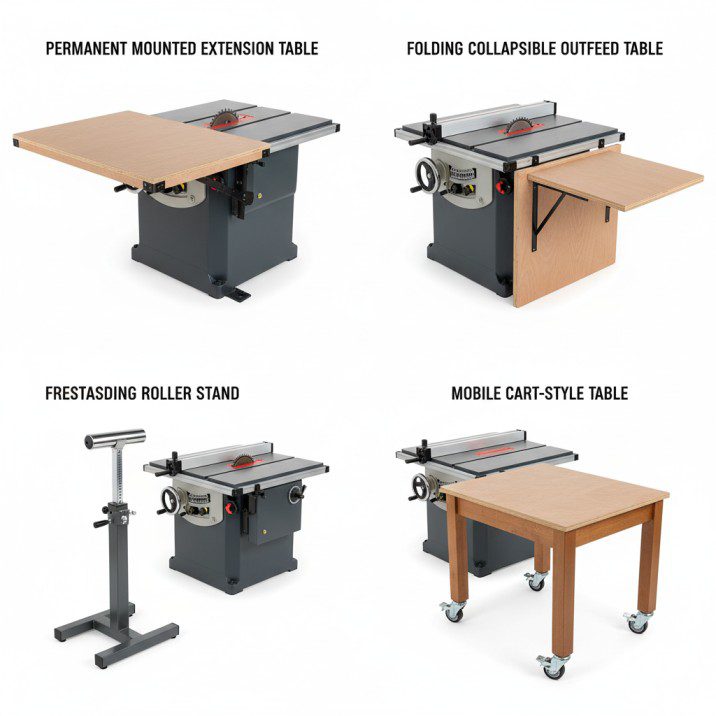
Permanently Mounted Extension Tables
These bolt directly to your table saw, creating a fixed extension that’s always ready. They’re the gold standard for dedicated workshops.
Pros: Rock-solid stability, perfect height alignment, can integrate storage underneath, maximum weight capacity
Cons: Requires dedicated floor space, not suitable for mobile workshops, higher initial cost
Folding and Collapsible Models
These attach to your saw but fold down when not in use, saving valuable floor space.
Pros: Space-saving design, quick deployment, maintains consistent height, good stability
Cons: Slightly less stable than permanent installations, requires setup time, moving parts can wear
Freestanding Roller Tables
Adjustable-height tables with rollers that stand independently behind your saw.
Pros: Extremely portable, works with multiple machines, adjusts to any height, affordable
Cons: Rollers can allow workpiece drift, less ideal for sled work, requires positioning each use
Mobile Cart-Style Tables
Rolling carts that park behind your saw and offer full-surface support.
Pros: Multi-functional workspace, moves easily, substantial flat surface, adjustable feet
Cons: Must be positioned carefully, requires locking casters, height alignment varies with repositioning
Visit our table saw buying guide to understand how outfeed support integrates with different saw types.
Best Commercial Outfeed Tables in 2025
Based on current market analysis and user feedback, here are the top-rated commercial outfeed solutions.
| Model | Price Range | Type | Surface Size | Best For | Key Feature |
|---|---|---|---|---|---|
| Rousseau 2780 Outfeed Table | $180-$220 | Folding attached | 27″ x 48″ | Cabinet saw owners | 300 lb capacity, steel construction |
| Kreg KRS1035 Router Table | $220-$260 | Freestanding | 24″ x 32″ | Multi-function | Router table + outfeed combo |
| Bora Centipede Workbench | $140-$180 | Adjustable | 24″ x 48″ | Versatile workshops | Modular, 12″-32″ height range |
| Shop Fox D2057A Roller Stand | $90-$115 | Roller support | Rollers 27″ wide | Entry-level users | Ball-bearing rollers, stable |
| HTC PMO-100 Mobile Base | $160-$195 | Mobile cart | 30″ x 40″ | Small shops | Integrates with mobile bases |

Kreg KRS1035 Multi-Purpose Shop Stand
- Premium Home Improvement Tool: Sturdy 12- and 16- gauge steel table is durable and adjustable
- Easy-to-Assemble Kreg Table: Simple directions allow painless setup so you can start working as soon as possible
- Adjustable Routing Table: Move height from 31 inches to 39 inches; with 4 levelers for uneven floors
New starting from: 199.00
Go to AmazonRousseau 2780: My top recommendation for cabinet saw owners. The all-steel construction provides rock-solid stability, and the folding mechanism operates smoothly after years of use. The 300-pound capacity handles full plywood sheets without flex.
Bora Centipede: The adjustable-height capability (12 to 32 inches) works with any table saw height. The sawhorse-style folding legs make storage incredibly space-efficient—the entire 4-foot table folds to about 5 inches thick.
Budget Options: The Shop Fox roller stand provides functional outfeed support at entry-level prices. While not matching the stability of flat-surface tables, it’s vastly better than no support for straight ripping operations.
Check our best table saw reviews to understand outfeed compatibility factors.
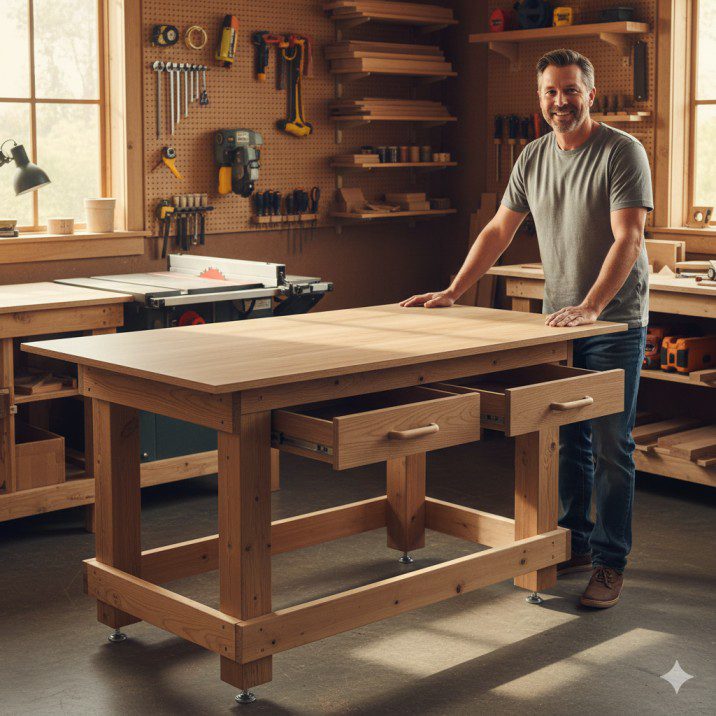
Building Your Own DIY Outfeed Table
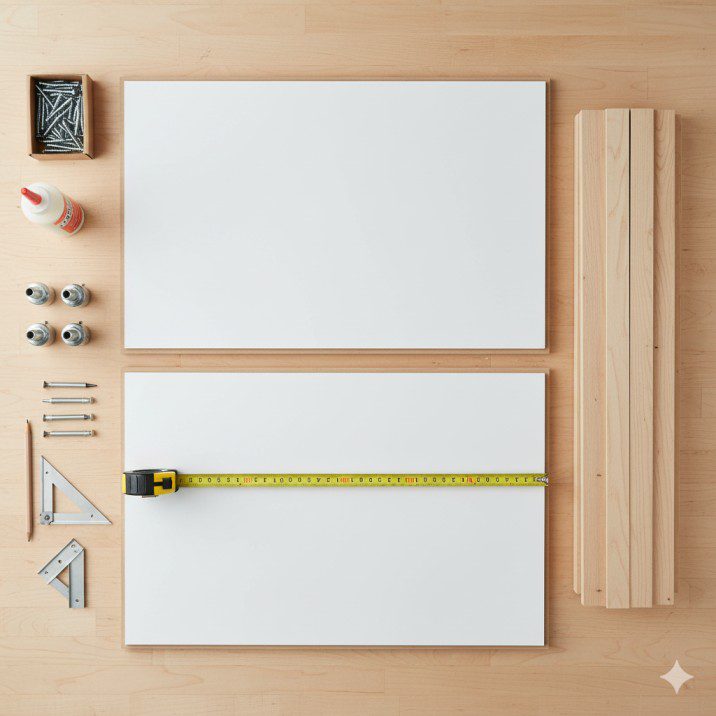
Building your own outfeed table is one of the most satisfying workshop projects. Here’s a streamlined build plan using torsion-box construction for a strong, flat, stable surface.
Materials List
For 48″ x 48″ Top:
- Two sheets 3/4″ melamine-coated MDF (4×4 feet)
- Eight pieces 3/4″ x 3″ hardwood for internal ribs (48″ long)
- Wood glue and 1-1/4″ screws
- Paste wax for finishing
For Base:
- Four 2x4s for legs (length = saw height – 4.5″ + 2″)
- Two 2x4s for stretchers (48″ long)
- Four adjustable leveling feet
- Heavy-duty brackets or pocket screws
Quick Build Steps
Step 1: Cut internal rib pieces and create a grid pattern (four ribs running length, four running width, spaced 12″ apart). Use half-lap joints where ribs intersect.
Step 2: Lay bottom skin face-down. Glue and screw ribs to it, ensuring perpendicular alignment with straightedge.
Step 3: Apply glue to top edges of ribs, position top skin, clamp, and screw. Let cure overnight.
Step 4: Build base frame by connecting four legs with stretchers using pocket holes or brackets. Create stable H-shape assembly.
Step 5: Install leveling feet on leg bottoms for height micro-adjustments.
Step 6: Attach top to base using angle brackets. Center top on frame.
Step 7: Position behind saw and use straightedge to adjust leveling feet until surface is perfectly flush with saw table.
Step 8: Wax the surface thoroughly for smooth material sliding.
Cost Analysis
Materials typically run $80-$140 depending on choices—30-60% less than comparable commercial tables. Build time: 6-8 hours across two days.
For more techniques, visit our table saw how-to guide.
Height Alignment: The Critical Setup Step
Even the best outfeed table is useless if not properly aligned. Here’s how to get it exactly right.
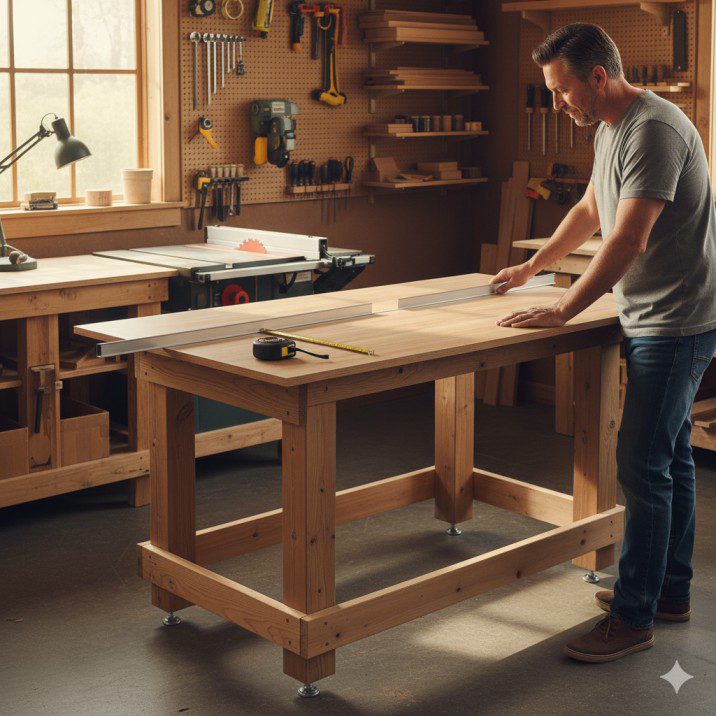
The Straightedge Method
Step 1: Place a 4-foot straightedge on your saw surface, extending over the outfeed table.
Step 2: Check for gaps under the straightedge using backlighting.
Step 3: Adjust outfeed table height until no light shows—straightedge should contact both surfaces consistently.
Step 4: Repeat at multiple positions across width (left, center, right).
Step 5: Check diagonally to verify no twist.
The Test Cut Verification
After straightedge alignment, rip a straight 4-foot test board. It should slide smoothly from saw to outfeed without any perceptible bump, drop, or resistance. Listen too—properly aligned tables make no sound as boards transition.
Alignment Tips
- Align to the main table near the blade, not misaligned wing extensions
- Check alignment seasonally if your floor experiences settling
- Keep adjustment wrench handy for quick tweaks
- For mobile setups, use registration marks on floor for repositioning
Learn about essential accessories on our table saw accessories page.
Space-Saving Solutions for Small Workshops
Not everyone has dedicated workshop space. Here are creative solutions for compact shops.
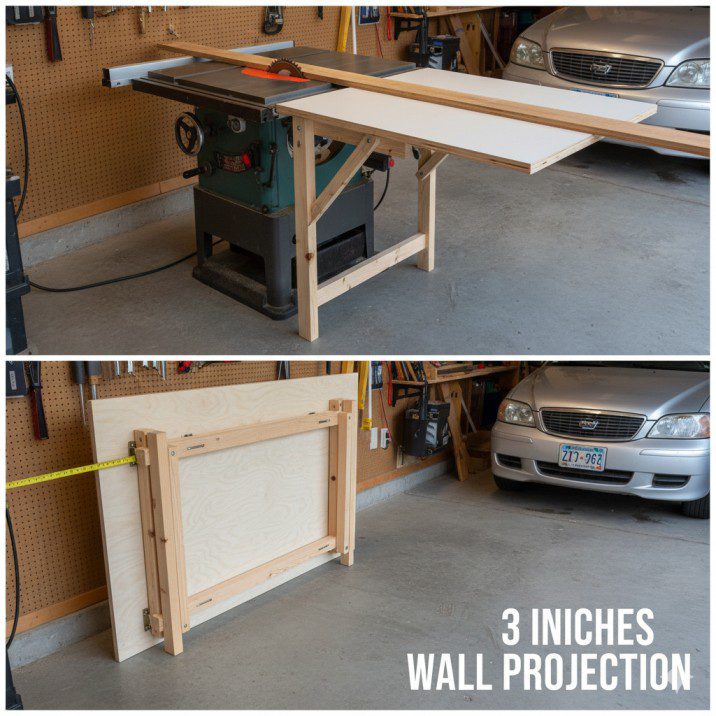
Wall-Mounted Flip-Up Table
Mount a hinged top to wall cleats at exact saw height. Folding leg supports swing out from underneath when deployed. When done, fold legs and swing top vertical—projects only 2-3 inches from wall when stowed.
Rolling Tool Cart
Use a cart that’s slightly lower than saw height with locking casters. Add thin shims on top to achieve perfect height match. When not supporting outfeed, it’s a mobile workbench.
Compound Workbench
Design your main workbench to park behind your saw at correct height. This dual-purpose approach maximizes limited space while providing both work surface and outfeed support.
| Solution | Space Savings | Setup Time | Stability | Best For |
|---|---|---|---|---|
| Wall flip-up | 95% floor space | 20-30 seconds | Excellent | Single-car garages |
| Rolling cart | 0% (stores elsewhere) | 1-2 minutes | Good | Multi-purpose shops |
| Compound bench | 0% (dual purpose) | Instant | Excellent | Planned layouts |
Maintenance Tips
Weekly Care
- Clear sawdust after each use
- Apply paste wax weekly for frequent users
- Check height alignment with straightedge
- Tighten any loose hardware
Monthly Checks
- Deep clean and vacuum underneath
- Verify leveling feet haven’t shifted
- Inspect structural joints for integrity
- Assess surface condition for wear
Annual Maintenance
- Complete inspection of hidden areas
- Replace worn or rusted hardware
- Verify accuracy with precision measuring tools
- Add reinforcement if flex or instability noticed
Frequently Asked Questions
How much outfeed support do I need? Minimum 3 feet for general work; 4 feet is ideal. Your outfeed should support at least 50-60% of your longest typical workpiece.
Can I use my workbench as outfeed? Yes, if height matches exactly and surface is smooth. This is actually smart shop layout for small spaces—just ensure proper alignment.
Do roller stands work as well as solid tables? Roller stands work for straight ripping but lack versatility for sled work or situations requiring clamping. Better than no support, but solid tables are superior.
What’s the best surface material? Melamine-coated MDF (smooth, flat, affordable), phenolic-coated plywood (more durable), or UHMW plastic (ultra-slick but expensive).
Can I build one for under $50? Yes, with scrap materials. One plywood sheet ($35-45) plus scrap 2x4s creates functional support, though less refined than commercial options.
Final Thoughts
Adding proper outfeed support represents one of those workshop upgrades where the difference is immediate and dramatic. The first time you rip an 8-foot board without help, without jury-rigged supports, and without safety concerns—you’ll wonder how you ever worked without it.
Whether you invest $80 in a DIY build or purchase a $200 commercial solution, outfeed support pays dividends every time you use your table saw. It’s not glamorous like a new power tool, but it fundamentally changes how your primary cutting station performs.
Start with your space constraints and typical projects. Small shop? Consider wall-mounted or folding designs. Process sheet goods regularly? Invest in 4-foot depth minimum. Working on a budget? A basic DIY build delivers professional results.
Most importantly, prioritize proper height alignment. The best outfeed table poorly aligned performs worse than a basic one that’s perfectly flush with your saw.
Ready to explore more table saw essentials? Visit our comprehensive resources for equipment reviews, techniques, and shop optimization strategies that help you work safer and achieve better results.
Quick Action Steps:
- Measure your saw table height and available space behind the saw
- Decide between DIY build or commercial purchase based on budget and skills
- Prioritize height alignment over all other features
- Test with scrap before trusting it with project pieces
- Maintain regularly to ensure long-term accuracy
Your next woodworking project deserves the safety and precision that proper outfeed support provides. Stop wrestling with falling boards and start cutting with confidence.

Finlay Connolly is a woodworking enthusiast and power tool specialist with over a decade of hands-on experience in the workshop. As the founder and lead writer at ProTableSawReviews.com, Finlay combines expert knowledge with real-world testing to help woodworkers, DIYers, and professionals choose the best tools for the job. With a sharp eye for detail and a passion for precision, Finlay is committed to providing trustworthy, practical advice backed by years of experience and research in the field. Whether you’re cutting dados or comparing fence systems, you can count on Finlay for honest, reliable reviews that make your next cut your best one.