Best Table Saw Push Sticks & Push Blocks (2026): Top Picks for Safer Rip Cuts
 Finlay Connolly
14 min read
Finlay Connolly
14 min read
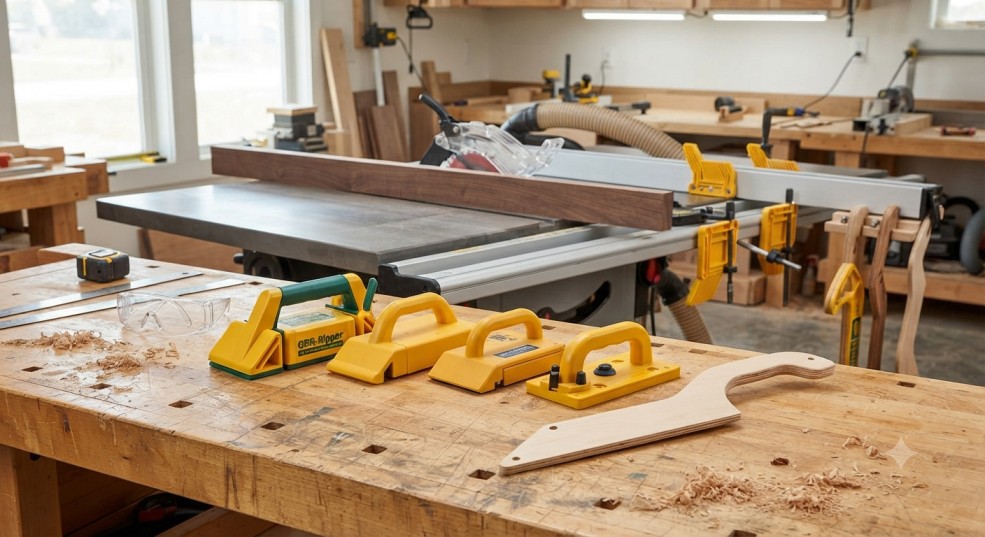
Short answer: the GRR-Ripper 3D Pushblock is the best all-around push block for most table saw work, a simple shop-made push stick is all you need for basic ripping, and if you’re cutting narrow strips regularly, a magnetic push block with a heel like the Micro Jig GR-100 keeps your hands the farthest from the blade. None of these cost more than a decent lunch, and any one of them is safer than the stock plastic stick that came with your saw.
That’s the short version. Below is the full breakdown — what each type does differently, when to use which one, and a few habits that matter more than the tool itself.
Why the stock push stick isn’t enough
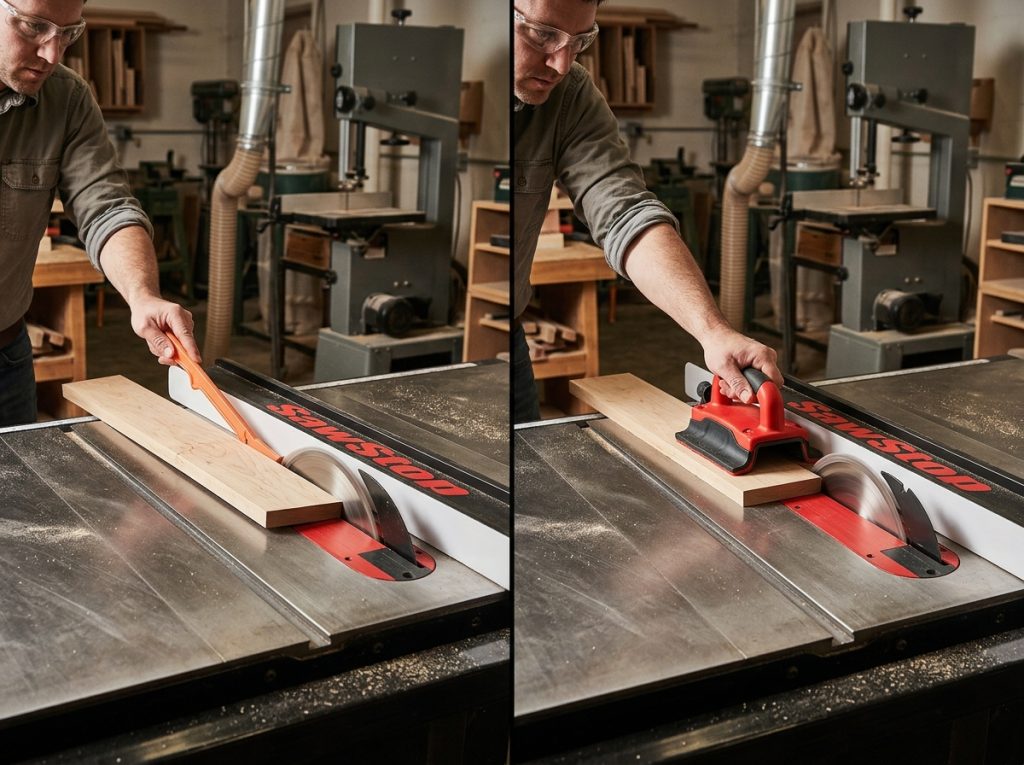
Most saws ship with a thin plastic push stick. It’s better than nothing, but it has one job: pushing a board forward. It doesn’t hold the board down, and it doesn’t hold it against the fence.
That gap matters more than people think. On a rip cut, the board wants to lift slightly as it passes the blade, especially near the end of the cut where your other hand runs out of safe room. A basic stick doesn’t stop that. A good push block does, because it applies downward pressure at the same time it pushes forward.
If you’ve ever had a board chatter or lift slightly right at the end of a rip, that’s usually not the blade. That’s a hand pressure problem, and it’s exactly what a proper push block is built to solve.
Push stick vs push block vs push shoe
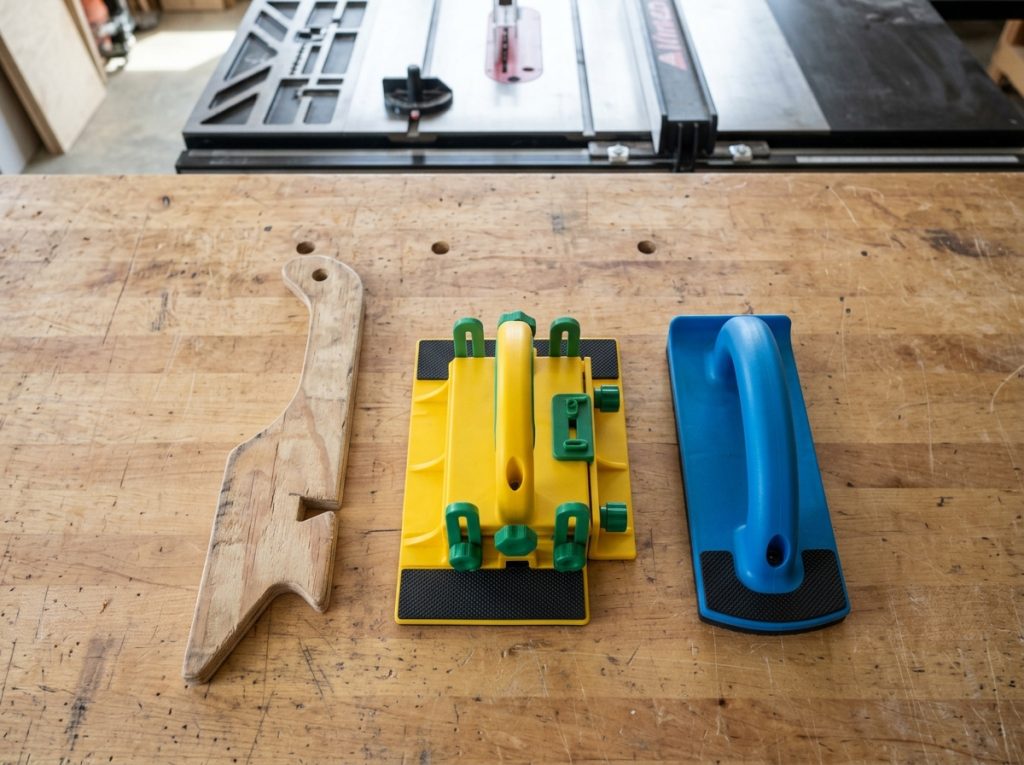
These terms get used loosely, so here’s what actually separates them.
| Type | What It Does | Best For |
|---|---|---|
| Push stick | Pushes the board forward only, minimal hand contact area | Narrow rips, finishing a cut past the blade |
| Push block | Pushes forward and down at the same time | General ripping, wider boards |
| Push shoe | Wide sole that rides on top of the board, often with a heel | Thin strips, keeping hands flat and low |
A push stick alone is fine for finishing a cut. A push block does more of the actual work of keeping the board controlled through the whole pass. Most experienced woodworkers use a push stick in one hand and a push block in the other, especially on wider rips.
Best push sticks and push blocks
| Product | Type | Best For | Notes |
|---|---|---|---|
| GRR-Ripper 3D Pushblock | Push block | General ripping, wider boards | Adjustable height, applies forward and downward pressure at once |
| Micro Jig GR-100 | Push block | Thin strip ripping | Low profile, keeps hands close to the table |
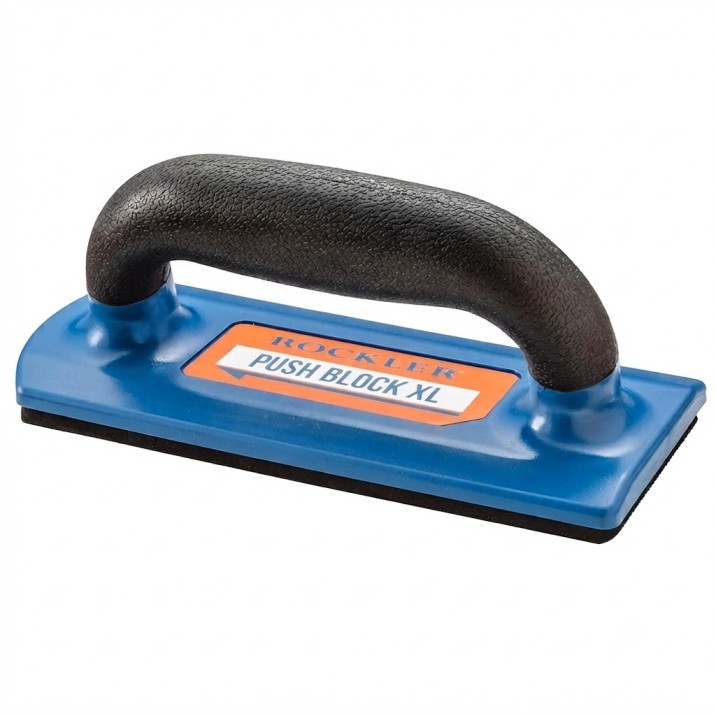
| Rockler Push Block | Push block | Beginners | Simple rubber-bottom design, easy to grip |
| Bench Dog Push-Loc | Push shoe | Repeated narrow rips | Magnetic components snap together for different board widths |
| Shop-made plywood push stick | Push stick | Any budget | Cut to your own hand size, easy to replace |
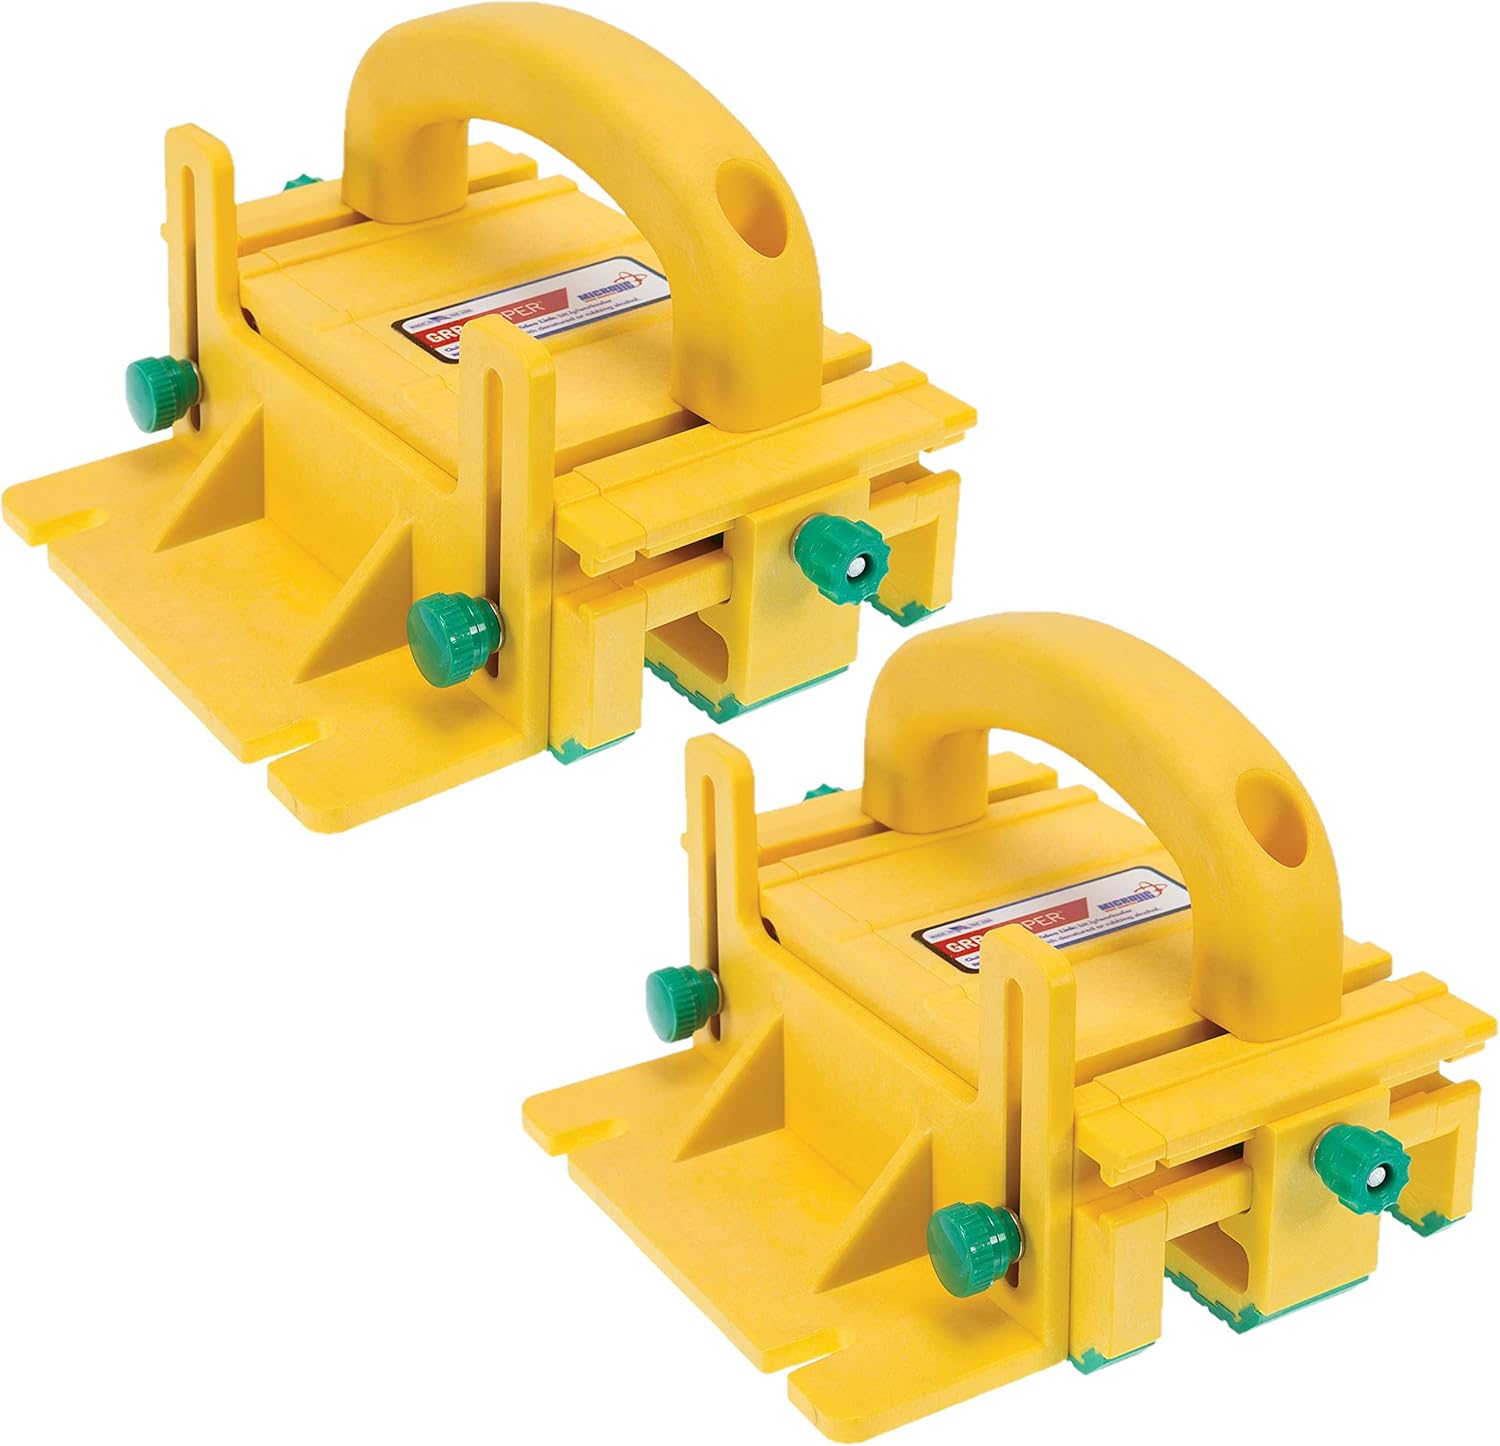
GRR-Ripper — best if you rip a lot of different board widths and don’t want to switch tools constantly. In real workshop use, the adjustable height means it works on 3/4″ stock and thin strips without swapping accessories.

Micro Jig GR-100 — best for narrow, repeated cuts like edge banding or thin trim strips, where a taller push block would actually get in the way of the fence.
Rockler basic push block — best for a beginner who wants one reliable tool without a learning curve. It won’t do everything the GRR-Ripper does, but it covers most home shop ripping.
Bench Dog Push-Loc — best if you find yourself ripping the same narrow width over and over, like face-frame stock or shims. The magnetic pieces let you build a custom-width push shoe in seconds.

Shop-made stick — best if you just need something today, or you want a few scattered around the shop so one is always within reach.
What materials work best for shop-made push sticks
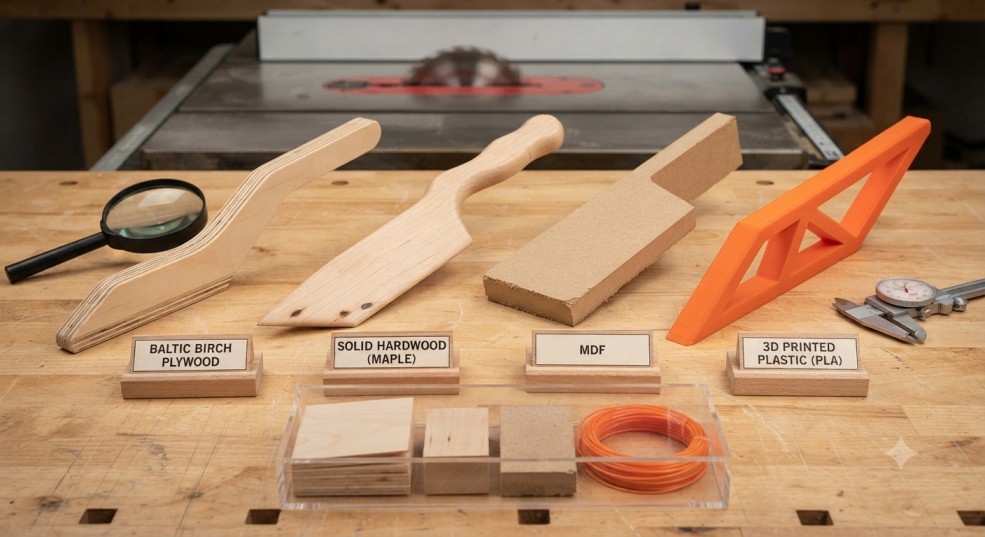
Not every scrap in the shop makes a good push stick. Some hold up for years, some crack the first time they get pinched by the blade.
| Material | Pros | Cons |
|---|---|---|
| Baltic birch plywood | Strong, layers resist splitting, cheap | Can splinter at the edges if not sanded |
| Solid hardwood (maple, oak) | Very durable, comfortable grip | Can split along the grain if it catches the blade wrong |
| MDF | Cheap, smooth edges | Crumbles instead of splitting cleanly — not ideal near a blade |
| 3D printed plastic (PLA/PETG) | Consistent shape, easy to reproduce | Can be too rigid, doesn’t absorb a glancing hit as well as wood |
Plywood is the most common choice for a reason. It’s cheap enough to treat as disposable, and the cross-grain layers mean it doesn’t split as easily as solid wood if it ever grazes the blade.
Magnetic vs hook-style push blocks
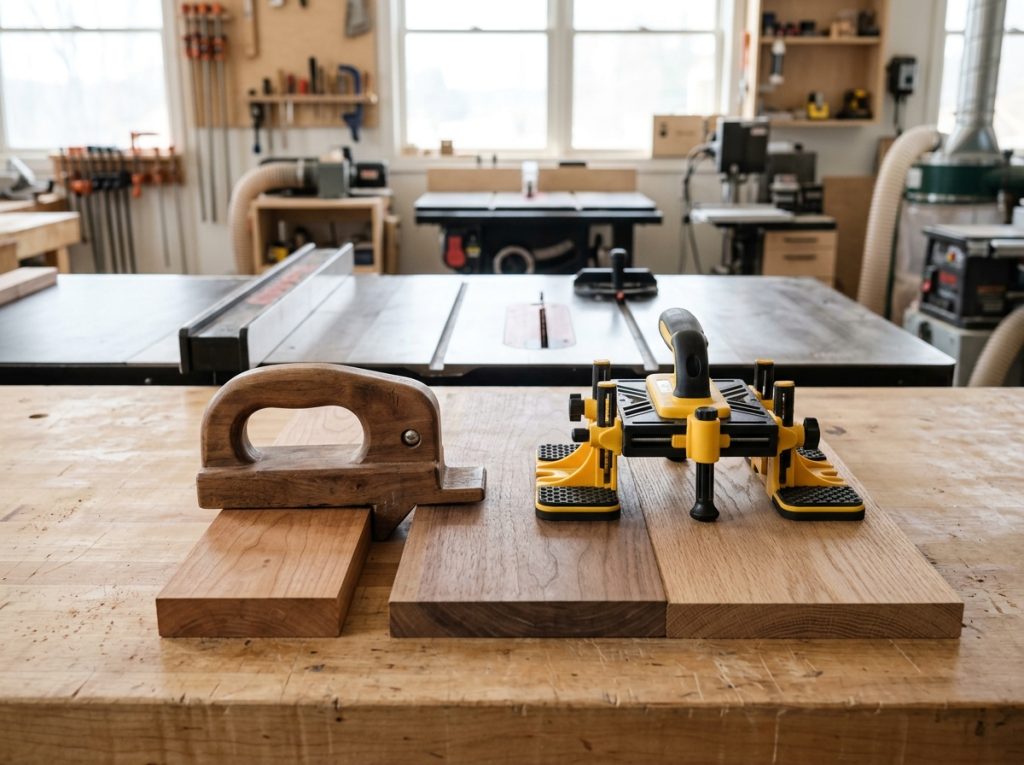
Push blocks generally fall into two designs, and each has a different feel in use.
Hook-style blocks have a heel that catches the trailing edge of the board, similar to a push stick but wider. They’re simple, cheap, and there’s nothing to adjust before you start cutting.
Magnetic blocks, like the Bench Dog Push-Loc, use separate pieces that snap together around the board. This lets you build a custom-width push shoe for a specific cut, then break it apart and reconfigure it for the next one.
Hook-style is the better choice if you want to grab a tool and go. Magnetic setups take a few extra seconds to configure but pay off if you’re running a batch of identical narrow rips, since you build the shoe once and reuse it for the whole batch.
Grip and hand comfort matter more than people expect
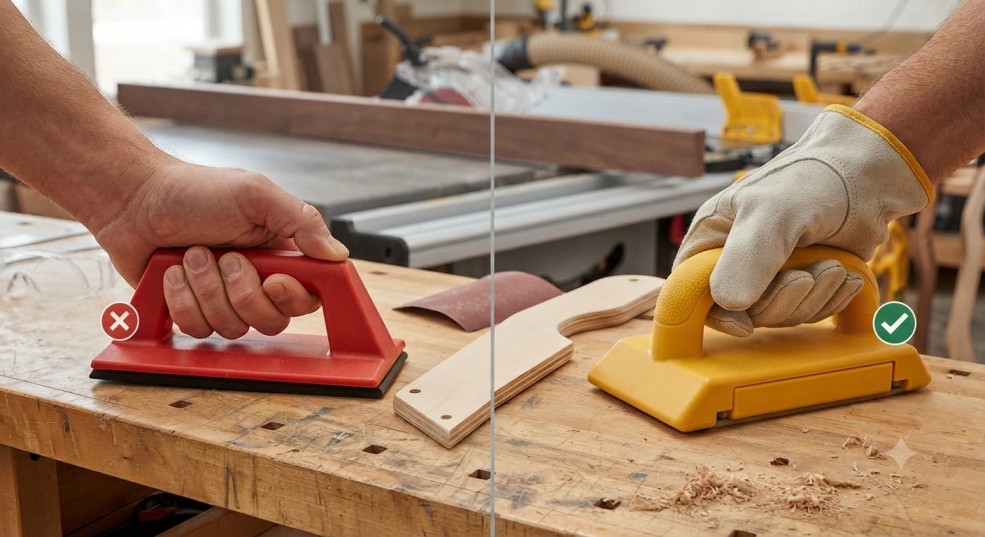
A push block that’s uncomfortable to hold gets used less carefully, and that’s when accidents happen.
Look for a handle that fills your palm without forcing your fingers to curl too tightly. If a block has a hard plastic edge digging into your hand after a few passes, you’ll start rushing the cut just to put the tool down, which is the opposite of what you want near a spinning blade.
Rubber-coated handles, like the ones on the Rockler and GRR-Ripper models, grip better with sweaty or gloved hands. That matters more in summer shop conditions than most buying guides mention.
If you’re building your own push sticks, round over the handle edge with sandpaper or a router before it ever touches the saw. A sharp plywood edge digging into your palm on a long rip is a small thing that adds up over a full day of cutting.
Using push blocks for resawing and tall stock
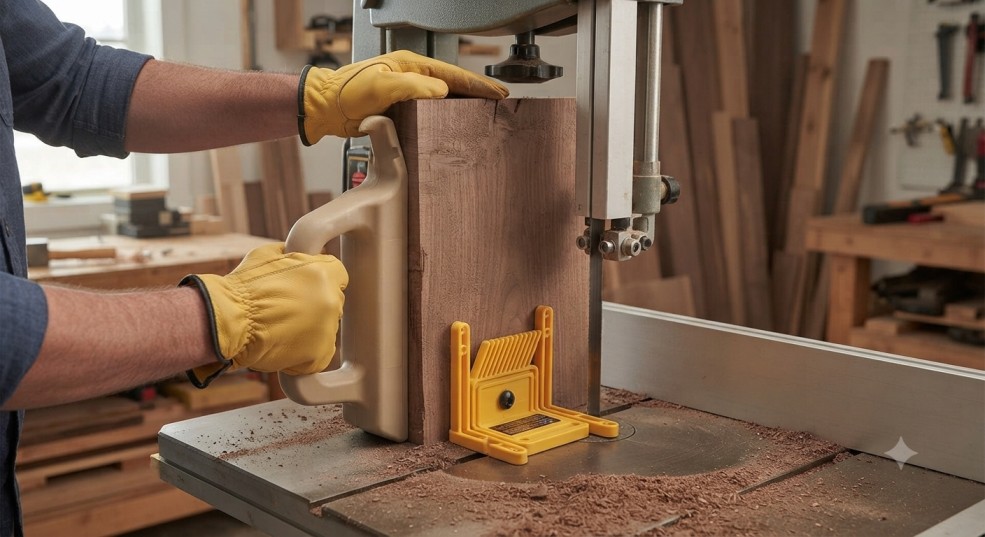
Resawing — cutting a thick board into thinner slices on edge — puts extra strain on hand control, since the board is tall and can tip toward or away from the fence mid-cut.
A tall push block with a heel that hooks over the top edge of the stock works better here than a standard flat push stick. It gives you more leverage to keep the board pressed flat against the fence through the entire pass.
Pairing a tall push block with a featherboard set at the right height makes a real difference on resaw cuts. The featherboard handles side pressure against the fence, and the push block handles forward motion and keeps the top of the board from tipping.
Why most woodworkers end up making their own push sticks anyway
Store-bought push blocks are worth owning, but a shop-made push stick still has a place in almost every shop, mostly because it’s disposable.
If a push stick gets too close to the blade during a cut, you want to lose a stick, not a finger. Cheap plywood sticks get replaced without a second thought. A $40 push block gets babied a little more than it should, which isn’t the mindset you want near a spinning blade.
How to make a basic push stick (free plan)
Materials:
| Item | Purpose |
|---|---|
| 1/2″ or 3/4″ plywood scrap, about 6″ x 18″ | Body of the push stick |
| Jigsaw or bandsaw | Cutting the shape |
| Sandpaper | Smoothing the grip edge |
Steps:
- Sketch a hook shape on the plywood, with a notch at one end that catches the back edge of your workpiece.
- Make the handle end wide enough to grip comfortably with your whole hand, not just fingertips.
- Cut the shape out on a bandsaw or jigsaw.
- Sand the handle edge so it doesn’t bite into your palm during longer cuts.
- Cut a second one at a different height. A tall one for standard stock, a low one for thin strips.
Keep two or three of these hanging near the saw. When one gets too short or chewed up from a close call, toss it and grab another.
Push sticks vs push blocks: which do you actually need?
| Situation | Better Tool |
|---|---|
| Ripping standard 3/4″ boards | Push block |
| Finishing a rip cut past the blade | Push stick |
| Ripping thin strips under 2″ wide | Push shoe or narrow push block |
| Crosscutting on a sled | Neither — use the sled’s fence and hold-downs |
| Resawing tall stock | Push block with a tall heel, plus a featherboard |
Most cuts actually call for both, used together. The push stick guides and finishes the cut near the blade, while a push block in your other hand holds the board flat and against the fence through the rest of the pass.
Common mistakes people make with push sticks and push blocks
- Using the same stick until it’s worn down to nothing. A short, chewed-up push stick puts your hand closer to the blade than a longer one would. Replace them often.
- Only pushing forward, not down. This is the biggest reason boards lift or chatter during a rip. A block that applies both directions of pressure solves this on its own.
- Setting the push stick aside mid-cut. If you start a rip with a push stick and put it down partway through because it’s “almost done,” that’s exactly when hands drift closest to the blade. Finish the pass with it in hand every time.
- Buying one push block and expecting it to handle every width. A tool that’s great for 3/4″ stock is often awkward for thin strips. Most shops end up with two or three different push tools for different jobs.
- Not adjusting hand position as the cut nears the end. The most dangerous few inches of any rip cut are the last ones, right as your free hand runs out of safe table space. That’s when a push stick should already be doing the work, not your fingers.
Safety habits that matter more than the tool itself
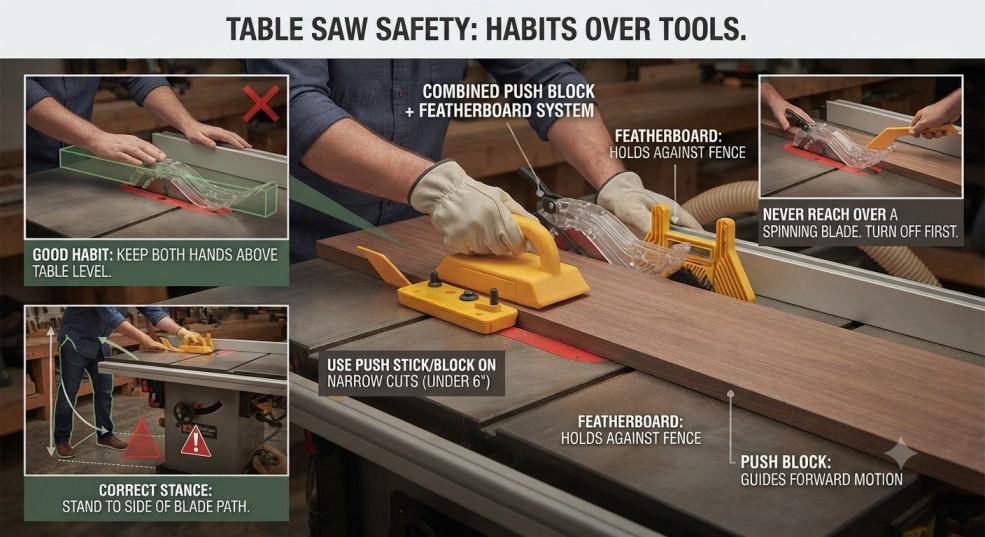
A good push block doesn’t replace good habits. It supports them.
- Keep both hands above the table at all times, never level with or below the blade height.
- Stand slightly to the side of the blade path, not directly behind it, in case of kickback.
- Never reach over a spinning blade to clear an offcut. Turn the saw off first.
- Use a push stick or block on every rip cut under about 6 inches wide, no exceptions, even for “quick” cuts.
- Combine a push block with a featherboard on longer rips. The featherboard holds the board against the fence, and the push block handles forward motion — together they remove most of the guesswork.
Kickback is still the biggest risk on a table saw, and most of it happens when a board twists or lifts because a hand wasn’t controlling it properly. If you want the fuller picture on what causes kickback and how to avoid it, our guide on table saw safety covers it in more detail.
Do push blocks work differently on different saw types?
Not really in terms of technique, but table size changes how much room you have to work with.
| Saw Type | What Changes |
|---|---|
| Benchtop / jobsite saw | Less table surface, so push blocks need to be used earlier in the cut since there’s less run-off room |
| Contractor saw | Standard table size, most push blocks work as designed |
| Cabinet saw | More table surface, extra room to keep a push block in play the entire cut |
If you’re running a smaller saw, check our best portable table saw reviews for models with enough table surface to comfortably fit both a rip fence and a push block without crowding your hands.
Where push blocks fit with the rest of your setup
A push block solves one part of a bigger safety picture. It doesn’t fix a fence that’s drifting out of square, and it won’t help if your blade choice is wrong for the material.
If your rip cuts come out tapered no matter how carefully you push the board, that’s usually a fence problem, not a hand-pressure problem. Our guide on aftermarket table saw fences covers the fix for that.
If you’re doing repeat crosscuts instead of rips, a crosscut sled handles hand safety differently, since the sled itself keeps your hands well clear of the blade path.
And if your saw doesn’t hold a square blade alignment to begin with, no push block technique fixes binding or kickback caused by a misaligned blade.
Keeping push sticks where you’ll actually use them
The best push stick in the world doesn’t help if it’s buried in a drawer across the shop when you need it.
Most experienced woodworkers keep two or three push tools within arm’s reach of the saw at all times, usually hanging on a nail or hook on the saw’s fence rail or a nearby wall. If grabbing a push stick takes more than a second or two, there’s a real temptation to just use your hand instead, especially on a cut that “looks easy.”
A few habits that help:
- Hang push sticks at the saw, not in a tool chest.
- Keep at least one tall and one low-profile option within reach, since board thickness varies from project to project.
- Replace a push stick the moment it looks chewed up or shortened from a close pass. Don’t wait for it to fail completely.
- If you use a magnetic push shoe system, store the pieces together in a small bin near the saw so reconfiguring it doesn’t become a hassle you skip.
Which push tool should you actually buy?
If you want the short version:
- You rip a wide range of board widths → GRR-Ripper 3D Pushblock
- You cut thin strips often → Micro Jig GR-100 or a push shoe
- You’re just getting your shop set up → Rockler basic push block, plus a couple of shop-made sticks
- You want a custom width for repeat cuts → Bench Dog Push-Loc
- You need something today, for free → Shop-made plywood push stick
None of these are wrong choices. The real mistake is having none of them within reach when you’re mid-cut.
FAQ
Do I really need a push block if I already use a push stick? Yes, for most rip cuts wider than a couple inches. A push stick only pushes forward. A push block adds downward pressure, which is what keeps a board from lifting or chattering as it passes the blade.
How close to the blade should a push stick be used? Start using it well before your hand gets near the blade, not as a last-second grab. A good rule is to have the push stick in hand from the start of any rip cut under 6 inches wide.
Can I make my own push block instead of buying one? Yes, though a shop-made block usually only pushes forward, not down. If you want the downward pressure of a commercial push block, a shop-made push stick is a good supplement, not a full replacement.
What’s the difference between a push block and a push shoe? A push shoe usually has a wider sole and rides flatter on top of the board, which works well for thin strips. A push block is often taller with a vertical grip, better suited to standard-thickness stock.
Do push blocks help with kickback, or just finger safety? Both. A push block that holds the board down and against the fence reduces the twisting motion that often causes kickback in the first place, not just the risk to your hands.

Finlay Connolly is a woodworking enthusiast and power tool specialist with over a decade of hands-on experience in the workshop. As the founder and lead writer at ProTableSawReviews.com, Finlay combines expert knowledge with real-world testing to help woodworkers, DIYers, and professionals choose the best tools for the job. With a sharp eye for detail and a passion for precision, Finlay is committed to providing trustworthy, practical advice backed by years of experience and research in the field. Whether you’re cutting dados or comparing fence systems, you can count on Finlay for honest, reliable reviews that make your next cut your best one.