How Is Wood Cut When Ripping With a Table Saw?
 Finlay Connolly
8 min read
Finlay Connolly
8 min read
By Finlay Connolly
The Short Answer
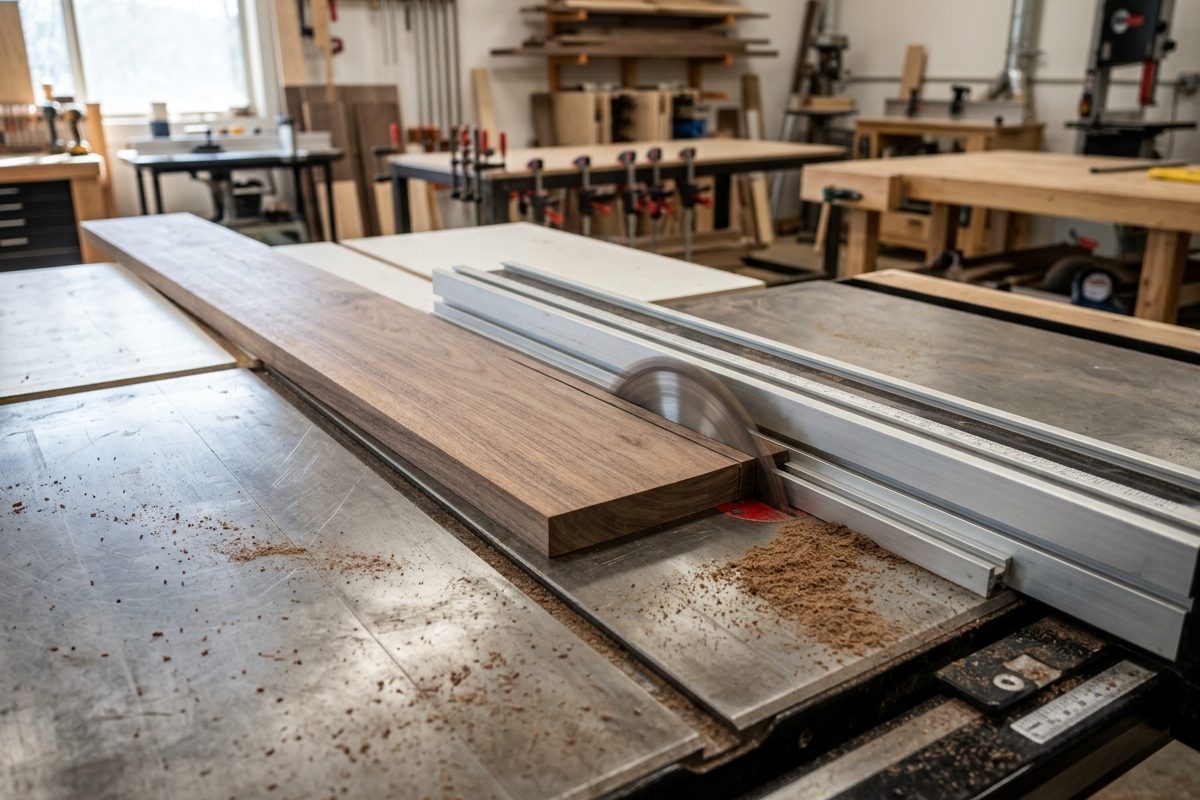
When you rip wood on a table saw, the wood is cut along the grain, following its length, to make the board narrower. This is called ripping because you’re separating the wood fibers in the same direction they naturally run, not cutting across them. The fence guides the board in a straight line while the spinning blade shears through it to produce a specific width.

That’s different from cutting wood to a specific length, which is called crosscutting, and it’s different from cutting against the grain, which isn’t really what a rip cut does at all. Ripping goes with the grain. Crosscutting goes across it. Getting that distinction right matters, because it affects which blade you should use and how the wood actually behaves during the cut.
Ripping vs. Crosscutting: The Real Difference

Every cut on a table saw falls into one of these two categories, and they behave differently because wood itself behaves differently depending on which direction you’re cutting relative to the grain.
A rip cut runs parallel to the grain, typically down the length of a board, and changes its width. If you’ve got a 6-inch-wide board and you need a 4-inch-wide piece, that’s a rip cut. A crosscut runs across the grain, typically shortening a board’s length. If that same board needs to go from 8 feet down to 4 feet, that’s a crosscut. Same saw, same blade slot in the table, completely different cutting action happening at the wood fibers.
What Actually Happens at the Blade

The blade sits in a slot in the table and spins toward the operator at the top of its rotation and away from the operator underneath the table. As you feed a board into the blade, each tooth enters the wood from the top surface, cuts through, and exits at the bottom, pulling chips up and out of the cut as it goes.
During a rip cut, the blade isn’t slicing straight down like a knife. It’s a combination of the blade’s rotation, the shape of the teeth, and the pressure you’re using to feed the board forward. The wood fibers get sheared apart along their natural grain direction, which is a cleaner, lower-resistance cut than trying to force a blade across the grain the same way.
Blade height changes how the teeth meet the wood. Set the blade too low, and the teeth end up rubbing against the material more than cutting it, which generates heat, burns the edge, and clears chips poorly. Set it too high, and you get more tearout on the underside of the cut along with more exposed blade above the table than you actually need, which is a real safety concern, not just a quality one. Most experienced woodworkers set the blade so the gullets, the gaps between teeth, clear the top of the material by a small margin, enough to cut cleanly without leaving more blade exposed than necessary.
Why Rip Blades Are Built Differently Than Crosscut Blades

Because ripping and crosscutting put different demands on a blade, dedicated rip blades and crosscut blades are ground differently. A blade built for ripping typically has fewer teeth with deeper gullets, which clears the larger volume of chips a rip cut produces at a faster feed rate. The teeth themselves are usually a flat-top grind, sometimes shortened to FTG, which acts more like a row of tiny chisels shearing the wood fibers cleanly along the grain. A blade built for crosscutting usually has more teeth with an alternating top bevel grind, which slices across the grain fibers instead of shearing them lengthwise. Using a crosscut-style blade for heavy ripping isn’t dangerous by itself, but it cuts slower and can load up with chips faster than a blade actually built for the job. If you’re deciding which blades to keep on hand for which cuts, our Best Table Saw Blade guide breaks down tooth count and grind style in more detail.
The Fence Is Doing More Work Than It Looks Like

The rip fence isn’t just a straightedge. It’s what turns a rough cut into a precise, repeatable width. You set the fence to your target measurement, keep the board pressed against it the entire length of the cut, and the fence holds that line steady while the blade does the actual cutting. Any gap between the board and the fence during the cut, even a small one, shows up as a wavy or inconsistent edge, since the board is free to drift slightly off the intended line.
This is also where ripping becomes a different safety situation than crosscutting. A rip cut puts constant sideways pressure between the board, the fence, and the blade for the entire length of the cut, which is a longer window for something to go wrong than a quick crosscut typically involves.
Why Ripping Carries More Kickback Risk

Kickback happens when the wood binds against the blade and gets thrown back toward the operator, and ripping is where most kickback incidents happen on a table saw. It usually comes from one of two things: the kerf, the slot the blade cuts, closing up behind the blade and pinching it, or the board twisting slightly so it catches the back teeth of the blade instead of feeding through cleanly.
A riving knife, the thin metal plate positioned just behind the blade, exists specifically to stop the first problem. It keeps the kerf propped open as the board passes through, so the wood can’t close up and pinch the spinning blade. This is why removing or skipping a riving knife for a rip cut is one of the more dangerous habits a woodworker can pick up, even though the cut might feel easier without it in the way.
How to Rip Safely, in Practice

- Always use the fence. Freehand ripping without a fence to guide the cut is how boards drift and bind
- Keep the riving knife or splitter installed for every rip cut, not just the ones that feel risky
- Use a push stick for the last several inches of the cut, once your hand would otherwise get close to the blade
- Feed the board at a steady pace. Stopping partway through a rip cut gives the wood more time to bind or burn
- Stand slightly to the side of the blade’s direct line, not directly behind it, so a kickback event doesn’t send material straight at you
- Use featherboards on longer rip cuts to keep steady pressure against the fence without needing your hand that close to the blade
Common Mistakes People Make When Ripping

- Using a crosscut blade for heavy ripping and being frustrated by slow, rough cuts instead of switching to a blade built for the job
- Setting the blade height too low, which causes rubbing, burning, and poor chip clearance instead of a clean cut
- Removing the riving knife because it feels like it’s in the way, then being caught off guard by kickback on a later cut
- Letting the board drift away from the fence mid-cut instead of maintaining steady contact the whole way through
- Rushing the last few inches of a rip cut with bare hands instead of switching to a push stick in time
- Confusing a rip cut with a crosscut when following cutting instructions, which leads to boards cut to the wrong dimension entirely
Frequently Asked Questions
Is ripping done with the grain or against the grain?
Ripping is done with the grain, not against it. The cut runs parallel to the wood’s natural grain direction, which is what separates ripping from crosscutting, where the cut runs across the grain instead. Some sources describe ripping as going against the grain, which is inaccurate and worth correcting, since the direction of the grain relative to the cut is the entire basis for the distinction between these two cut types.
What’s the difference between ripping and crosscutting?
Ripping cuts along the length of a board, parallel to the grain, and changes its width. Crosscutting cuts across the board, across the grain, and changes its length. They require different blade types for best results, and ripping generally carries a higher kickback risk since the cut runs longer and puts sustained pressure between the board, blade, and fence.
Why does my rip cut come out rough or burned?
This is usually one of a few things: a dull blade, a blade with the wrong tooth geometry for ripping, blade height set too low so the teeth rub instead of cut cleanly, or feeding the board too slowly and letting the blade sit in one spot longer than it should. Checking blade sharpness and height before assuming there’s a bigger problem with the saw is a reasonable first step.
Do I need a special blade for ripping?
A dedicated rip blade, with fewer teeth and a flat-top grind, cuts faster and clears chips more efficiently than a standard crosscut or combination blade. For occasional ripping, a quality combination blade will still get the job done. For frequent or heavy ripping, a dedicated rip blade makes a noticeable difference in feed speed and cut quality.
What safety equipment matters most for ripping specifically?
A riving knife and a push stick are the two most important pieces for rip cuts specifically, since ripping is where kickback risk is highest on a table saw. Featherboards are a strong addition for longer or repeated rip cuts. If you’re building out your safety and setup accessories, our Table Saw Accessories guide covers push sticks, featherboards, and related add-ons in more detail.
The Bottom Line
Ripping cuts wood along the grain to change its width, using the fence to guide a straight, repeatable line while the blade shears through the fibers rather than tearing across them. Getting clean, safe rip cuts comes down to a few fundamentals: the right blade for the job, correct blade height, a riving knife left in place, and steady, controlled feeding of the board from start to finish. Once those basics are dialed in, ripping becomes one of the most reliable, repeatable cuts a table saw makes.
If you’re still getting comfortable with a table saw generally, our Best Table Saws for Beginners guide is a good next stop for picking a saw that makes learning these fundamentals easier rather than fighting an underpowered or poorly set up machine.

Finlay Connolly is a woodworking enthusiast and power tool specialist with over a decade of hands-on experience in the workshop. As the founder and lead writer at ProTableSawReviews.com, Finlay combines expert knowledge with real-world testing to help woodworkers, DIYers, and professionals choose the best tools for the job. With a sharp eye for detail and a passion for precision, Finlay is committed to providing trustworthy, practical advice backed by years of experience and research in the field. Whether you’re cutting dados or comparing fence systems, you can count on Finlay for honest, reliable reviews that make your next cut your best one.