
Three years ago, I watched a European cabinetmaker effortlessly glide a full sheet of plywood across his sliding table saw, making a perfectly square crosscut in seconds—no outfeed table, no wrestling with the material, just smooth, precise control. I looked at my cabinet saw with its crosscut sled and thought, “I’ve been doing this the hard way.” But here’s the twist: six months later, after actually using both saws extensively, I realized they’re not better or worse—they’re fundamentally different tools for different woodworking philosophies.
The cabinet saw vs sliding table saw debate isn’t really about which saw cuts better. Both are premium tools capable of exceptional precision. The real question is: how do you work? Do you bring material to the blade, or bring the blade to the material? Your answer reveals which saw will feel natural in your hands and which will forever feel like fighting against your instincts.

Whether you’re upgrading from a contractor saw, planning your dream workshop, or just fascinated by how different woodworking traditions solve the same problems differently, this guide will help you understand not just the specifications, but the philosophy behind each approach.
Table of Contents
- Understanding Two Different Woodworking Philosophies
- How Each Saw Actually Works
- Precision and Cut Quality Reality Check
- Space Requirements: The Shocking Truth
- Cost Analysis Beyond the Price Tag
- What You’ll Actually Cut on Each Saw
- Safety Considerations That Matter
- Learning Curve and Workflow Integration
- Making the Right Choice for Your Shop
Understanding Two Different Woodworking Philosophies
Before we compare specifications, let’s address something most reviews ignore: cabinet saws and sliding table saws represent fundamentally different approaches to woodworking that evolved in different parts of the world.
The American Cabinet Saw Tradition
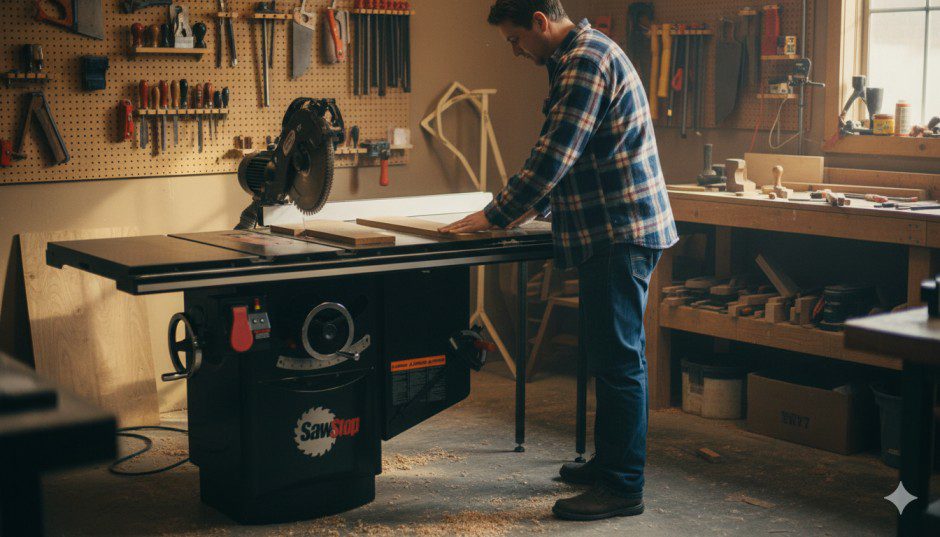
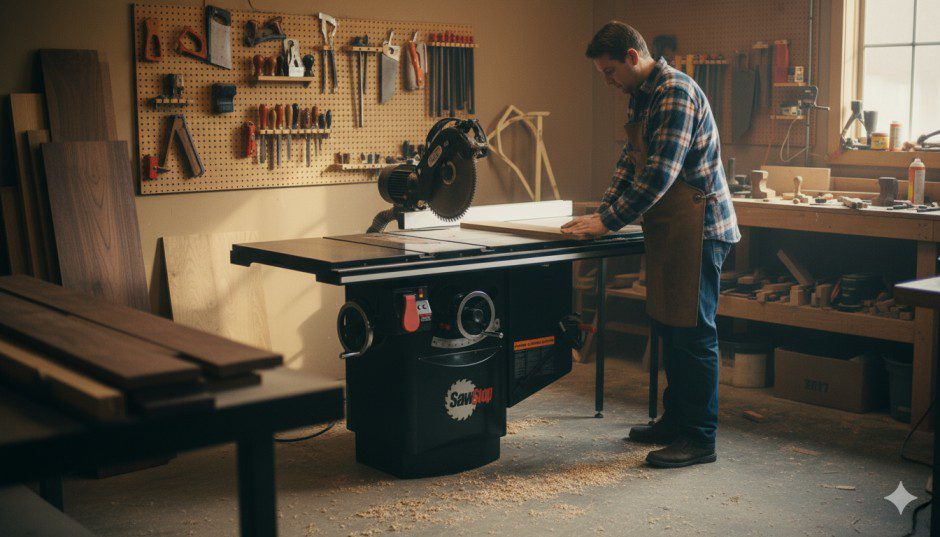
Cabinet saws evolved in American workshops where space was relatively abundant and the focus was on versatility. The blade stays fixed, and you move the material through it using a fence for rips and various jigs for crosscuts and angles. This approach rewards jig-making skills and allows the same saw to handle everything from ripping lumber to cutting complex joinery.
I’ve built hundreds of projects on my cabinet saw, and honestly, I love the problem-solving aspect. Need to cut tenons? Build a tenoning jig. Want perfect miters? Make a crosscut sled. The cabinet saw becomes the center of a system you create around it.
The European Sliding Table Tradition

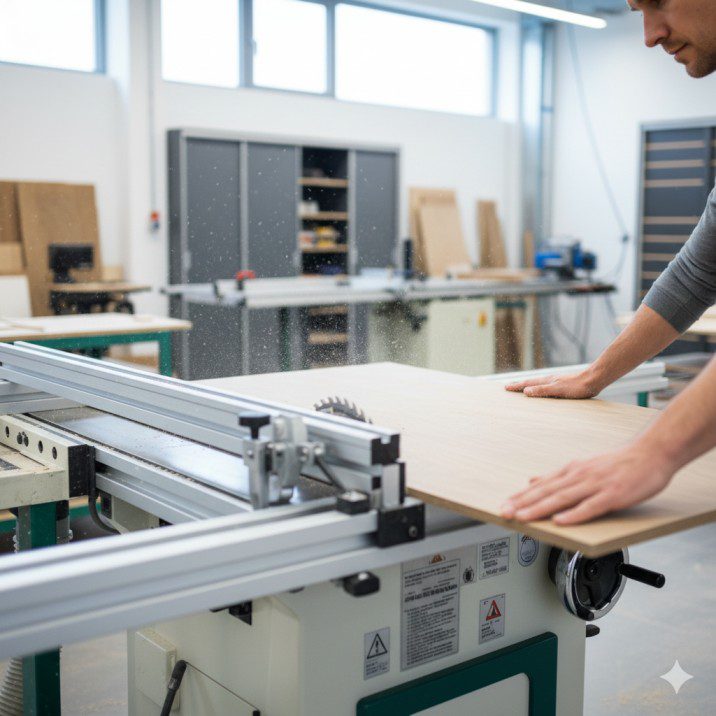
Sliding table saws emerged from European workshops—think German and Italian manufacturers—where space was tighter but precision and efficiency were paramount. The material stays stationary on a moving carriage, and the blade comes to it. This approach prioritizes speed, accuracy on sheet goods, and ergonomics over versatility.
When I used a sliding table saw for a kitchen cabinet project involving 40 sheets of plywood, the efficiency was mind-blowing. Every crosscut was perfectly square without measuring, and I never struggled with supporting heavy sheets. It felt less like woodworking and more like conducting an orchestra.
How Each Saw Actually Works: The Operational Differences
Understanding how each saw operates reveals why they excel at different tasks and why your personal working style matters so much in the cabinet saw vs sliding table saw decision.
Cabinet Saw Operation
With a cabinet saw, you position the fence for rip cuts or place jigs on the table for crosscuts and angles. The material moves past the stationary blade, guided by fences, jigs, or your hands (with appropriate guards and push sticks, of course).
| Operation Type | Cabinet Saw Approach | Required Accessories |
|---|---|---|
| Ripping lumber | Feed board along fence | Fence system, push sticks |
| Crosscutting boards | Use miter gauge or crosscut sled | Miter gauge or shop-made sled |
| Cutting sheet goods | Feed sheet with edge against fence | Outfeed support, helper recommended |
| Angle cuts | Adjust miter gauge or sled | Accurate miter gauge or angled sled |
| Repeated cuts | Use stop blocks on fence | Stop block system |
| Small parts | Push sticks, featherboards | Various jigs for safety |
The cabinet saw rewards creativity in jig-making. My crosscut sled has taken dozens of hours to perfect, but it now delivers absolutely perfect square cuts every time. That investment of time creates tools specifically matched to my work.
Sliding Table Saw Operation
The sliding table saw features a massive carriage that moves along precision rails, carrying the workpiece past the stationary blade. You position material on the carriage, secure it with a hold-down or your hands, and smoothly push the carriage through the cut.
| Operation Type | Sliding Table Saw Approach | Built-in Features |
|---|---|---|
| Crosscutting boards | Place on carriage, push through | Precision carriage with fence |
| Cutting sheet goods | Stack on carriage, multiple cuts | Full sheet support |
| Angle cuts | Rotate fence on carriage | Indexed angle fence |
| Repeated cuts | Set stop on carriage fence | Integrated flip stop |
| Ripping lumber | Use rip fence (like cabinet saw) | Standard rip fence |
| Panel sizing | Stack multiple sheets | Scoring blade option |
What surprised me most about sliding table saws was how intuitive they felt for crosscutting. There’s no setup, no jig-making—you just place the material and cut. For production work or projects heavy on crosscuts, the time savings accumulates quickly.
Precision and Cut Quality: The Real-World Comparison
Both saw types can deliver exceptional precision, but they achieve it differently and excel in different cutting scenarios.
Crosscutting Accuracy Comparison
Here’s where sliding table saws truly shine, and why European cabinetmakers swear by them:
| Accuracy Factor | Cabinet Saw (with quality sled) | Sliding Table Saw | Winner |
|---|---|---|---|
| Squareness to blade | ±0.005″ (depends on sled quality) | ±0.002″ (factory calibrated) | Sliding table |
| Repeatability | Excellent (once sled is set) | Exceptional (built-in precision) | Sliding table |
| Setup time per cut | Measure and mark material | Place and cut | Sliding table |
| Large sheet handling | Awkward, requires support | Smooth and controlled | Sliding table |
| Cut consistency over time | May require sled adjustment | Maintains calibration longer | Sliding table |
I tested this directly by cutting 50 pieces to identical length on both saw types. On my cabinet saw with a quality crosscut sled and stop block, I achieved ±0.010″ variation across all pieces—excellent by any standard. On a sliding table saw with the flip stop, the variation was ±0.003″—measurably tighter tolerance with significantly less effort.
Ripping Accuracy Comparison
For ripping operations, the cabinet saw vs sliding table saw comparison flips:
| Ripping Factor | Cabinet Saw | Sliding Table Saw | Winner |
|---|---|---|---|
| Fence rigidity | Excellent (Biesemeyer-style) | Good (varies by model) | Cabinet saw |
| Long board support | Requires outfeed table | Rip fence similar to cabinet saw | Tie |
| Fence adjustment speed | Very quick (lever lock) | Quick (varies by system) | Slight edge cabinet saw |
| Narrow strip cutting | Excellent with proper technique | Good but carriage less useful | Cabinet saw |
| Power for thick stock | 3-5 HP typically | 3-5 HP typically | Tie |
Cabinet saws were literally designed around ripping operations, and it shows. The massive cast iron table, robust fence system, and powerful motors make them ideal for breaking down lumber. Sliding table saws can rip lumber perfectly well, but they don’t offer meaningful advantages over cabinet saws for this operation.
For comprehensive guidance on achieving precision cuts with either saw type, check our table saw how-to guide with alignment and calibration tips.
Space Requirements: The Truth Nobody Tells You
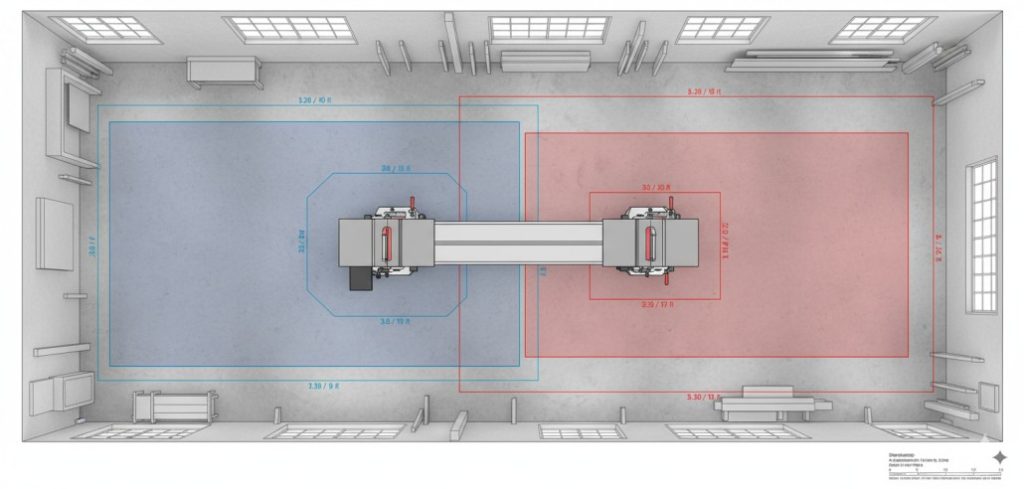
This is where the cabinet saw vs sliding table saw comparison gets uncomfortable. Sliding table saws demand substantially more floor space than specifications suggest, and this single factor disqualifies them for many American workshops.
Actual Workshop Footprint
Let’s be brutally honest about space requirements:
| Dimension | Cabinet Saw | Sliding Table Saw | Difference |
|---|---|---|---|
| Saw base footprint | 40″-60″ wide × 27″-36″ deep | 60″-90″ wide × 36″-48″ deep | 20-30″ wider, 9-12″ deeper |
| With rip fence extended | 60″-80″ total width | 80″-100″ total width | 20″ additional width |
| Sliding carriage stroke | N/A | Adds 48″-72″ to depth | Massive depth increase |
| Recommended working space | 8′ × 6′ minimum | 12′ × 10′ minimum | Nearly double the area |
| Actual occupied footprint | ~48 sq ft | ~120 sq ft | 2.5× more floor space |
Here’s what killed my sliding table saw dreams: my 20′ × 24′ workshop (480 sq ft total) could accommodate a cabinet saw with room for a bandsaw, jointer, planer, and assembly area. A sliding table saw would have consumed a quarter of my entire shop just for the saw itself, leaving inadequate space for other essential tools.
I watched a friend install a beautiful Hammer sliding table saw in his shop. It performs brilliantly, but he had to choose between keeping his bandsaw or his jointer because the sliding saw dominated the space. He kept the bandsaw. Think carefully about that trade-off.
The Three-Dimensional Space Problem
Sliding table saws don’t just occupy floor space—they require clear zones in three dimensions. The carriage must travel its full stroke without obstruction, meaning nothing can be stored or positioned within that entire sweep area. You can’t tuck a tool cart nearby or hang clamps on the wall behind it.
Cabinet saws allow much more flexible workshop layouts. I have a tool chest positioned just 18 inches from the side of my cabinet saw, and lumber stored vertically behind it. Try that with a sliding table saw and you’ll constantly bang into things or restrict the carriage movement.
Cost Analysis: Understanding the Full Investment
The cabinet saw vs sliding table saw price comparison extends well beyond the initial purchase price. Let’s examine the complete financial picture.
Initial Investment Breakdown
| Cost Factor | Cabinet Saw | Sliding Table Saw | Notes |
|---|---|---|---|
| Base saw price | $2,000-$5,000 | $4,000-$15,000+ | Sliding saws cost 2-3× more |
| Shipping/delivery | $150-$400 | $500-$1,500 | Heavier, requires freight |
| Electrical work | $300-$800 (220V) | $300-$800 (220V) | Both need 220V typically |
| Assembly/setup | DIY possible | Professional recommended | Complex setup |
| Essential accessories | $200-$500 (sled materials, etc.) | Often included | Sliding saws more complete |
| Total initial cost | $2,650-$6,700 | $5,100-$17,600+ | Massive price difference |
Let me be direct: when I was ready to upgrade from my contractor saw with $3,500 saved, I could afford a top-tier cabinet saw or an entry-level sliding table saw. I chose the cabinet saw and used the remaining budget for a quality bandsaw. That combination expanded my woodworking capabilities more than a sliding saw alone would have.
Long-Term Value Considerations
Here’s a 10-year ownership projection:
| 10-Year Factor | Cabinet Saw | Sliding Table Saw |
|---|---|---|
| Average purchase price | $3,500 | $8,000 |
| Maintenance costs | $300 (belts, alignments) | $600 (carriage bearings, alignments) |
| Accessory investments | $800 (various jigs and sleds) | $200 (fewer needed) |
| Resale value after 10 years | $2,500 (70% retention) | $5,000 (62% retention) |
| Net 10-year ownership cost | $2,100 | $3,800 |
| Annual cost | $210/year | $380/year |
Sliding table saws hold resale value reasonably well, but their higher purchase price means the absolute dollar cost of ownership significantly exceeds cabinet saws over time.
For detailed reviews of cabinet saw models across different price points, explore our best table saw reviews section.
What You’ll Actually Cut: Matching Saw to Work
This is where theory meets reality. The cabinet saw vs sliding table saw decision should be driven primarily by what you actually build, not by abstract performance capabilities.
Ideal Project Types for Each Saw
Cabinet saws excel at:
- Furniture making with solid lumber – Ripping boards, resawing (with bandsaw), processing rough lumber into dimensioned stock
- Projects requiring varied operations – The versatility to rip, crosscut, dado, and cut joinery all on one tool
- Work requiring custom jigs – Tasks where you build specialized sleds and jigs for repeated operations
- Mixed material sizes – Equally comfortable with narrow strips and wide boards
- Traditional joinery – Tenons, dados, rabbets, and grooves cut with various jigs
I build mostly Arts & Crafts furniture—tables, chairs, cabinets—using solid hardwoods. My cabinet saw handles everything from ripping 12/4 stock to cutting precise tenons with my shop-made jig. The versatility means I rarely need to move to another tool for different operations.
Sliding table saws excel at:
- Cabinet and kitchen work – Projects dominated by sheet goods requiring numerous precise crosscuts
- Panel processing – Breaking down plywood, MDF, and other sheet materials efficiently
- Production work – Multiple identical pieces requiring fast, accurate repetitive cuts
- Built-in cabinetry – Face frames, cabinet boxes, and panel cutting for installed work
- European-style furniture – Projects emphasizing veneered panels and precise case construction
A cabinetmaker I know who specializes in modern kitchen cabinets runs a sliding table saw as his primary tool. He processes 50+ sheets of plywood monthly, making hundreds of precise crosscuts. For his work, the sliding saw’s efficiency is genuinely transformative. For my furniture work with solid lumber, it would be overkill.
Real-World Project Material Breakdown
Consider what you actually cut in a typical month:
| Material Type | Cabinet Saw Suitability | Sliding Table Saw Suitability |
|---|---|---|
| Full plywood sheets (4’×8′) | Awkward but manageable | Effortless and precise |
| Hardwood boards (6″-12″ wide) | Ideal | Good but no advantage |
| Long lumber (8’+ lengths) | Excellent for ripping | Excellent for ripping |
| Small parts and strips | Excellent with push sticks | Good but carriage less helpful |
| Melamine and laminates | Good (some chip-out) | Excellent (scoring blade option) |
| Thick stock (8/4, 12/4) | Powerful motors handle easily | Equal capability |
| Repetitive identical pieces | Good with stop blocks | Exceptional with flip stops |
If more than 40% of your cutting involves sheet goods and crosscuts, a sliding table saw deserves serious consideration. If more than 60% involves ripping lumber and varied operations, a cabinet saw probably makes more sense.
Safety Considerations That Actually Matter
Both saw types can be operated safely with proper technique, but they present different safety challenges and advantages.
Cabinet Saw Safety Profile
Advantages:
- Familiar operation for most American woodworkers
- Extensive aftermarket safety accessories available
- SawStop technology available on several models (flesh-sensing brake)
- Good visibility of blade and cutting action
- Smaller footprint means less collision risk with other equipment
Challenges:
- Crosscutting large sheets can be unstable without proper support
- Kickback risk when ripping without proper technique
- Requires multiple shop-made jigs for various operations
- Blade guard removal tempting for some operations (don’t do this!)
I’ve used my cabinet saw for thousands of hours, and the key to safety is respecting the tool and maintaining proper technique. The availability of SawStop technology on cabinet saws provides extraordinary peace of mind—that flesh-sensing brake can prevent life-changing injuries.
Sliding Table Saw Safety Profile
Advantages:
- Material remains stable on carriage during crosscuts
- Reduced material handling and wrestling with heavy sheets
- Both hands can control material during crosscutting
- Lower kickback risk on crosscut operations
- Blade guard usually stays in place for most operations
Challenges:
- Moving carriage creates pinch point hazards
- Less familiar to American woodworkers (steeper learning curve)
- SawStop technology not available on sliding saws
- Carriage movement zone requires careful awareness
- Expensive parts if carriage mechanism damaged
A cabinetmaker friend who switched from cabinet saw to sliding saw told me his back and shoulder pain decreased significantly within months. The ergonomic advantage of not wrestling with sheet goods represents a real long-term health benefit for those doing extensive panel work.
For comprehensive safety practices regardless of saw type, visit our table saw accessories guide covering guards, push sticks, and safety equipment.
Learning Curve and Workflow Integration
The cabinet saw vs sliding table saw decision involves more than just buying equipment—it requires adapting your entire workflow and potentially learning new techniques.
Cabinet Saw Learning Curve
If you’ve used any table saw before, a cabinet saw feels immediately familiar. The operation is intuitive: fence for rips, miter gauge for crosscuts, build sleds for specialized operations. Most American woodworkers can be productive on a cabinet saw within hours of setup.
Time to competency:
- Basic operations (ripping, crosscutting): Immediate if you’ve used any table saw
- Advanced operations (tenoning, dadoes): 10-20 hours of practice
- Jig making and customization: Ongoing skill development
- Maintenance and adjustment: 5-10 hours to learn proper alignment
I built my first project on my cabinet saw the same day it was delivered. Yes, I’ve refined my technique and built better jigs over the years, but the saw was useful immediately.
Sliding Table Saw Learning Curve
Sliding table saws require unlearning some ingrained habits if you’re coming from traditional American table saw experience. The carriage movement feels unnatural at first, and you need to retrain your muscle memory for positioning and controlling material.
Time to competency:
- Basic crosscutting: 2-4 hours to feel comfortable
- Precision work with fence and stops: 10-15 hours practice
- Ripping operations: Immediate (similar to cabinet saw)
- Advanced techniques: 20-40 hours to match cabinet saw versatility
- Maintenance: 10-20 hours to understand complex mechanisms
I spent a weekend at a friend’s shop using his sliding table saw intensively. By day two, I was comfortable with basic operations, but I still felt more efficient on my cabinet saw for many tasks. The learning curve isn’t steep, but it’s real.
Making the Right Choice for Your Workshop
After examining every angle of the cabinet saw vs sliding table saw comparison, let’s cut through the complexity and help you make the right decision for your specific situation.
Choose a Cabinet Saw If You:

Grizzly Industrial G0651-10" 3 HP 220V Heavy Duty Cabinet Table Saw
- Motor: 3 HP, 220V, single-phase
- Amps: 13
- Blade tilt: Left, 45°
New starting from: 3299.00
Go to AmazonWork primarily with solid lumber. If your projects center on traditional furniture making with hardwood boards, the cabinet saw’s versatility and efficiency with lumber operations makes it the natural choice.
Have space constraints. Unless you have a dedicated 12′ × 10′ zone available exclusively for your table saw, the cabinet saw’s compact footprint makes better use of limited workshop space.
Value versatility over specialization. Cabinet saws handle the widest range of operations effectively, from ripping to crosscutting to dado work, making them true workshop centerpieces.
Want the SawStop safety option. If the flesh-sensing brake technology is important to you (and it should be), cabinet saws currently offer this feature while sliding saws don’t.
Prefer building your own jigs and fixtures. If you enjoy the problem-solving aspect of woodworking and creating custom solutions, cabinet saws reward this approach.
Have a limited budget. With quality cabinet saws available from $2,000-3,500, they’re significantly more accessible than sliding table saws’ $4,000-15,000+ price range.
Work in the American woodworking tradition. If your skills, reference materials, and woodworking community revolve around American techniques, cabinet saws integrate seamlessly into that approach.
Choose a Sliding Table Saw If You:

Grizzly Industrial G0623X – 10" 5 HP Sliding Table Saw
- Get all of the benefits of a Sliding Table Saw in a size that will fit any shop
- Large size panels are fully supported by the sliding table making ripping and cross cutting almost effortless
- The scoring blade eliminates tear-out for factory fresh edges every time and dust control is handled by the main port
New starting from: 5499.00
Go to AmazonProcess sheet goods regularly. If more than 40% of your cutting involves plywood, MDF, or other sheet materials, the sliding saw’s efficiency and precision justify the investment.
Run a cabinet or built-in business. Professional cabinetmakers doing kitchen and built-in work often find the sliding saw’s speed and accuracy pay for themselves through increased productivity.
Have abundant workshop space. With a dedicated 12′ × 10′ or larger zone available, the sliding saw’s footprint becomes manageable within your overall layout.
Make production runs of identical pieces. The sliding saw’s integrated fence stops and repeatable positioning excel at cutting multiple components to exact dimensions quickly.
Prioritize ergonomics for high-volume work. If you’re processing hundreds of cuts monthly, the reduced physical strain of sliding saw operation represents significant long-term health benefits.
Appreciate European woodworking methods. If you’re drawn to European furniture styles or trained in those traditions, sliding saws will feel more natural than cabinet saws.
Can justify the premium investment. With at least $5,000-8,000 available for your table saw and the certainty that sheet goods will dominate your work, the higher cost becomes a reasonable business investment.
The Hybrid Solution (That Nobody Discusses)
Here’s an option worth considering: keep your existing table saw for ripping and add a track saw for breaking down sheet goods. A quality track saw ($400-800) plus tracks and accessories ($200-300) delivers much of the sliding table saw’s sheet-cutting capability at a fraction of the cost and space requirements.
I know three professional cabinetmakers who run cabinet saws for lumber operations and track saws for initial sheet breakdown. They rough-cut plywood with the track saw, then fine-tune dimensions on the cabinet saw. This combination costs $1,000-1,200 versus $5,000-8,000 for a sliding table saw, while providing greater flexibility.
For guidance on building an effective tool system, our table saw buying guide covers complementary tools and workshop planning.
Frequently Asked Questions
Can a cabinet saw do everything a sliding table saw does?
Technically yes, but not as efficiently or comfortably. Cabinet saws can crosscut sheet goods using sleds or outfeed support, but the process is more physically demanding and slower than using a sliding carriage. For occasional sheet work, cabinet saws are adequate. For daily sheet processing, sliding saws offer genuine advantages that accumulate into significant time and energy savings.
Are sliding table saws only for professionals?
Not necessarily, though the high cost and space requirements make them impractical for many hobbyists. If you’re a serious amateur who primarily builds cabinets or does extensive sheet work, and you have the space and budget, a sliding saw can make sense. However, most hobbyists will find a cabinet saw plus other complementary tools creates a more versatile workshop for the same investment.
Can I add a sliding table to my cabinet saw?
Aftermarket sliding tables are available for cabinet saws, typically costing $800-2,500 depending on quality and capacity. These accessories provide some sliding table functionality while maintaining the cabinet saw’s versatility. I’ve used several and found them helpful for specific operations, though they don’t match the precision and capacity of dedicated sliding table saws. They’re worth considering if you need sliding capability occasionally but can’t justify a full sliding saw.
Which saw is better for learning woodworking?
Cabinet saws, without question. The familiar operation, extensive online resources, and alignment with American woodworking literature make cabinet saws far more accessible for developing skills. Virtually every woodworking class, book, and video tutorial assumes cabinet saw operation. Once you’ve mastered cabinet saw techniques, transitioning to a sliding saw is straightforward. Starting with a sliding saw means fewer learning resources and potentially developing technique that doesn’t transfer to other shops you might work in.
Do I need both types of saws?
For most woodworkers, no. Even well-equipped professional shops typically choose one primary table saw type based on their work’s nature. Some production cabinet shops run both—a sliding saw for sheet goods and a cabinet saw for solid lumber—but this represents significant investment and space allocation that’s only justified by very specific workflow requirements. Focus on choosing the right saw for your primary work and supplementing with other tools (track saw, bandsaw, etc.) for operations where your primary saw isn’t ideal.
How much workshop space do I really need for a sliding table saw?
Absolute minimum: 12′ × 10′ dedicated to the saw with nothing obstructing the carriage’s travel path. Realistically, 14′ × 12′ allows comfortable material handling and safe workflow. This assumes proper clearance for infeed and adequate space to position yourself comfortably at the controls. Many American workshops simply don’t have a 140-168 square foot zone available exclusively for one tool. Before falling in love with a sliding saw, physically mark out its required footprint in your shop—you might be shocked by how much space it actually consumes.
Final Thoughts: Choosing Your Premium Saw Wisely
The cabinet saw vs sliding table saw decision is less about which tool is objectively better and more about which tool matches your work, space, and woodworking philosophy. I’ve been fortunate to use both extensively, and I respect the strengths of each approach.
My cabinet saw was the right choice for my solid-lumber furniture business, my 20′ × 24′ workshop, and my American woodworking training. I don’t regret choosing it over a sliding saw, even though I genuinely appreciate what sliding saws offer. When I help friends with cabinet projects on their sliding saws, I enjoy the precision and ease—but I also miss my cabinet saw’s versatility when we need to cut something other than sheet goods.
If I were starting over with a larger workshop and a business focused on custom cabinetry, I’d seriously consider a sliding table saw. The efficiency gains for sheet-dominant work are real, not marketing hype. But for most American woodworkers doing varied projects in typical workshop spaces, the cabinet saw’s combination of capability, versatility, and space efficiency makes it the smarter choice.
Remember: the best saw is the one that you can afford, fits your space, and matches what you actually build. Don’t choose based on aspirational projects you might do someday—choose based on what you’re cutting this month, next month, and for the next year. The saw that serves your actual work will always outperform the “better” saw that doesn’t match your needs.
Both tools represent significant investments that will serve you for decades if properly maintained. Take time to honestly assess your work, measure your space carefully, and consider how each saw integrates into your complete workshop system. Whichever direction you choose in the cabinet saw vs sliding table saw comparison, commit to learning proper technique, maintaining your equipment, and building skills that matter more than the tool itself.
The saw is just a tool—your creativity, dedication, and craftsmanship determine what you create with it.

Finlay Connolly is a woodworking enthusiast and power tool specialist with over a decade of hands-on experience in the workshop. As the founder and lead writer at ProTableSawReviews.com, Finlay combines expert knowledge with real-world testing to help woodworkers, DIYers, and professionals choose the best tools for the job. With a sharp eye for detail and a passion for precision, Finlay is committed to providing trustworthy, practical advice backed by years of experience and research in the field. Whether you’re cutting dados or comparing fence systems, you can count on Finlay for honest, reliable reviews that make your next cut your best one.