How to Remove a Stuck Table Saw Blade: Step-by-Step Guide
 Finlay Connolly
8 min read
Finlay Connolly
8 min read
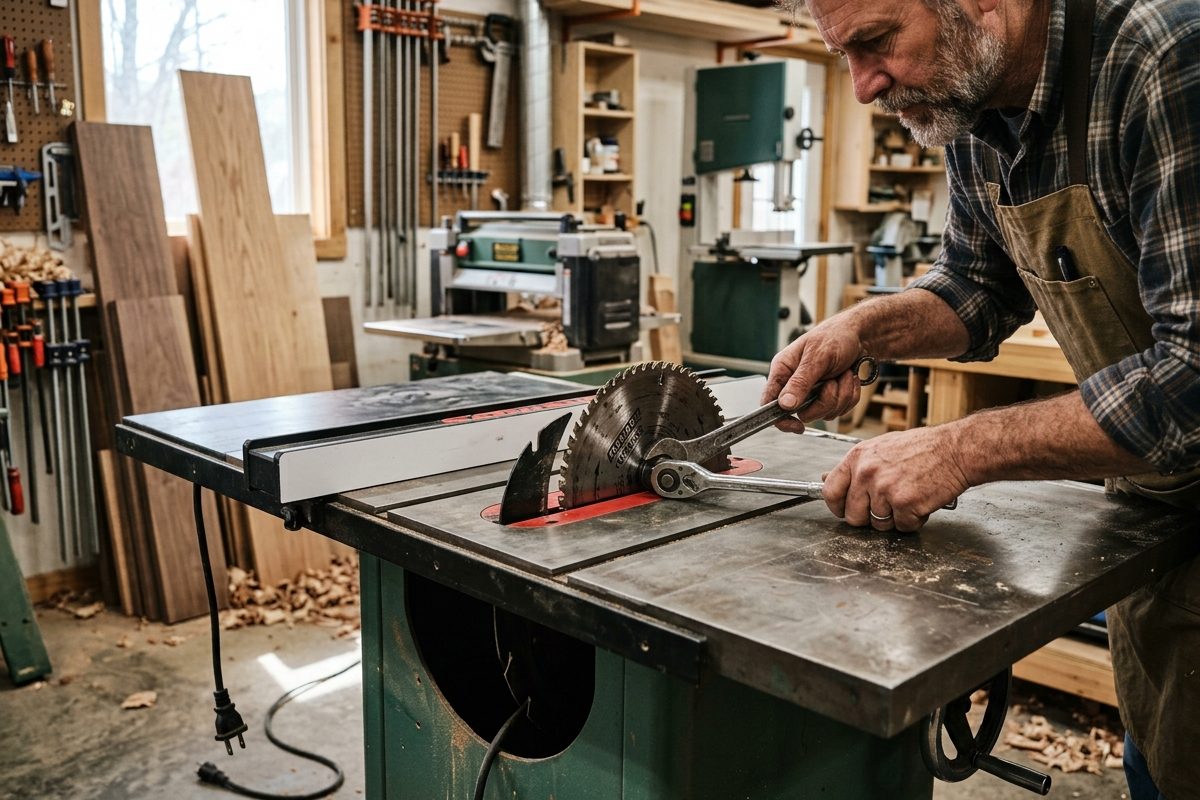
Unplug the saw, spray penetrating oil around the arbor nut and let it sit for 15 to 20 minutes, then loosen the nut by pulling your wrench toward the front of the saw — not by guessing “lefty loosey,” since table saw arbor nuts are often reverse-threaded on purpose. If it still won’t budge, a few firm hammer taps on the wrench, then heat as a last resort, gets through almost every stuck blade without damaging the saw.
That’s the short version. Here’s the full process, plus the one detail that trips up more people than anything else on this job.
Why the direction matters more than the force

This is the part most people get wrong first, and it’s worth understanding before you touch a wrench.
Table saw manufacturers design the arbor nut to tighten itself slightly every time the saw runs, not loosen. Since the blade spins in one direction under load, the nut is threaded so that normal cutting torque works against it coming loose, not with it. On a lot of saws, this means the nut is reverse-threaded, so the usual “righty tighty, lefty loosey” rule doesn’t apply.
The safest way to think about it, regardless of what saw you own: loosen the arbor nut by pulling the wrench toward the front of the saw. That direction is consistent across right-tilt and left-tilt saws, even though the actual thread handedness (and which way that looks like “clockwise” or “counterclockwise”) changes depending on which side of the blade the nut sits on. If you’re not sure, check your owner’s manual for your exact model before applying real force in the wrong direction, since forcing a nut the wrong way is one of the more common ways people strip threads or bend an arbor.
What you’ll need

| Item | Why |
|---|---|
| Arbor wrench (usually included with the saw) | Holds the arbor shaft steady so it doesn’t spin while you turn the nut |
| Nut wrench or socket + ratchet | Turns the arbor nut itself |
| Penetrating oil (PB Blaster, Kroil, or similar — WD-40 works but is weaker) | Breaks down rust and resin buildup holding the nut |
| Rubber mallet | Taps the wrench to break the nut’s initial grip |
| Safety glasses | Non-negotiable — stuck fasteners can slip or snap under force |
| Stiff brush and clean rag | Clears sawdust and old resin once the nut is off |
| Heat gun or small torch (optional, last resort) | Expands the metal slightly to break a severely corroded nut free |
Safety first, before anything else

- Unplug the saw completely. Don’t just switch it off. A blade nut that suddenly breaks free while you’re leaning on a wrench is not the moment to discover the saw still has power.
- Raise the blade to its full height so you have clear access and room to work.
- Wear safety glasses. If a rusted nut lets go suddenly, or a wrench slips, you want your eyes protected.
- Keep your hands away from the blade’s teeth. Use a block of scrap wood wedged against the blade to keep it from spinning, or better, use the saw’s arbor wrench on the flat part of the arbor shaft itself if your saw has one, so you’re never touching the blade directly.
- Clear sawdust and debris from the work area, especially if you’ll be using penetrating oil or heat. Both can turn old sawdust into a fire risk.
Step-by-step: removing a stuck blade

1. Locate and engage the arbor lock, if your saw has one. Many saws have a lock button or pin near the arbor that stops the shaft from spinning while you loosen the nut. Check your manual if you’re not sure where it is. If your saw doesn’t have one, you’ll need two wrenches — one holding the arbor’s flat section, the other turning the nut.
2. Try it dry first. Position your wrench on the nut, pulling toward the front of the saw. If the blade is only lightly stuck, this alone might do it. Don’t force it hard on the first attempt — if it doesn’t move with firm, steady pressure, stop and move to the next step rather than risking a stripped nut or bent arbor.
3. Apply penetrating oil. Spray it generously around the nut and where the blade meets the arbor flange. Let it sit for 15 to 30 minutes. This step is the one people skip most often, and it’s the one that solves the problem most often. Rust and dried pitch are the two most common reasons a blade seizes up, and oil is what actually breaks that bond, not brute force.
4. Tap the wrench with a mallet. With the wrench still positioned correctly, give it a few firm taps rather than one huge swing. Vibration often breaks a corroded nut free more effectively than steady pressure alone. Alternate the angle slightly between taps if the first few don’t do anything.
5. Add leverage if you still need it. A breaker bar or a length of pipe slid over your wrench handle gives you more torque without more risk to your hands. Keep your body positioned so that if the nut suddenly releases, your hand doesn’t swing toward the blade.
6. Use heat only if oil and tapping haven’t worked. A heat gun applied to the nut (not the blade) for a minute or two can expand the metal just enough to break a stubborn rust bond. Keep flame or high heat away from any oil residue you’ve already applied, since penetrating oil is flammable. This step is rarely necessary, and it’s the one to treat as a last resort, not a first move.
7. Once it’s off, inspect everything before reassembly. Check the arbor threads, the nut, and the blade flanges for damage. Clean off old resin and rust with a brush, then wipe everything down. If the nut spun freely without ever really biting into the threads, or if the threads look chewed up, that nut may need replacing before you trust it again.
Troubleshooting: when the basic method doesn’t work
| Symptom | Likely Cause | What To Do |
|---|---|---|
| Nut spins freely but blade stays stuck | Threads are stripped or worn | The nut likely needs replacing — check with your saw’s manufacturer for the correct size |
| Arbor spins along with the nut | Arbor lock isn’t engaging, or the lock mechanism is worn | Use two wrenches instead of relying on the lock, or repair the lock before further use |
| Blade won’t separate even after the nut is off | Resin or corrosion has bonded the blade to the flange | Apply oil directly between the blade and flange, then gently wiggle the blade side to side while pulling |
| Nut was extremely difficult from the very first use | Over-tightened during the last installation | Once removed, don’t overtighten on reassembly — snug is enough, since the arbor’s design already prevents loosening during use |
Preventing this next time

A few habits go a long way toward never fighting a stuck blade again.
Wipe the arbor and flange clean of resin and dust every time you change a blade, not just when something’s stuck. Built-up pitch is one of the most common causes of a seized blade, and it’s avoidable with a quick wipe-down each time.
Don’t overtighten the nut when installing a new blade. Since the arbor’s threading already works to prevent loosening during normal use, snug is enough. Overtightening mostly just makes the next removal harder, and in some cases can distort the blade slightly.
If your shop deals with humidity, a light coat of paste wax or a rust-inhibiting spray on the arbor threads after cleaning helps prevent the corrosion that causes most stuck-blade situations in the first place.
When to call it and get help
If you’ve worked through penetrating oil, tapping, added leverage, and cautious heat, and the nut still won’t move, it’s worth stopping before you risk damaging the arbor shaft itself. A bent or sheared arbor is a far more expensive problem than a stuck nut, and at that point a repair shop with an impact wrench and the right experience is the safer call.
This is also the point to check whether your saw is even worth the repair cost. If you’re dealing with a stuck blade on an old, worn saw that’s had other issues too, it might be a good moment to look at what a properly maintained saw should cost you versus continuing to fight an aging one.
Keeping this from happening again
Once your blade is off and everything’s cleaned up, it’s a good time to check the rest of your setup while you’re already in there. A dull or resin-caked blade contributes to the same buildup that causes stuck nuts, so swapping to a clean, sharp blade at this point solves two problems at once. If you’re running a dado stack regularly, those arbor threads see more wear from repeated changes, so the cleaning and light-wax habit matters even more.
FAQ
Which way do I turn the nut to loosen a table saw blade? Pull your wrench toward the front of the saw. This holds true regardless of your saw’s tilt direction, even though the actual thread handedness varies by model. Check your manual if you’re unsure before applying real force.
Why is my table saw blade so hard to remove? Usually rust, dried resin buildup from repeated cuts, or the nut being over-tightened during the last installation. Heat from extended use can also cause the metal to expand and grip tighter temporarily.
Is it safe to use a heat gun to remove a stuck blade? Yes, as a last resort, applied to the nut rather than the blade, and only after oil and tapping haven’t worked. Keep it away from any penetrating oil residue, since most penetrating oils are flammable.
Can I damage my saw trying to remove a stuck blade? Yes, mainly by forcing the nut in the wrong direction or applying excessive force without penetrating oil first. A bent or sheared arbor is a much bigger repair than a stuck nut, so working through the steps in order matters more than raw force.
How do I stop my blade from getting stuck in the future? Wipe down the arbor and flange every time you change blades, avoid over-tightening the nut on installation, and consider a light coat of wax or rust inhibitor on the threads if your shop deals with humidity.

Finlay Connolly is a woodworking enthusiast and power tool specialist with over a decade of hands-on experience in the workshop. As the founder and lead writer at ProTableSawReviews.com, Finlay combines expert knowledge with real-world testing to help woodworkers, DIYers, and professionals choose the best tools for the job. With a sharp eye for detail and a passion for precision, Finlay is committed to providing trustworthy, practical advice backed by years of experience and research in the field. Whether you’re cutting dados or comparing fence systems, you can count on Finlay for honest, reliable reviews that make your next cut your best one.